Recent events have demonstrated that threats to the status quo throughout the world can materialize quickly, making it crucial for military manufacturers to stay adaptable and ready to handle changing conditions as they arise. No matter what industry you are in, change is occurring fairly swiftly, as author Jim Pattison concisely put it. Shorter design and manufacturing timelines, the requirement for higher material and part replacement efficiency, and an expedited time to market are difficulties that military manufacturers must overcome using every technical instrument at their disposal.
The world of production is changing as a result of the present manufacturing revolution, which is being fueled by digital technology. While technologies like artificial intelligence, augmented reality, and the Industrial Internet of Things (IIoT) are accelerating time to market and production efficiency, 3D scanning has yet to reach its full potential in the aerospace and defense industries.
A non-contact, non-destructive approach to digitally gathering precise measurement data on the form, scale, and texture of a physical object or environment is 3D scanning. As a powerful “weapon” in the arsenal of manufacturers determined to maintain their competitive edge while keeping the U.S. safe, 3D scanning can be an invaluable tool for rapidly reverse engineering parts, cutting design and production cycles, and detecting manufacturing errors. It is capable of measuring and inspecting parts with an accuracy that exceeds that of traditional measurement tools.
Undoubtedly, many manufacturers are not entirely aware of the benefits of 3D scanning for enhancing the caliber and speed of their output. This article answers the most often-asked issues regarding the application of 3D scanning and how it can, among other benefits, assist manufacturers in reducing design and production lead times.
How can 3D Scanning Improve Military Production?
One option is through speeding up and improving the maintenance and repair of armament systems. Every piece of military equipment ages with each day that goes by, eventually failing and becoming useless. With the use of 3D/laser scanning, engineers can quickly reverse-engineer, machine, and replace older parts, keeping machinery in top working order.
You can be working on parts for which there are no design files, which is a common problem with outdated equipment. It’s possible that the original computer-aided design (CAD) file isn’t available, or that the parts weren’t created with CAD, and the original blueprints are gone. In either scenario, 3D scanning is the most efficient and precise technique to record and maintain the complete dimensional information and feature descriptions of the parts.
Utilizing 3D scanning also makes design optimization simpler. The design and functionality of a part can always be improved after it has been created as a CAD file. Additionally, laser scanning is incredibly helpful in reducing production errors. Engineers can assess whether a scanned part complies with its OEM design by comparing it to the original design file. They can even identify design deviations in manufactured parts so that production or material flaws can be fixed early on in the manufacturing process. Particularly useful for difficult-to-measure components like turbine blades. It is possible to analyze dimensional accuracy and look at the tolerances of tools like molds and dies. One example of this would be the amount of “spring-back effect” that takes place during sheet metal forming. New stamping dies may need to be made using the 3D scan data.
There are numerous types of 3D scanners, including CT (X-ray computed tomography), Time-of-Flight (TOL) large-area scanners, projected light, laser triangulation, and others. For example, TOL scanners are wonderful for scanning buildings but would not be a good choice for scanning a part with inside components. Each type of scanner has unique strengths and drawbacks that may make it more suited for some applications. On the other hand, a CT scanner is ideal for scanning objects with internal geometry since it uses X-rays to build 3D representations of both internal and external components. However, you wouldn’t use it to scan the outside of an office building or a railway trestle.
Of course, there are scanners that are good at handling a wide range of diverse applications. A handheld laser scanner is the general most adaptable 3D scanner. It is transportable and capable of taking 3D geometries from almost any size of the item, from the outside of a high-tech fighter jet to a little component like an aircraft angle-of-attack sensor.
Different 3D Scanners for Different Applications
Depending on what you’re measuring, the type of measurement data you want to get, and when you need it, you’ll want to utilize a certain type of scanner. The several kinds of 3D scanners that are now on the market and their applications are described here.
- Light-Based Coordinate Measuring Machine (CMM): A CMM that measures an object’s three-dimensional dimensions using a laser or light-based triangulation sensor. For tasks needing accuracy more than 0.0001″ or 0.0254 mm, such as examining turbine blades, test apparatus, injection molds, and master gauges, CMMs are a great option.
- Computed Tomography (CT): Internal geometry can be captured by CT scanners, making them a great option for measuring medical devices and other mechanisms with internal components as well as applications requiring measurements that go beyond what is possible with line-of-sight scanning.
- Structured Light Scanners: These scanners are a great option if you need to measure complicated and detailed items. They apply white or blue light to an object to produce a number of reference patterns. The surface of the object causes the light to reflect, and the scanner analyses the images it captures to determine the object’s depth and other surface details. The many scanned patches can be “stitched” together using pre-mounted stickers, and the spatial data points can be gathered in an object-specific density.
- Time-of-Flight (TOL) Scanners: These scanners offer geographical information and 3D measurements for very large objects or settings where manual measurements are challenging or even impossible. As their name suggests, they measure by timing how long it takes a laser pulse to bounce off an object’s surface and return to the scanner. The measurement of huge structures, such as factories, power plants, oil rights, or civil engineering projects, as well as other construction or landscape-related projects, are ideal applications for TOL scanners.
- Laser Scanners: These three-dimensional measurement and inspection tools truly embody the Swiss Army Knife design. They can be used in a variety of settings and collect precise 3D data on objects ranging in size and shape from full-sized cars to boat propellers. Due to their efficiency, portability, versatility, and ease of use, they are a viable option for almost all types of inspections.
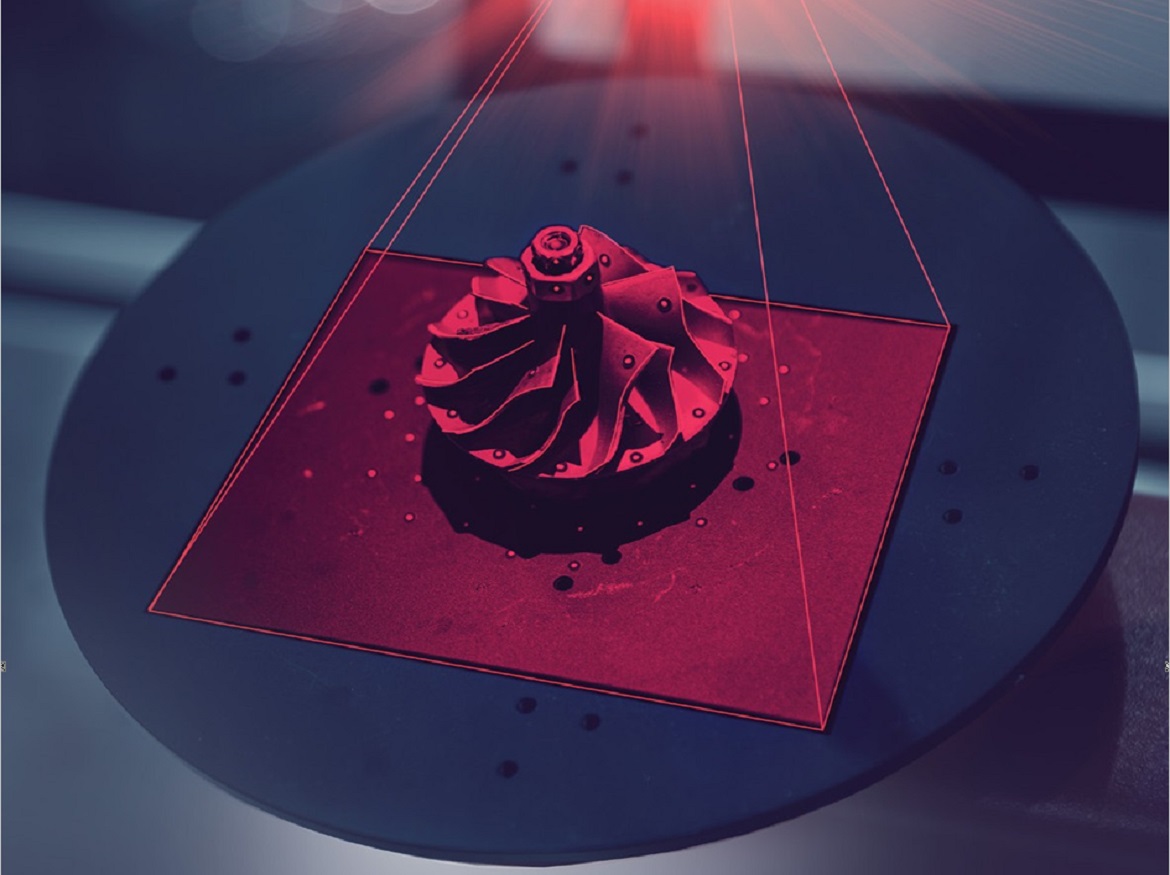
A 3D laser scanner transmits laser light onto an object’s surface, detects the light that is reflected, and then determines the distances between each geographical point on the object’s surface and the scanner. The scanner builds a “point cloud” of geographical entities from the object’s surface as its laser sweeps it, defining the shape and dimensions of the object’s surface.
The integrated software that comes with the scanner turns the point cloud into a stereolithography (STL) polygonal file and offers real-time rendering, complete model editing, polygon reduction, and data output to all common 3D programs. A 3D IGES/STEP/Parasolid model produced from an STL file is then transformed into the necessary CAD format. The file can be used to build a 3D replica of the object once it has been converted to a CAD format for measurement, analysis, reverse engineering, inspection, rapid prototyping, or mass production.
There are some tasks where a combination of scanners will yield the greatest results. For instance, we frequently utilize a laser scanner to produce the initial 3D model of a gun part before further perfecting it with even more exact measurements using a conventional CMM, which is accurate to 0.0001″, or 2.54 microns. A human hair is approximately 70 microns thick as a point of comparison.
A HandHeld scanner has a +/- precision of 0.025 mm or 25 microns, or +/- one-thousandth of an inch, and can record 60,000 distinct spatial measurements each second. Its results have been utilized in court cases as expert evidence to establish the existence of product problems and map their history in the production process because of its reputation for accurately inspecting for tight tolerances.
Modern scanners are capable of capturing the geometry of almost anything, no matter how small or large, including a petrochemical facility or a heart stent. We have scanned a wide range of objects while working for the DoD and defense contractors, including machine guns, grenades, M16 rifles, ejection seats from jet fighters, anchorage systems on Coast Guard cutters, and more.
We have scanned numerous big weapons platforms and vehicles over the past 30 years, including whole tanks (and their tracks), combat jets, various fixed-wing and rotary aircraft (including helicopter interiors), and experimental craft. Even military transport planes were checked on the flight line of the Air Force Base. The technician would probably incorporate the usage of the previously described TOF large-area scanners given the size of aircraft carriers.
It is possible to scan various people carriers, including Mine Resistant Ambush Protected Vehicles (MRAPs), and it has been done in the past. To enable them to be upgraded to defend against Improvised Explosive Devices (IEDs), the US military sought to measure MRAPs. Since accuracy is crucial when retrofitting, the military now frequently demands that measurements be made using laser scanning.
How Does 3D Scanning Save Time and Money?
Depending on the task, time savings can be measured in weeks or even months with corresponding cost savings. For instance, the Corpus Christi Army Depot (CCAD), which overhauls, fixes, and modifies rotary-wing aircraft, was able to reverse engineer components in only two hours instead of two weeks, saving them more than 99 percent of their time. As a result, the CCAD is now able to precisely describe the part surface in a matter of hours and return aircraft to service much more quickly.
All branches of the U.S. military as well as top defence companies including Lockheed Martin, Raytheon, L3, Boeing, Bell Helicopter, and the National Institute of Standards & Technology (NIST) have now incorporated 3D scanning into their production processes. For good reason, 3D scanning produces extremely accurate CAD models from an object’s geographical data by quickly and precisely measuring its dimensions. Rapid part geometry analysis is made possible, reverse engineering is accelerated and becomes more accurate, design optimisation is aided, tooling faults are exposed, and most importantly, the development and delivery of vital weapons and systems to U.S. fighting forces across the world are sped up.
This article was written by Steve Kers- en, President of NVision Inc. For more information, visit www.nvision3d. com.
Click on the following link Metrologically Speaking to read more such news about the Metrology Industry.


