Precision engineering for aerospace and automotive sectors demands a proactive approach to complex part verification. Italian subcontract manufacturer, R. Busi, made a strategic decision to move to 5-axis co-ordinate measuring machines (CMMs). Renishaw 5-axis measurement heads have enabled the company to meet the verification needs of increasingly complex part designs and deliver the tolerances and repeatability they demand.
Background
Founded in the Province of Pavia, Italy, by Raffaele Busi in 1946, R. Busi Officine Meccaniche di Precisione (Precision Mechanical Work) is a subcontract manufacturer of precision-engineered metal parts.
Built on an ethos of highest-quality manufacturing, today the company is a strategic partner to a number of well-known national and international brands in a variety of sectors, notably automotive and aerospace.
R. Busi operates from a 22,000 sqm facility in Mezzanino, Italy, where its factory houses 40 production machines including lathes, 5-axis vertical milling machines and 4-axis horizontal machining centres. It employs 40 production personnel working in two shifts.
The company manufactures precision parts in large series and also produces one-off prototypes for a large number of clients. It is particularly recognised for its work in the aerospace industry, where very tight tolerances and high repeatability are paramount.
Gianmarco Ballerini, Chief Technical Officer at R. Busi, said, “We are immensely proud of the precision work we do in technologically advanced sectors like aerospace. That said, some of our finest mechanical engineering work can be traced back to our very earliest days, producing the tiniest of components hidden away inside industrial sewing machines. Tolerances were extremely tight and a perfect mirror finish was needed; it was very demanding work even then.”
Part verification and quality control are vitally important to R. Busi and the business has had to evolve rapidly, from manual process measurements, often using precision tools designed and built in-house, to the use of programmable CMMs.
As a part of its continual improvement philosophy, the company made the decision to move to 5-axis CMM part verification.
“In short, having three 5-axis CMMs operating in a dedicated measurement room means we not only get extremely precise measurements, we get them very rapidly as well. By dramatically increasing measurement speed and significantly reducing production machinery downtime, the business has gained a serious productivity advantage.”
R. Busi (Italy)
Challenge
Any evolution in the part verification process had to be capable of supporting the high production throughput levels achieved at the R. Busi factory. A migration to 5-axis CMMs needed to avoid introducing any obstacles or bottle-necks in operations.
At the same time, the 5-axis measurement technology adopted by the company had to provide the flexibility required to verify a highly diverse range of parts produced for a wide range of different industrial sectors.
Accuracy, of course, was an absolutely vital criteria in selecting a 5-axis metrology solution. It would need to meet the most exacting standards of the aerospace sector where 100% part verification is a prerequisite consideration.

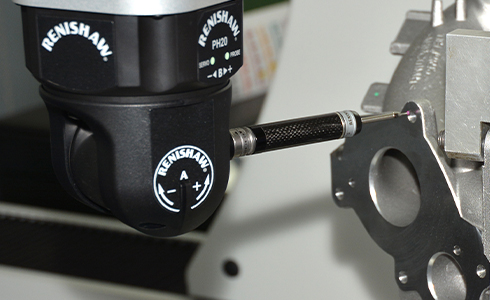
Renishaw’s PH20 CMM head measuring a part at R. Busi
Solution
Initially, the company had a measurement head retrofitted to an existing 3-axis CMM. Once the system was proven, two new CMMs were added, both specified to include the 5-axis measurement heads at the outset. Renishaw’s REVO® and PH20 5-axis measurement systems were specified to be used.
Head of Quality at R. Busi, Paolo Orlandi, said, “We already used Renishaw machine probes throughout our production processes, so equipping a dedicated measuring room with closely related technology from the same supplier was a logical and quite easy step to take.”
“Since our production activities can often include some quite complex bespoke parts, we really wanted to make the move to something a little better than a standard 3-axis CMM. Something that would give us the accuracy, flexibility and speed we needed.”

Sergio Orlandi, Owner of R. Busi
Rapid touch-trigger measurement
The unique ‘head touches’ of the PH20 5-axis touch trigger system enables R. Busi to take measurements by moving just the head, rather than the CMM structure. Measurements can be taken faster as a result, with improved accuracy and repeatability. Its 5-axis motion also reduces time spent indexing the head. This combination of factors typically results in a 3-fold improvement in throughput over conventional systems.
Furthermore, the PH20’s infinite positioning capability ensures optimal feature access while minimising stylus changes. By minimising the space required for probe head rotation around the part, it enables larger parts to be measured on the CMM. Automatically aligning itself with the part co-ordinate system, the PH20 also helps avoid stylus collisions and the need for very high accuracy fixturing.
The PH20 probe head is used with the industry standard modular TP20 touch-trigger probe system, providing R. Busi with a wide selection of trigger forces, directional sensing options and extensions. Being detachable, the TP20’s modules provide further crash protection and can be automatically changed using Renishaw’s TCR20 stylus change rack.
5-axis scanning
For certain part measurements R. Busi also made use of Renishaw’s REVO 5-axis measurement system. The REVO system is used by the company in specific checks on the form of holes and other features where multiple surface data point scans are taken without adversely affecting measurement times.

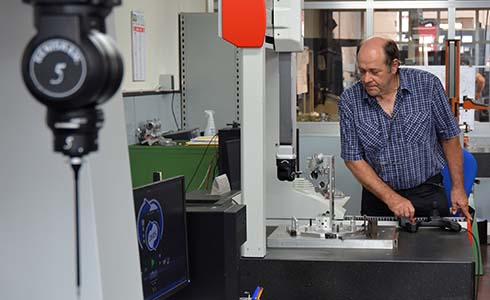
Paolo Orlandi, Head of Quality at R. Busi, measuring a part with 5-axis technology

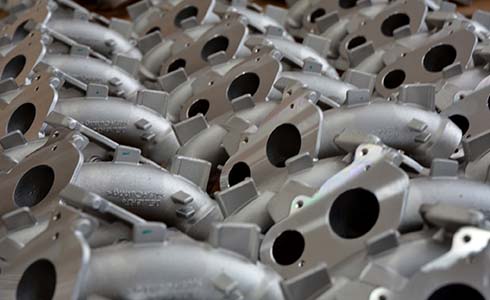
Examples of parts manufactured by R. Busi
Results
The introduction of 5-axis measurement technology has had a wide-ranging impact on R. Busi’s precision manufacturing operations as Mr Orlandi explains:
“In short, having three 5-axis CMMs operating in a dedicated measurement room means we not only get extremely precise measurements, we get them very rapidly as well. By dramatically increasing measurement speed and significantly reducing production machinery downtime, the business has gained a serious productivity advantage.”
“With the Renishaw measuring heads and probes, we now have easy access to every conceivable part feature. As a result, we don’t need to design special fixtures for part positioning, nor do we need access to a wide variety of styli which need categorising and continually changing. Everything is just simpler.”
“The learning phase was really quick as well, with the software proving easy-to-use and providing extremely accurate results. When needed, we also have online access to a Renishaw expert who helps us find quick solutions to any part-specific problem arising.”
“The sheer variety and complexity of parts that R. Busi needs to measure, makes it very difficult to exactly quantify all the improvements that have been achieved. All I’d say is that the move from more traditional measurement practices to 5-axis CMMs has been a great success and I wouldn’t go back to what we had before. Accuracy is everything to our business, and we now have the technology we need to deliver it well into the future.”


