The phrase “When does surface roughness become waviness” is occasionally used. It’s almost impossible to respond to this.
The size of the workpiece frequently determines the transition from the roughness idea to the waviness concept.
For instance, a watch staff’s irregular spacing, which is seen as waviness on a machine spindle, would be considered roughness on a machine spindle. We categorize the irregularities in part based on the number of waves in the functional length. On a watch staff, one wave would be regarded as curvature, but more waves on a longer shaft might be regarded as waviness.
Since their causes also relate to performance characteristics, it is preferable to segregate roughness, waviness, and shape in accordance with their causes. As a result, we can define shape, waviness, and surface roughness as follows.
What is Surface Roughness or Roughness?
The abnormalities that are inherent in the production process are referred to as surface roughness or roughness. (For instance, a cutting tool or grit). The deviations of a real surface’s normal vector from its ideal form serve as a measure of surface roughness. The surface is characterized as rough if these variations are considerable and smooth if they are minimal.
What is Waveness?
Waves are the portion of the texture where surface roughness is present. It could be caused by material deflections and strains, vibrations, chatter, or work. It is likewise impossible to identify with certainty where the waviness ends and the shape merges with the part’s overall form, but by applying the same standard, we can say that:
What is Form?
Form, which ignores fluctuations brought on by surface waviness and roughness, is the overall shape of the surface.
These distinctions are qualitative rather than quantitative, yet they are still very important because this definition is well-established and functionally solid. Surface roughness is exclusively a byproduct of the manufacturing process itself, not the equipment. Marks may be left by the tool or the grit itself; for some operations, these marks will be periodic in nature, while for others, they will be more haphazard.
The tearing of the part during machining, the accumulation of debris near the edge, and minor flaws in the tooltip all contribute to the formation of a finer structure. However, waviness is blamed on the particular machine, an imbalance in the grinding wheel, inaccurate lead screws, and a lack of stiffness.
Form faults are frequently the result of inadequate clamping force, a crooked slideway, or heat generated during the operation, which can cause a surface to flex.
It is important to note that these three qualities are never encountered separately. The majority of surfaces are the consequence of the interaction of surface waviness, shape, and roughness.
How to Measure Surface Roughness?
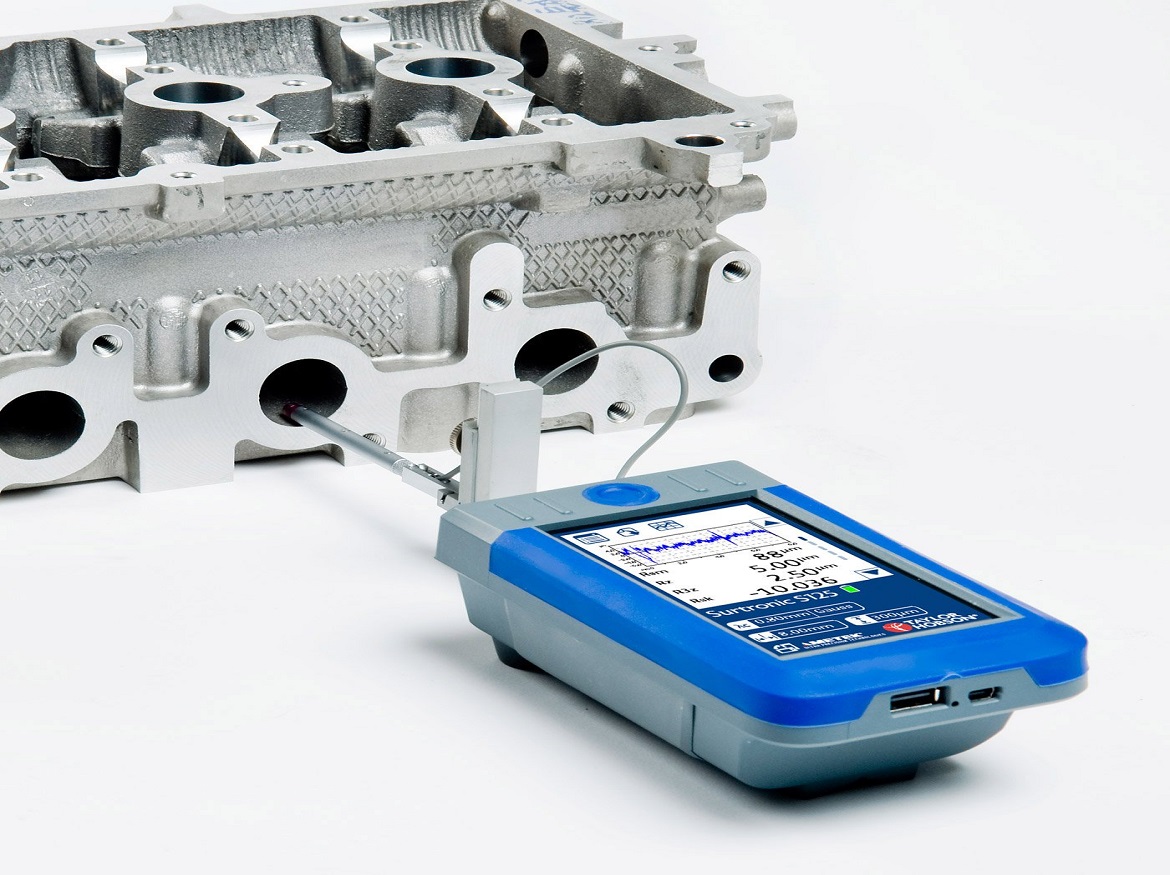
A surface roughness measurement tester is necessary because the individual surface roughness abnormalities are too small to be seen with the unaided eye. A short distance is covered by a tiny stylus moving at a fixed pace. To create a significantly increased vertical magnification, an electrical signal is obtained and amplified.
Together with numerical values that describe the surface texture or surface roughness, this signal may be shown on both graph and screen outputs. Watch the Surtronic Duo II surfaced roughness tester surface roughness measurement demonstration video.
A 60° or 90° conical stylus with a spherical tip and a 2 m radius is the ISO standard for measuring surface roughness. To effectively utilize this stylus, which is fairly delicate, you will need a device with outstanding mechanical qualities.
What are The Surface Roughness Parameters?
The outcomes can be scrolled through. Using the options, you can choose a mode that will display five measurement parameters per screen or choose a large character style for improved visibility. Measurement metrics for surface roughness include Ra, Rz, Rp, Rv, and Rt.
- Rp: Maximum profile peak height
- Rv: Maximum profile valley depth
- Rz: Maximum height of the profile
- Ra: Arithmetic mean deviation
- Other parameters: Rsk, Rku, Rq, Rz1max
To safeguard the stylus, the gadget can be docked in its second mode. The stylus is protected, so the device can be turned off and used somewhere else. The Surtronic team is bringing precise surface measurement data to the factory floor and shop floor. A device that may be used anywhere and is as simple to operate as a smartphone.
What are the Applications of Surface Roughness?
Surface roughness and function are strongly related in many applications; for example, where two surfaces are in close movement contact, their roughness will affect their sealing or wear qualities. This could imply that “the smoother the better” applies, however, this isn’t necessarily the case because other factors might be at play.
Roughness valleys have been found to be necessary for oil to hold where lubrication is required. It is also necessary to consider the cost of creating extremely smooth surfaces, which could result in a large rise in expenses without considerably improving performance.
No matter how well-lubricated two surfaces in relative motion (such as a shaft and its bearing) are, some wear will still happen. If the surfaces are rough, the peaks will eventually wear away, making the surfaces smoother. Since metal is being removed, the fit of the two components will alter more quickly than if the finish was perfect from the beginning. Conversely, some components, such as clamping mechanisms or a pin with an “interference fit,” rely on friction to work.
The use of lip seals to stop hydraulic fluid leakage is another instance where surface roughness might affect performance. It is challenging to maintain a fluid film between the shaft and the seal if the finish is too smooth. Abrasion and subsequent disintegration from a finish that is overly abrasive might lead to failure. After machining, a component’s texture can often be examined to show tool flaws, improper tool settings, or improper tool speeds and feeds.
A surface’s appearance can have some bearing. For instance, sheet steel used for vehicle bodies needs to have a finish that enables paint to adhere to the surface evenly and without any “orange peel” effect. Anyone who has attempted to paint on a glass surface will understand how challenging it is to get a solidly bonded finish. Not just metallic parts need to be controlled; paper and plastic pieces also need to be repeatable to the same degree.
Credits: Taylor Hobson
Click on the following link Metrologically Speaking to read more such blogs about the Metrology Industry.


