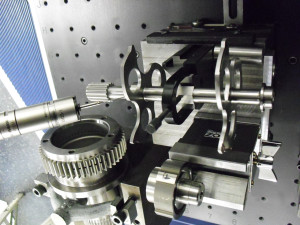
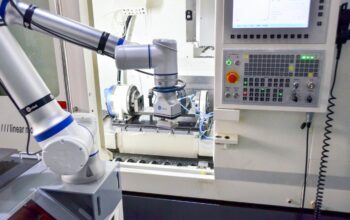
Ultra-precise dimensional measurements critical to risk mitigation under AS9100 Rev. C.
Gear Manufacturing, Inc. (GMI), Anaheim, CA, was founded in 1989 with a mission to manufacture high-quality custom gears and gear-related components and assemblies. Housed in 27,500-square-foot facilities, the company is equipped with the latest CNC machining centers supported by extensive engineering capabilities and leading-edge software. The company makes almost every type of precision gear configuration imaginable, which it produces in materials ranging from tool steel and titanium to cast iron, copper, all types of alloys and engineered plastics – virtually any material that can be used to cut a gear.
Approximately two-thirds of GMI’s output is dedicated to the aerospace and defense industries and includes customers such as Northrop Grumman, Lockheed Martin and Boeing, as well as the Bell Helicopter and Sikorsky Aircraft. It will come as no surprise that GMI products comply with standards promulgated by the American Gear Manufacturer’s Association (AGMA), Deutsches Institute Fur Normung (DIN), National Aerospace Society (NAS), the Society of Automotive Engineers (SAE), and the American Society of Mechanical Engineers (ASME). In addition, GMI’s processes comply with AS9100 – the aerospace version of the ISO9000 quality management system – recognized internationally by both the SAE and the European Association of Aerospace Industries. Specifically, GMI complies with Rev. C of AS9100 released in January 2009, and which adds an emphasis on risk mitigation.
Not unexpectedly, GMI’s adoption of AS9100 Rev. C has had a major impact on the company’s approach to manufacturing management.
Risk management and mitigation
Risk management and mitigation is the identification, assessment and prioritization of risks. As defined by AS9100 Rev. C, risk is the effect of uncertainty, whether positive or negative on achievement of objectives. Risks causing uncertainty can derive from project failures (at any phase in design, development, production or sustaining life-cycles), legal liabilities, financial markets and credit risk, as well as accidents and natural causes. Strategies to mitigate risk typically include reducing the probability of the risk, reducing the negative effect should the risk occur, transferring the risk to another party, avoiding the risk, or even accepting some or all of the potential or actual consequences of a particular risk.
The notion of risk is subtle. Gary Smith, president, Gear Manufacturing, Inc., commented, “Risk mitigation includes things like having a catastrophe plan in place to account for events including having a key staffer walk out the door to get hit by a truck. Risk can be inherent in PO quality clauses containing some gray areas that may not be fully understood; it might also reside in tight tolerances or other specifications that could be difficult to validate.”
In manufacturing process terms, one aspect of mitigating risk is to be certain that correct revisions of engineering documents, instructions and specifications are used. And when tooling and other equipment (including CNC machines) are employed, it is essential to demonstrate the integrity of the equipment as related to the suitability and fitness-to-purpose of the items produced.
Manufacturing a product as complex as an aircraft or space vehicle requires close attention at every step of the process for every part produced – no matter how small.
For GMI, an important area of risk management and abatement is to be sure that the parts it manufactures meet specified dimensional tolerances.
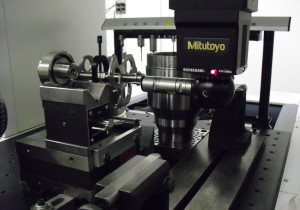
GMI routinely manufactures to tolerances as low as one-tenth (.0001 inch). Validating these tolerances can be problematical, especially given the limitations, in terms of gage repeatability and reproducibility (GR&R), of both metrology instruments and of their human operators. GR&R is the amount of measurement variation introduced by a system comprising the measuring instrument together with the individual using the instrument. Repeatability refers to variation introduced by the instrument; reproducibility refers to variation introduced by the instrument operator. Gage R&R references the combined effect of the two.
Magnifying GMI’s measurement challenge is the fact that its aerospace customers frequently specify that measuring techniques must meet the GR&R 10:1 rule. The 10:1 rule holds that total GR&R should not exceed 1/10 that of the tolerance required. For example, if the tolerance is .002, then the total of GR&R should be .0002 or better. In other words, the combination of measurement uncertainties introduced by both instrument and human error cannot total more than 10% of the tolerance being measured. Tough, but necessary in aerospace.
GMI found that achieving these levels of repeatability and reproducibility was challenging for even skilled operators using the most accurate handheld measuring instruments. According to Smith, “About 20% of the parts GMI was making were extremely difficult to validate at the tolerances required. Our measurement process involved using high accuracy super-micrometers and going directly from reference gage block to workpieces – then going back-and-forth from blocks to workpieces. This process burned up a lot of time and motion. Measurements were becoming too time consuming. A way had to be found to avoid overwhelming our capacity for taking these measurements.”
Since its founding, GMI had been using Mitutoyo metrology equipment.
As a result of this longstanding relationship, GMI decided to consult with Mitutoyo America to see if they could suggest a solution.
Ultra-high precision measurement
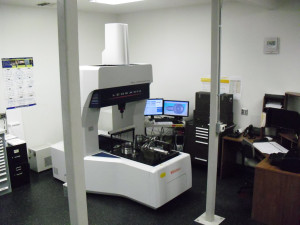
Smith elaborated, “We supplied Mitutoyo with some sample parts and asked for a recommendation. We were looking at tolerances that could go down to as little as 50 millionths on length with measurements that had to comply with the gage R&R 10:1 rule. Within weeks, Mitutoyo came back with an approach based on use of a Mitutoyo Legex 574 CNC Coordinate Measuring Machine (CMM).”
The Legex 574 CMM combines state-of-the-art design, electronics, computing, sensors and materials to offer substantially enhanced performance while at the same time providing a relative price advantage. A total accuracy of 18 millionths (.000018, MPEE = [0.35+L/1000] µm), a large measuring range (X: 510mm, Y: 710mm, Z: 455mm) high traverse speed (200mm/sec.) and robust worktable loading capacity (200kgf) make the Legex 574 CNC CMM both productive and practical in diverse applications.
“Furthermore,” Smith said, “Accuracy of the Legex ranges from 2 to 22 millions at its longest point of travel. The Legex is a lab-grade machine that provides us with part checking capabilities that can go beyond those of our customers. It has gear geometry checking capabilities and we can use it to calibrate our own gage artifacts. Procuring the Legex was a no-brainer – even had it cost twice what it actually did.”
CMM operating system
The Legex 574 CMM uses Mitutoyo’s MCOSMOS (Mitutoyo Controlled Open System for Modular Operation Support) operating system. By combining intuitive icon-based programming with the ability to import native CAD models, MCOSMOS enables even novice users to easily import part and fixture models and “virtually” place them in the volume of their specific CMM. MCOSMOS graphically defines the CMM, racks, probes and even styli. Selected graphically, all measurement points are clearly displayed on a 3D graphic view that can be rotated, zoomed or panned to any convenient viewpoint. Animation enables offline running of a workpiece before ever placing it on the CMM, thus providing machine volume verification and collision avoidance. Then, MCOSMOS enables users to choose various software modules to analyze measurement results, to document and present results, and to archive the data in practical structures. Furthermore, MCOSMOS integrates with networked systems for in-line process control applications as well as to enable true enterprise-wide functionality.
By incorporating high-level software, CMMs can measure virtually any type of geometry. For example, MCOSMOS includes standard and optional modules, enabling CMMs to:
- Support a variety of probes including contact, constant contact scanning, laser scanning, optical, etc.
- Enable a rotary table to act as a fourth axis
- Create and process prismatic features imported from a CAD model for comparison to nominal values (including animated path generation and collision avoidance)
- Collect data in real-time and network for SPC
- Evaluate airfoils and turbine blades
- Measure all types of spur (straight or helical), simple and complex segmented gear, bevel (straight or spiral), hypoid, and worm gear profiles and subsequently compare results to international and user-defined standards
The gear measurement capabilities mentioned last in the preceding list is enabled via use of GEARPAK – the MCOSMOS software suite enabling GMI to measure all the types of gear tooth geometries as described above. It is used for rapid generation of measurement programs and creates evaluations and reports. The parameters to be included in a report are determined by the user, with numeric or graphic representations, or a combination of the two.


