A well-known, but infrequently discussed truth within aviation was laid bare at the recent 2019 Aerospace Maintenance Competition #AMCAero. Bluntly put – traditional manual measurements are highly subjective, error-prone and up to 37x less consistent than 8tree’s OEM-approved dentCHECK tool. It was the first time that the aviation community was presented with such detailed analytics explaining the differences between both methods, and the resulting impact on aviation efficiency and safety. Read on for additional context…
Prior to the dent-mapping event, competitors studied a detailed manual instructing them to adhere to correct tool-handling procedures, to ensure measurement accuracy. One such instruction for proper use of traditional manual tools advised participants to place rulers or depth gauges with their edge along the direction of zero curvature. This is extremely crucial since an incorrect placement could yield grossly inaccurate measurements!
Along with instructions on how to map dents using traditional methods, a quick guide for the dentCHECK inspection tool was also published. Competitors from around the world, comprising maintenance professionals from commercial airlines, MROs, military organizations, and aviation schools – many of whom are first time users of the tool – studied the quick guide, to learn proper use of the dentCHECK tool.
“Engineers, technicians, students… Ready, Set, Go!” As the organizers kicked-off the 2019 Aerospace Maintenance Competition, teams of two took turns to map eight simulated dents prepared on two airframe panels. Within the allocated 15 minutes, competitors were tasked with mapping one assigned dent using traditional methods, and then repeating the same inspection task with the dentCHECK inspection tool. Two basic measurements were required – Maximum Depth (Y), and Smallest Width (A). So how did the numbers stack up?
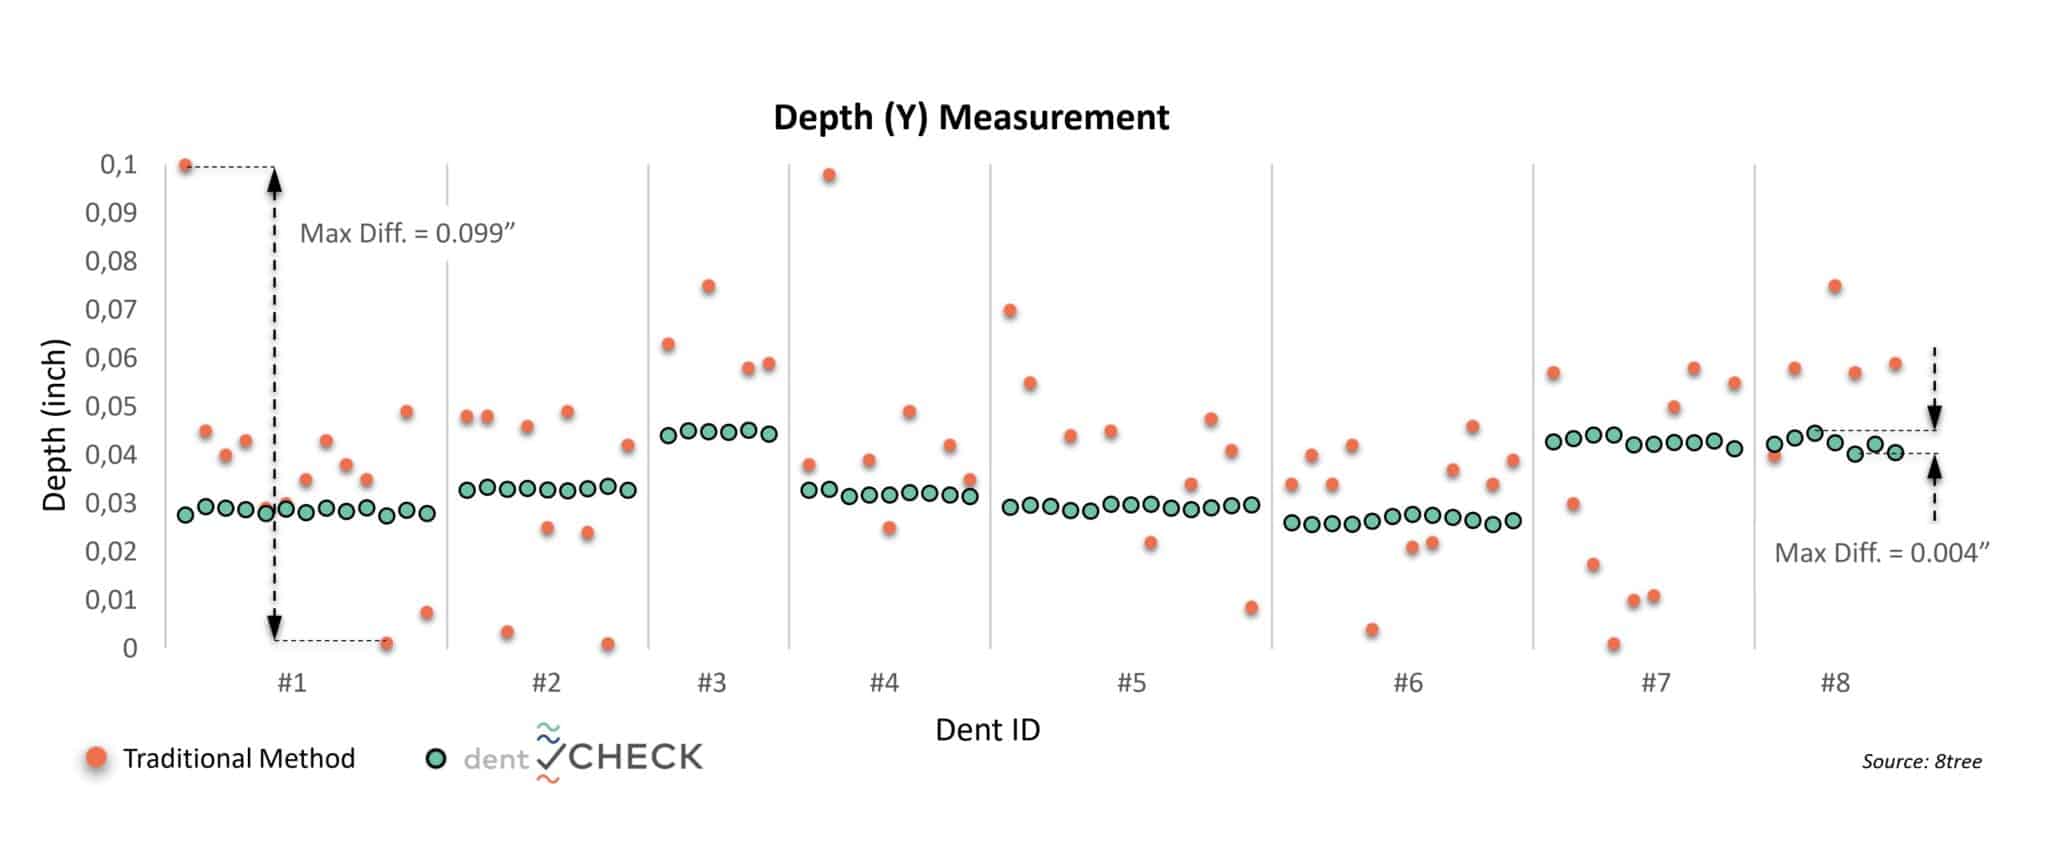
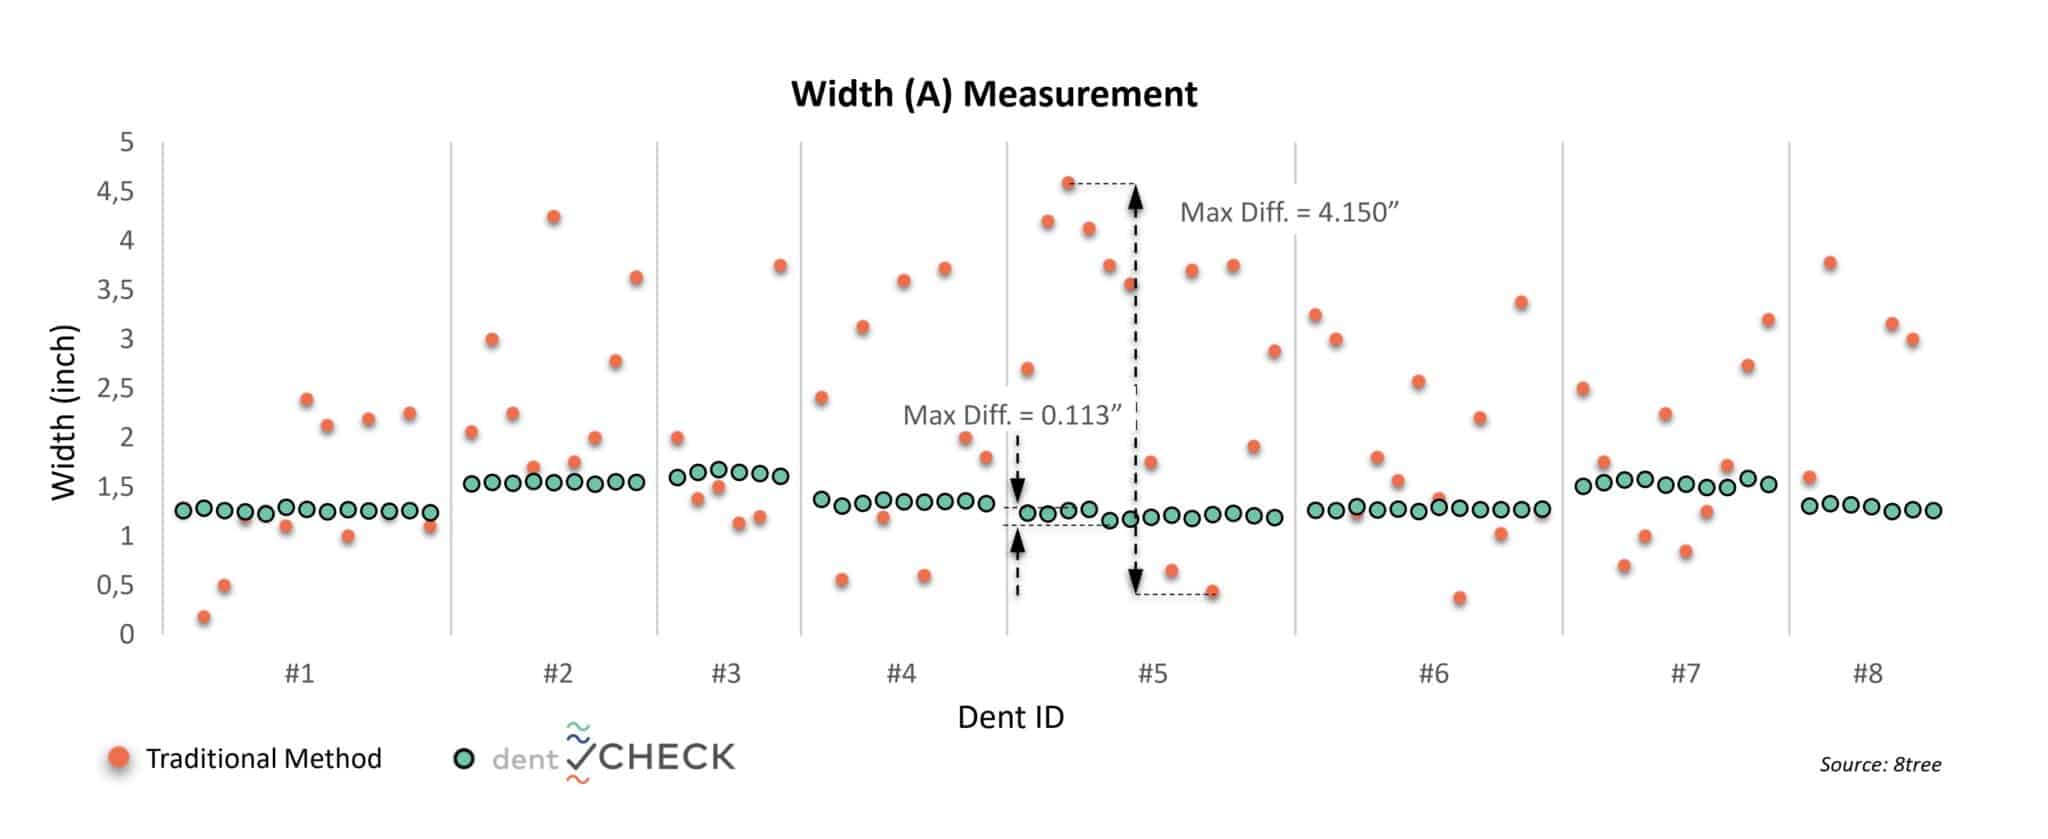
The two charts* below contrast the measurement results on all eight dents. In general, the measurements obtained using traditional manual methods are scattered across a wide spread. In contrast, using dentCHECK produced consistently accurate measurements for all of the eight different dents, irrespective of the human operator. Using the maximum absolute differences as a yardstick of measurement consistency, dentCHECK demonstrated ~25x more consistency in measuring depth, and ~37x more consistency in measuring width when compared to traditional manual methods.
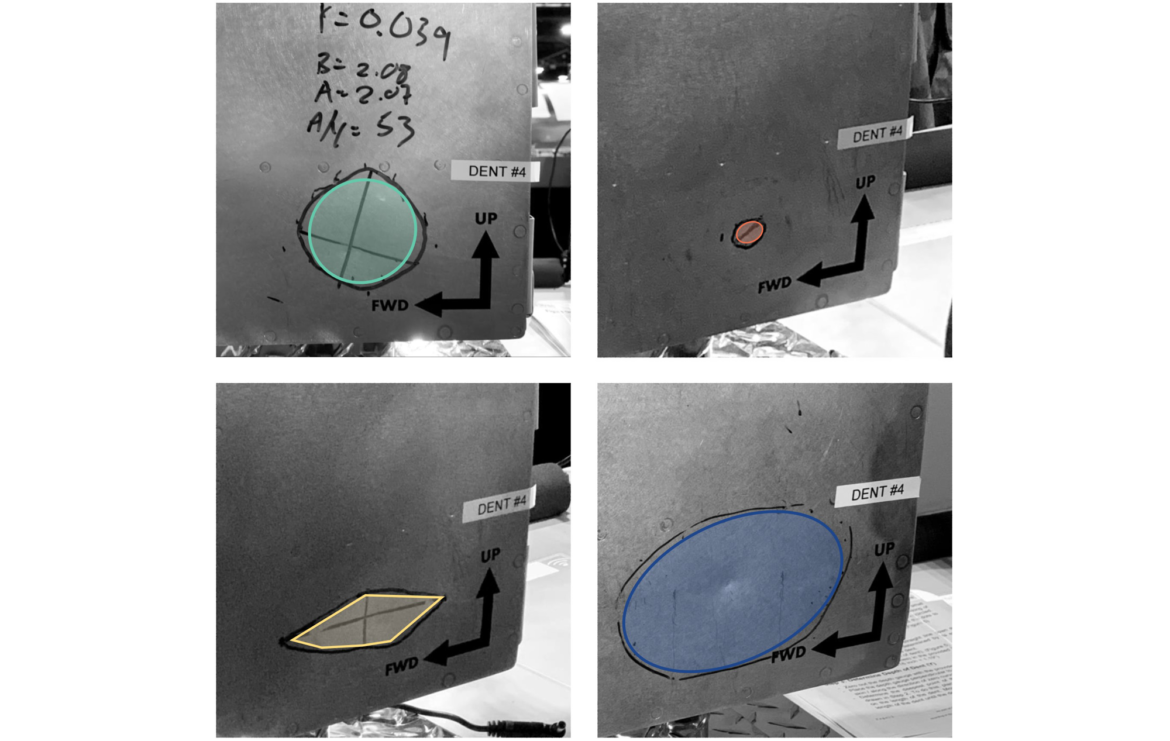
There are many explanations for the inconsistencies of traditional methods – some are systematic errors, some are random. Tilting the depth gauge while taking a measurement, failure to zero out the depth gauge, and plainly determining the start and end points of a dent edge with the naked eye – all contribute to the subjectivity of traditional manual measurement methods.
Knowing that traditional methods are operator-dependent, what are airlines and MROs doing to combat the subjectivity of their inspection processes? What are the risks if no actions are taken? Can technology help in reducing turn-around-time of an aircraft? Stay tuned for the next episode of this article series to find out!
* Depths > 0.100” are considered outliers and are not included in this study


To know more, check 8tree.


