The automotive industry places great importance on the design and quality of car interiors. As a result, efficient inspection processes are crucial to ensure the high standards and performance of automotive interior components.
The following case study explores the inspection challenges faced by an automotive component manufacturer and how they overcame those challenges using Scantech’s 3D inspection solutions.
Challenge of Inspecting Automotive Components
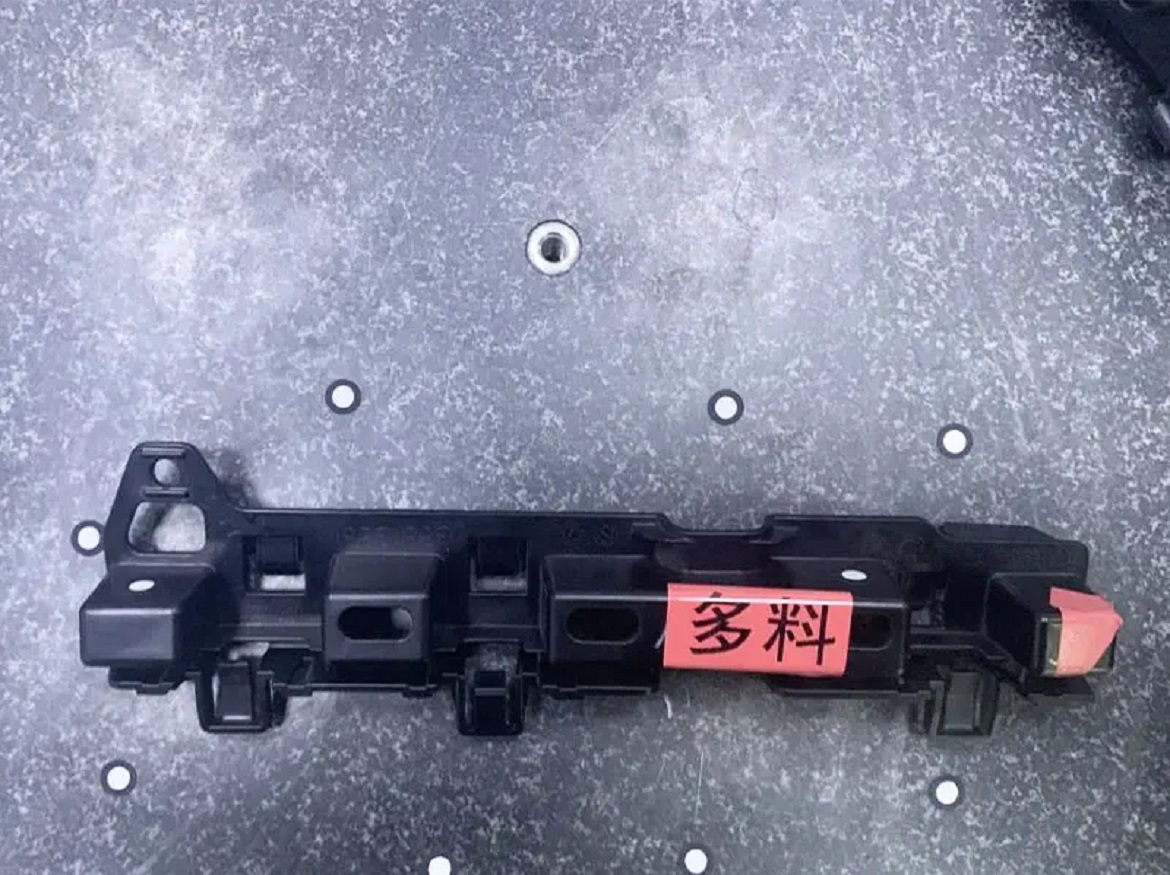
The customer wanted to inspect rubber wiring ducts which was designed for BMW’s automotive interiors. The customer was looking for a new measurement method to enhance its inspection efficiency as well as provide intuitive and quantified inspection reports to OEMs.
The wiring duct in this case has a dimension of 250 mm in length, 30 mm in width, and 70 mm in height. Its complex shape and intricate designs make it difficult to measure. It also has black surfaces, which are challenging to measure with ordinary 3D scanners.
Inspecting a wiring duct ensures that the electrical installation meets the relevant standards and regulations. It is essential to maintain the integrity and reliability of the electrical system.

Traditional inspection methods has the following limits, which are not efficient enough to measure the products.
Low efficiency: The inspection process is time-consuming and labor-intensive, and requires multiple tools for different dimensions and features.
High cost: The inspection tools are expensive to develop and maintain, and need to be updated frequently to match the changes in the product design.
No intuitive report: The inspection results are not easy to present and communicate, and do not provide a comprehensive view of the product quality.
Inspection 3D Solution: Portable 3D Laser Scanner SIMSCAN
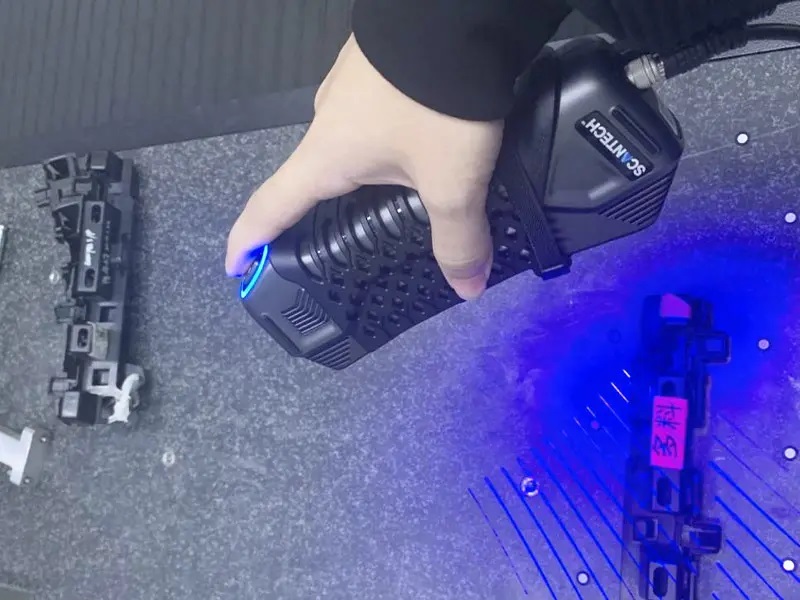
To address the challenges mentioned above, the customer utilized Scantech’s SIMSCAN 3D scanner for the project. Portable 3D scanner SIMSCAN allows direct surface scanning without any preparation, resulting in fast speed and easy access to complete data. Thanks to its compact size and robust algorithm, it is ideal for 3D scanning hard-to-reach areas.

The following steps were undertaken:
Target Placement: Firstly, the customer applied targets around the wiring duct to facilitate accurate 3D scanning.
Parameter Setting: After target placement, the necessary scanning parameters were configured to ensure optimal data acquisition.
Laser Scanning: Using the SIMSCAN 3D laser scanner, the customer 3D scanned the rubber wiring duct, capturing precise laser point data.
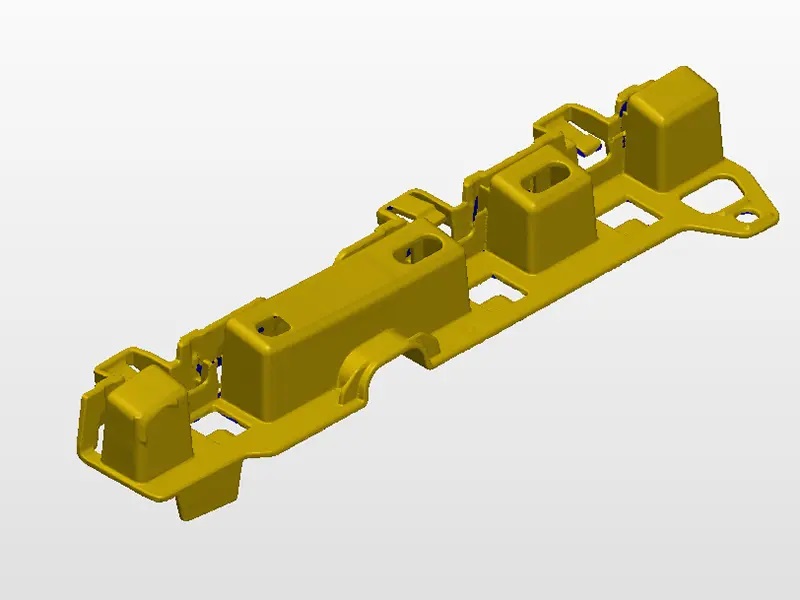
Mesh Generation: The collected data was processed to generate meshes, creating a comprehensive digital representation of the inspected surface.
Data Import and Analysis: The generated data was imported into Scantech’s 3D software, where comparative analysis was performed to evaluate the product’s dimensions and quality.
3D scanning created a detailed and accurate visual representation of the wiring duct, capturing all the necessary details. With 3D scanning, precise measurements of the wiring duct were obtained, including dimensions, clearances, and distances.
This allowed inspectors to examine the duct and store the data for future reference, making the inspection process more efficient. This ensured that the duct met the required specifications and helped in planning any modifications or replacements.

Why Scantech’s Products? Benefits and Innovative Features
The use of Scantech’s SIMSCAN offered several benefits, including:
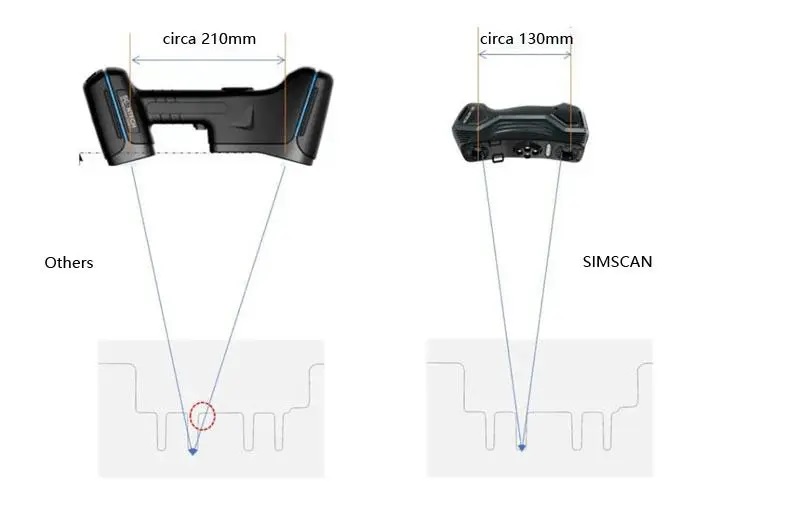
Excellent for hard-to-reach areas: SIMSCAN has a small camera distance of about 130 mm, which gives it a narrow view angle. This means that it can scan tight spaces like holes and grooves better than other common 3D scanners in the market, which have more view obstruction. The picture below shows how SIMSCAN captures data from narrow areas.
Fast and easy: The customer 3D scanned the wiring ducts directly without any preparation, such as spraying or coating, using the SIMSCAN 3D laser scanner. The scanning process took only 5 minutes, and the data processing took another 2 minutes. The total time was 9 minutes, which was much faster than traditional methods. Scantech’s 3D scanners enabled quick and accurate inspections, improving the efficiency of the entire inspection process.
Innovative and advanced: The customer used the SIMSCAN to scan the wiring ducts from multiple angles and distances, and obtained complete and high-quality data. It has three scanning modes and HD cameras built-in, which enable it to scan objects with complex surfaces or in confined areas with high precision. Its accuracy can reach up to 0.020 mm.
Accurate and comprehensive: The customer imported the scanned data into the 3D software, and compared it with the digital model to perform relevant size inspections. The software generated color maps for deviation and GD&T analysis, to show the quality of the wiring ducts in a clear and intuitive way. SIMSCAN provided visual inspection reports, facilitating clear evaluation and enhanced communication between the customer and the OEM.
By leveraging Scantech’s 3D scanning solutions, the customer successfully addressed the challenges associated with inspecting rubber products for automotive interiors. The use of SIMSCAN allowed for efficient and accurate inspections, visual reporting, and improved communications with the OEM.
This case study highlights the benefits and innovative features of Scantech’s solutions in the automotive industry, providing insight into how advanced inspection technologies can enhance quality control and streamline production processes.


