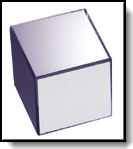
Alignment Mirrors (shown right) have been used for decades in space and aeronautics industries for the alignment of fixtures and assemblies to extremely high tolerances. This alignment work has traditionally been performed using Theodolites due to their ability to align the optical crosshairs of the Theodolite exactly to the face of the mirror, this technique is referred to as Collimation.
With the advent of Laser Trackers that derive highly accurate distance measurements with precise angle measurements without human intervention the interest in measuring mirrors has grown. Multiple studies have been performed and the determination of these studies is that the Laser Tracker can provide accurate measurements to Alignment Mirrors.
Measure the Mirror
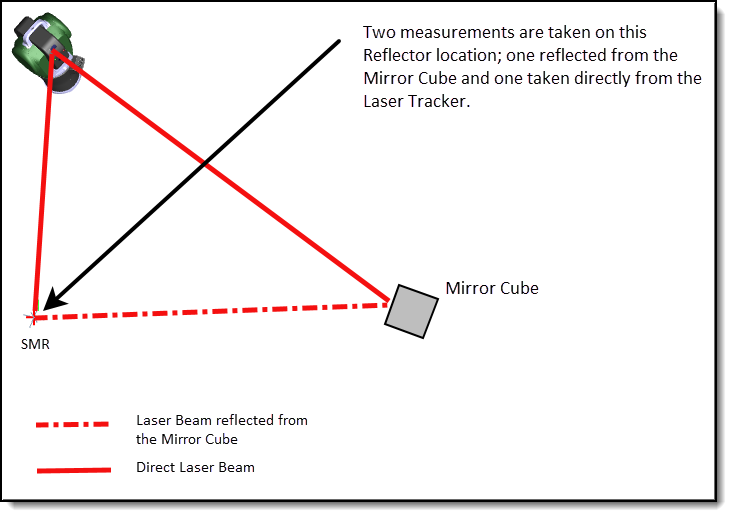
To measure the position of a mirror the Laser Tracker must be set up in such a way that the Laser beam can reflect off the mirror to an SMR (Spherically Mounted Reflector) mounted on a stable Optical Stand or Mount that can also be measured directly by the Laser Tracker (shown right).
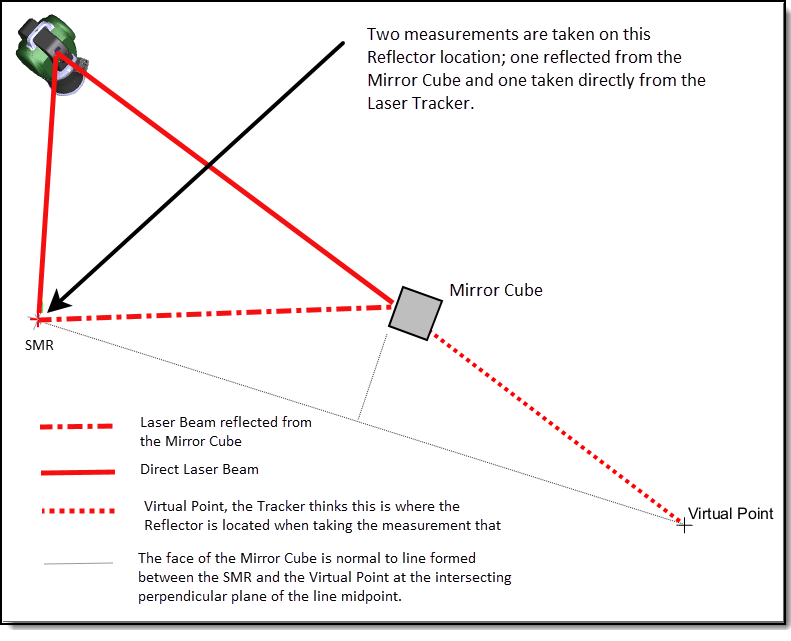
- Measure the SMR through the Mirror Cube, this provides a distance measurement and a point that appears beyond the Mirror, this will be referred to as a Virtual Point (see illustration below). This point uses the Horizontal and Vertical angles of the Laser Tracker and the Distance measurement that is “lengthened” by reflecting it to the SMR that is sitting on the Optical Stand.
2. Measure the SMR directly from the Laser Tracker, you must be extremely careful not to move the stand, ideally, you should “break” the beam after the previous measurement and then use the Camera or Tracker Controls to point the Tracker at the SMR (after rotating towards the Laser Tracker) and lock the Laser Beam to the SMR and then Measure the Point.
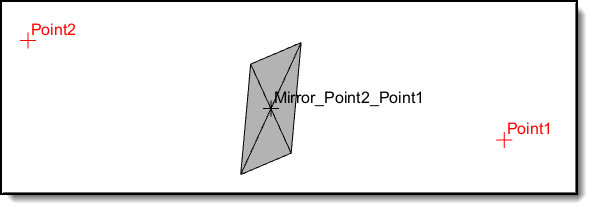
- In the Measure Manager Data Tree of Verisurf, select the two points, and using a right mouse click select Construct – Mirror Point to calculate the position of the Mirror, the Mirror point will be saved in the Data Tree under the Points node (below right).
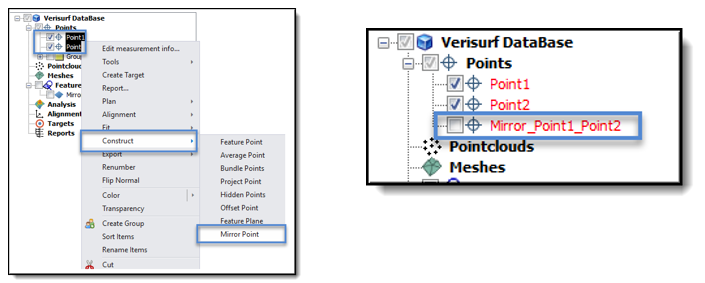
Change the Graphical View of the Mirror Point – by right-mouse-clicking on the Mirror Point and selecting Construct – Feature Plane you can create Plane the centroid of the Plane is the Mirror Point. By creating a Feature Plane, you can Edit the Plane by double-clicking on it to open the Calculate Fit dialog and changing the size. This is useful for visualizing the location of the Mirror Point.
Important Note: the graphical representation of Point1 is correct due to the distance measurement from the reflected laser beam.
Using the Construct Mirror method in Verisurf to calculate the Position of a Mirror is significantly faster and requires less equipment for shops that already own a Laser Tracker. The use of Digital and Analog Theodolites will yield the same results but require significantly more skill by the operator to achieve those results while being more prone to operator error.
To know more, check Verisurf.


