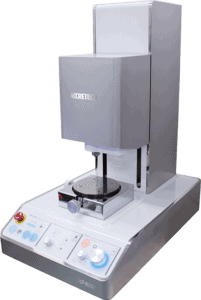
Fast contour and roughness measurements
It’s no longer enough for many workpieces these days to collect dimensional measurements. More and more, it’s necessary to collect the entire two- or three-dimensional topography of a surface. With the services of optical measuring technology, point clouds are created with extremely high point density. The resolution that this enables is suitable for being able to evaluate even the smallest geometries.
For larger and flat measuring ranges, in particular, optical measuring technology is an advantage because it allows measuring to proceed much more quickly.
By doing so, measurements can even be made directly against a CAD model – and a two-dimensional display of the deviations can be rendered in close to real-time. These results allow for fast conclusions on the production process and enable short reaction times up to closed control loops.
Another advantage of optical measuring technology is that workpieces and their surfaces can be measured without contact so as to avoid damaging them with the measuring probe. This is relevant to sensitive plastic and mirror surfaces, for example.
ACCRETECH Opt-Scope – touchless contour and roughness measurements

Fast measurements for 3D surface structures with white light interferometer
- Saves a lot of time in comparison to physical measurement
- Vertical Scanning Range 20 mm
- Resolution 0.01 Nm
- Precision ±(0,1+|H/1000|) μm
With the Opt-Scope, ACCRETECH offers an optical surface measuring system based on white light interferometry that can be used to measure both contours and roughness – and with a resolution up to 0.01 nanometres.
The white light interferometry procedure utilizes interferences from broadband light, which has a shorter coherence length than laser light. The beam of light is split into two paths by a beam splitter. One beam reflects onto a reference mirror and the other onto the sample to measure. The two beams intersect one another on the return path. This creates an interference pattern that is recorded by a camera. Interferences occur when the difference in length between the reference mirror and the sample surface is smaller than the coherence length.
This effect is utilized in the scanning white-light interferometry of the Opt-Scope. The sample is moved perpendicular to the measurement assembly through the interfering range and the interference patterns are plotted by the camera at discreet intervals of movement. For each pixel, the autocorrelation function (interferogram) of the original light beam is recorded where it travels through the path.
The Opt-Scope measuring system makes the measurement of surface topographies possible in a measurement time of a few seconds. This makes it up to 100 times faster than a physical 3D surface measurement. High precision and highly polished surfaces can also be measured too, such as for example from mirrors to an extremely rough surface such as on grinding stones.
The Z measuring range area of the gauging device is 20 mm. The Opt-Scope has a CNC-controlled X/Y table for automation and to expand the measuring area. It also has a stitching function so that larger areas can be measured as well.
To know more, please check Accretech.


