In order to meet the demands of high-precision production, the automatic turning shop Klumpp GmbH & Co. KG from Bretten, Germany put its own quality management to the test – and then fundamentally rebuilt it. Our case study shows how Klumpp overcame hurdles and raised potential to increase manufacturing quality and make their own QS more economical.
Small turned parts are used in many assemblies of different industries. The demanding workpieces are produced to a thousandth of a millimeter exactly as specified. Klumpp, in Bretten near Karlsruhe, is one of the world’s leading manufacturers of turned parts and specializes in large-scale production of such high-precision turned parts. The products are between 4 and 32 mm in size. Klumpp manufactures them from different materials and with highly complex functionality. In order to meet the demands of its customers, Klumpp relies on modern production technology and high-quality processing methods.
Necessary new orientation
For this reason, the company also decided to put its own quality management to the test. The realization: the previous procedure was very complex and not 100% reliable due to the influence of the operators. The results could also not be documented according to today’s standards. In addition, the controls had to be carried out in the precision measuring room – away from the production line and connected with time-consuming logistics.
For Klumpp, these weaknesses were reason enough to reorient themselves in quality assurance. Together with Mahr, Evelin Kobiljar, who is responsible for metrology as division manager, developed a new concept to monitor the quality of the production continuously, close to production and in a documentable manner.
Solution: Measuring cell in production
At the heart of the new solution is an air-conditioned and covered measuring cell, which is located directly in production. This provides protection against contamination and ensures consistent climatic conditions. The machine operators carry out the measurements here themselves.
Kobiljar has set up a coordinated system of test equipment within the measuring cell. It is process-reliable, keeps absolute measurements stable and has been approved by the precision measuring room. The measuring programs used are still created in the precision measuring room, as this is where the responsibility for quality management lies. All devices retrieve the current measurement program from there – an important basis for making measurements safe and reliable.
Four steps to success
The quality assurance according to the new measuring concept takes place in four steps:
Step 1: The very first step is the identification of the responsible employee as well as the specimen itself. The latter is recognized by reading in a QR code. This step is important for the documentation – and at the same time offers another advantage: the measurement always takes place with the correct and up-to-date measuring program.
Step 2: Afterwards, the internal dimensions are automatically measured with four Mahr digital dial gages. The measurement results are transmitted via cable to the shaft measuring system with which subsequent tests are carried out.


Networked: First, the inside dimensions are measured with digital dial gages from Mahr (left picture). These transmit the measured data via cable to the shaft measuring system (right picture).
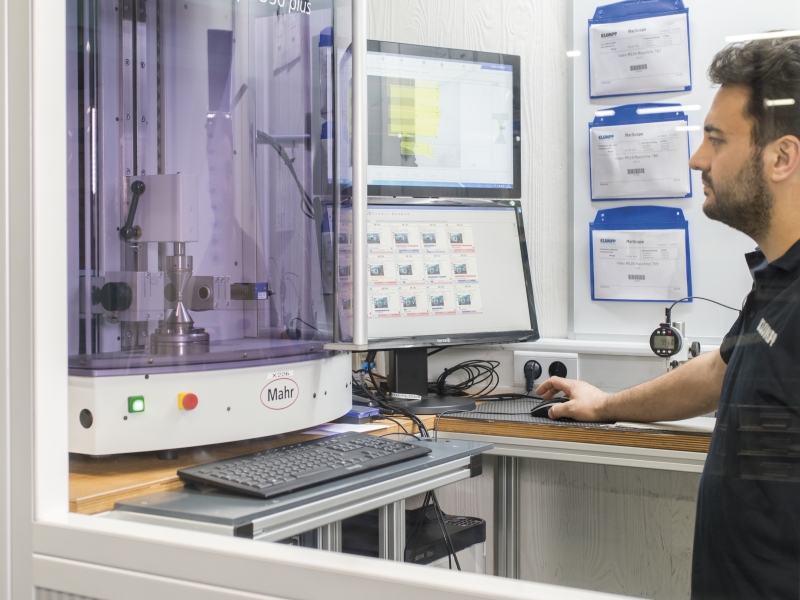
Step 3: After recording the internal dimensions, the Klumpp employee checks the external dimensions of the workpiece with the fully automatic optical measuring system MarShaft SCOPE 350 plus. The operator clamps the workpiece into the measuring system and then starts the measurement. The system measures a total of 40 features of the outer contour – such as diameter, length, radii and angle – in just 15 seconds. The measuring sequences are fully automatic and free of operator influences.


Klumpp now measures the outer contour of their test specimens without contact and fully automatically with the shaft measuring system MarShaft SCOPE 350 plus. The optical sensor is a matrix camera.
Step 4: When all measurements have been completed, all measurement data for the internal and external measurements are sent to the quality management system, where the measurements are evaluated and documented.
Advantages of the measuring concept
The new measurement solution brings many advantages to Klumpp and its quality assurance staff:
- Quality assurance costs have dropped as the number of handheld instruments has been significantly reduced.
- Reduced costs and effort for calibrations and instrument management. The investment in measuring instruments and systems paid for itself within a few months.
- The measurements are more efficient and reliable – and always independent of the operator’s influence.
- There is fast feedback as to whether the production is within the production tolerances – expensive rejects or complaints are thus effectively and measurably avoided.
Conclusion
Overall, Klumpp’s entire assurance of manufacturing quality is now more efficient and reliable. Now that the new measuring concept has been successfully tested, Klumpp will remove a great extent of the manual metrology from production. Instead, a total of seven standardized measuring cells are to be set up. Then the company has achieved its goal: to reliably ensure the production quality of precision turned parts in production.


