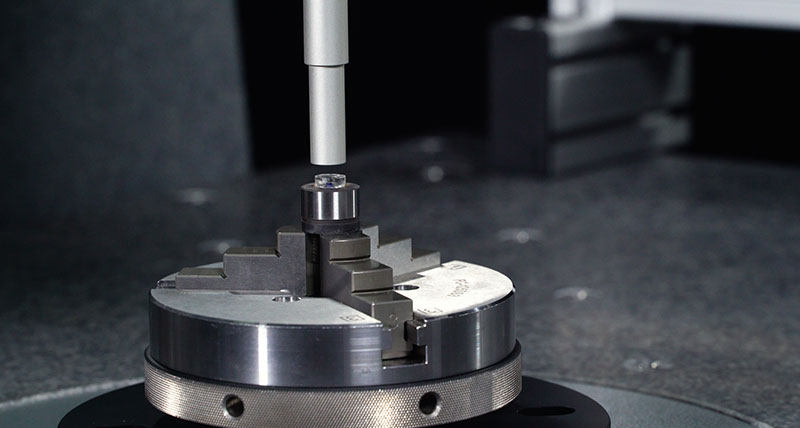
High-volume inspection of smartphone camera lenses simplified with low-force probing and optical scanning capabilities in one coordinate measuring machine (CMM).
Hexagon’s Manufacturing Intelligence division has today launched a new coordinate measuring machine (CMM) that overcomes challenges common to the measurement of delicate components, such as smartphone camera lens assemblies, to help manufacturers perform quality inspections up to four to six times faster than conventional methods with uncompromising sub-micron accuracy.
Continued demand for high-value products that are precisely assembled from delicate materials, such as smartphones and wearable technology, requires electronics manufacturers to inspect large volumes of fragile and miniaturized components with high precision. For example, the plastic lens barrel of a smartphone could have a part diameter of 7 mm and the tolerance to which they are produced could be as small as 1-2 microns. The precise geometrical shape of these components is of great importance because misalignment would lead to distorted camera images and severely affect the customers’ experience of the product. For many applications, quality sampling is sufficient, but every part of a lens assembly must be inspected to ensure perfect quality.
With a first term length-measurement accuracy of .28 microns, the Leitz PMM Gold – with a “P” for precision – is the most accurate metrology machine ever produced by Hexagon. The new machine’s optical inspection takes about five minutes to inspect a lens barrel from start to finish, doesn’t require human intervention beyond the positioning of parts, and does not contact fragile components during measurement. In addition to supporting faster measurement processes, its non-contact probes are especially sensitive to deviations in geometry, which can be critical to validating the quality of precision components. For example, up to seven different material layers are required to produce a single smart-phone camera lens, so even minor variances in surface quality can drastically alter results.
By contrast, the profilometers traditionally used for the inspection of delicate electronics parts such as smartphone camera lenses, often deform components during measurement and require a commitment of 20 to 30 minutes per part for inspection due to stringent part-positioning requirements. While highly accurate, an additional limitation of the profilometer is that it can only be used for final quality inspection, whereas non-contact inspection can be introduced at each phase of assembly where it is required.
Svenja Schadek, product manager, commented, “As the world’s largest CMM provider, Hexagon has significant experience across product teams in responding to the needs of manufacturers as they navigate new challenges to productivity and quality. Through combined R&D effort, we developed a CMM that features very high accuracy and a smaller footprint so that our customers could bring the latest consumer products to market faster, with greater confidence in their manufacturing processes by employing rigorous, high-sample-rate inspection.”
The ability to easily switch between optical and low-force tactile inspection tools is a strength of the Leitz PMM Gold, as accurate measurement of components with deep crevices or detailed features can be difficult to achieve without the use of styli. Low-force tactile probing capabilities provided by the new CMM ensure that delicate surfaces remain intact, while an optical sensor supports the performance of rapid inspection without contacting parts. The CMM’s fully automatic sensor-exchange system enables users to easily switch between these probe and sensor heads and delivers seamless transitions when measuring a mixture of different part features.
Designed especially for ultra high precison manufacturing, the Leitz PMM Gold is 30 percent smaller than competing machines, which saves valuable floor space. Available globally from today, the CMM’s unique capabilities are also ideally suited to the high-accuracy inspection of precision gears for electric vehicles, as well as other precision components and the calibration of gauges and masterparts.
For more information please visit HexagonMI.com/Leitz-PMM-Gold
Contact:
Stacey Wiebe (US based)
Global Media Relations Officer
Hexagon’s Manufacturing Intelligence Division
Mobile: +1 209 479 9455
e-mail: stacey.wiebe@hexagon.com
Robin Wolstenholme (UK based)
Global Media Relations and Analyst Relations Manager
Hexagon’s Manufacturing Intelligence Division
Phone: +44(0)207 0686562
e-mail: robin.wolstenholme@hexagon.com
About Hexagon
Hexagon is a global leader in sensor, software and autonomous solutions. We are putting data to work to boost efficiency, productivity, and quality across industrial, manufacturing, infrastructure, safety, and mobility applications.
Our technologies are shaping urban and production ecosystems to become increasingly connected and autonomous – ensuring a scalable, sustainable future.
Hexagon’s Manufacturing Intelligence division provides solutions that utilise data from design and engineering, production and metrology to make manufacturing smarter.
Hexagon (Nasdaq Stockholm: HEXA B) has approximately 21,000 employees in 50 countries and net sales of approximately 3.8bn EUR. Learn more at hexagon.com and follow us @HexagonAB.


