Have you ever scanned a large-size sculpture, or object, and the measurement results are a total disaster? Scanning large-size objects can be challenging as errors accumulate over a certain distance during measurement. How can we eliminate accumulated errors? By integrating photogrammetry with 3D scanning, we can enhance the speed and accuracy of data collection and the 3D modeling process.
What’s photogrammetry?
The word “Photogrammetry” was coined by Prussian architect Albrecht Meydenbauer in his article “Die Photometrographie” in 1867. Photogrammetry develops from plane table, analogy, analytical to digital photogrammetry. Each phase of its development extends about 15 years. In this blog, we mainly focus on digital photogrammetry.
Photogrammetry is a measuring technique that takes photographs from different perspectives to obtain 3D coordinates. Specifically speaking, it extracts geometric information by triangulating the locations of points on the subject.
Photogrammetry software can find characteristic points that are repeated in photos. The distance of these points can be inferred using triangulations. The more photos we take from different angles, the more accurate these locations are. Finally, these points would be converted into a mesh and a 3D model.

Photogrammetry works like aerial photography. The latter can be used to take images and get a general sense of topography. However, in contrast to aerial photography which contains positional errors, photogrammetry is more accurate when measuring distances, areas, or direction. It is widely used in architecture, engineering, mapping, and quality control.
How can photogrammetry be used in 3D scanning?
3D laser scanner uses lasers to scan the geometry of an object and obtain its 3D data. Once all the points are captured, a dense point cloud is generated, which can be used to create a 3D model. Most 3D scanners on the market are capable of scanning objects whose sizes are within a range of 1 m, while it is difficult for these 3D scanners to scan large-scale objects like wind turbines, planes, and buildings. There is where photogrammetry comes in.

When measuring an object with photogrammetry, the first step is to put reflective markers on the object surface and coded targets around it. A scale bar is also necessary to serve as a reference. Then, shots are taken from different perspectives, while making sure that you take photos that overlap.
These photos will help to construct a general 3D geometry of the object. The details of the object’s surface then can be captured using a 3D scanner. With high-resolution and full-frame cameras, a photogrammetry system can give you the highest quality output. Thanks to its large shooting area and precise algorithms, it can reduce errors of connection that accumulate over distance.
How can Scantech help?
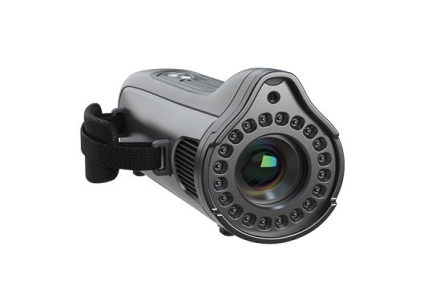
Scantech offers MSCAN photogrammetry system for scanning large-scale objects, with high requirements in accuracy and measurement repeatability. MSCAN photogrammetry system can work alone, or work with handheld 3D scanners, to achieve a volumetric accuracy of up to 0.015 mm/m.

MSCAN

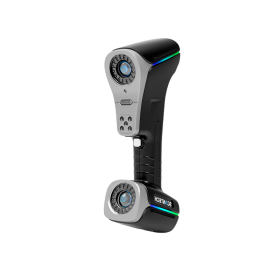
KSCAN
To take photogrammetry to a new level, Scantech provides KSCAN composite 3D scanner. It brings infrared laser scanning, blue laser scanning, and photogrammetry into one single device. It delivers highly repeatable scanning results with great details in high efficiency. When it comes to measurement, it is suitable for both large-scale and tiny objects.

Here is an example of how KSCAN 3D scanner helps to inspect a planet carrier gear for a wind turbine. The diameter of this kind of planet carrier gear is generally bigger than 1 meter and weighs more than 1 metric ton. Usually, planet carrier gears are produced in small batches as the types of planet carrier gears vary. Engineers can get every single detail of the part and obtain precise 3D measurement results, using KSCAN-Magic 3D scanner with built-in photogrammetry,


