In this article, Dr.-Ing. Marc Wendel – Senior Application Manager at Taylor Hobson Ltd – talks about non-contact metrology for the 3D acquisition of form errors, based on a multi-wavelength interferometric approach.
1️⃣ What are the methods of measuring optical components?
Taylor Hobson offers two methods/approaches to measuring optical components:

- One is a tactile approach i.e., a single trace or a raster scan using a diamond tip. This is a fast way to do a 2D measurement on an optical surface, with very good cost-efficiency.

- The second approach is by use of an interferometric point probe for fast and ultra-accurate 3D form error measurement.
2️⃣ What is Multiwavelength Interferometry (MWLI)?
Interferometrical point sensors can easily achieve accuracies within a few nanometers and record changes in the path in the picometer range. With the appropriate collimation, very large measuring ranges are possible. However, one is limited to half of the wavelength as unambiguity range when using a homodyne interferometer.
Multiwavelength Interferometry (MWLI) uses several independent, discrete wavelengths that share one optical path, and calculates a synthetic beat wavelength. This way, the very good resolution as well as the very large measuring range of homodyne interferometers, can be combined with an unambiguity range extended by various magnitudes.

For example, when using two wavelengths λ1 and λ2 to measure the same distance, each wavelength will deliver its own interference signal. This corresponds to two independent homodyne interferometers with high accuracy but small unambiguity range λ1/2 and λ2/2, respectively. Thanks to the MWLI technology, however, the unambiguity range can be expanded by calculating the synthetic beat wavelength of both discrete wavelengths. The size of the achieved unambiguity range is equal to half of the synthetic beat wavelength Λ, which can be more than 1 mm.
3️⃣ What are the properties of Multiwavelength Interferometers?
• Non-contact, optical measurement
• Extremely high accuracy (< 2 nm, 2 σ)
• Large working distance (up to 30 cm)
• Large working range
• Absolute measurements (tolerates signal interruption and measures step heights up to 1.25 mm)
• Different surface types and materials (transparent, opaque, specular, polished, rough)
• Varying reflection coefficients (from 0.1% up to 100%) due to phase evaluation
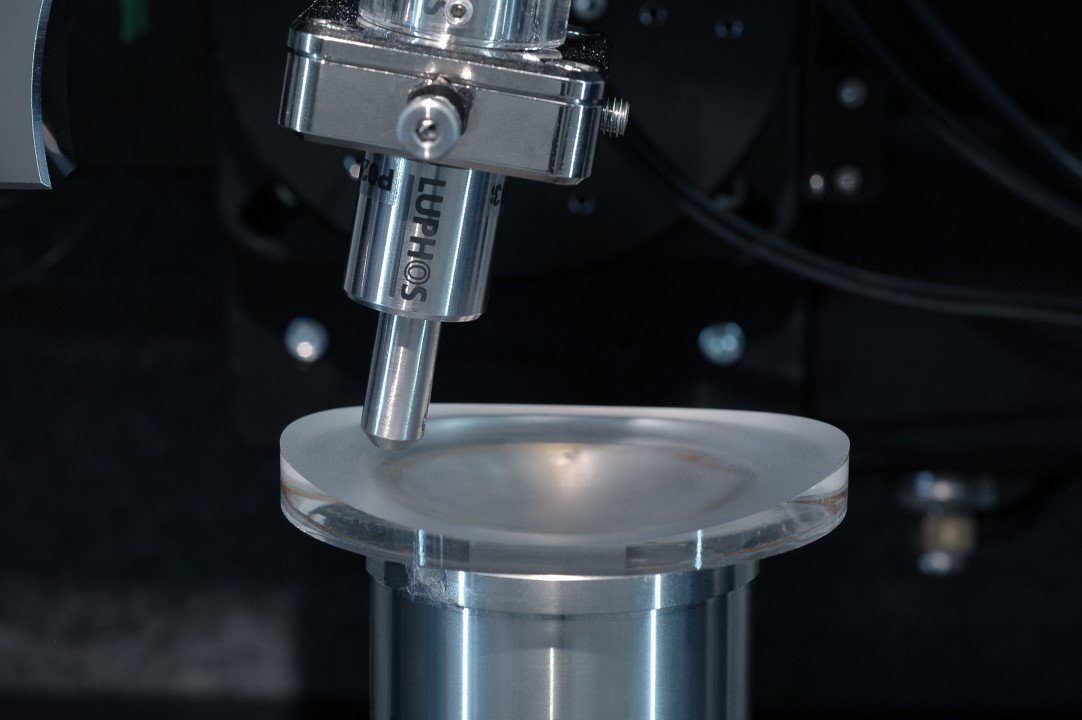
4️⃣ What is the LUPHOScan system and 3D form measurement of aspheres and freeforms?
The LUPHOScan system is a turnkey solution (see Fig4) to measure different types of surfaces, starting from flats or spheres (up to hemispheres), aspheres, both convex and concave or with inflection points. You can measure freeforms, as well as surfaces with small steps like diffractive optical elements, large steps like Fresnel lenses, interrupted surfaces like D-shaped or a rectangular lens, elements with a central hole or any other kind of discontinuity.
The background idea of the system was to combine the advantages of two worlds: tactile measurement with great geometric flexibility and a non-contact, accurate interferometric measurement. Like this, we came up with a LUPHOScan which is a scanning interferometer based on an optical point sensor.

5️⃣ What is the working principle of the LUPHOScan non-contact Interferometer?

Linear and rotational stages are responsible for the positioning of the object sensor above the surface. Here, two linear stages, in radial (R) and in the vertical direction (Z), position the sensor in the measurement volume, while a rotational stage (T) facilitates the vertical measurement in relation to the surface.
The object sensor is measuring the distance to the object under test. While the geometrical design shape of the surface is being captured, the object rotates by means of an additional air-bearing spindle. This leads to a measuring trajectory along a spiral path on the design surface.
However, during the measurement not just the distance from the object to the sensor must be measured, but in addition, the exact position in the measurement volume for each acquired data point. To achieve this, (as shown in Fig5) three reference sensors and a robust metrology frame with highly accurate reference mirrors are necessary. Thanks to the shown positions of two linear and one cylindrical reference mirror, the absolute position of the object sensors in the measuring volume can be measured uninterruptedly. The reference sensors are positioned in a way that Abbe errors of the first order (caused by mechanical movement of the stages, they influence the measuring distance) can be compensated completely.
For more information, visit 👉Non-Contact 3D Optical Profilometer | Surface Profiler | 3D Profilometer | Taylor Hobson (taylor-hobson.com)


