How it Can Help Your Production and Manufacturing
The subject of augmented reality has been a hot topic in recent times. Augmented reality is when reality is enhanced by computer-generated information, i.e., making additional information about the real world visible to the user. This can be achieved by displaying the information using glasses; by projecting directly onto real objects using a video projector or laser projector; or by overlaying a video image with additional information, captured using a camera.
In industry, the use of tablet PCs with an integrated camera is becoming popular. In this case the video image captured by the camera is shown on the display and “enhanced” with additional information. The accuracy of the augmented reality overlay enables extremely fast and cost-effective inspection of components, tools and production facilities.
As globalization expands, flexible, mobile control and monitoring of processes is increasingly becoming a key issue. Ensuring quality across the global process chain, is also important in terms of controlling costs in terms of personnel, time and travel.
Recently, there has been a noticeable trend of moving the necessary systems away from fixed control centers and input terminals to mobile terminals. This is where augmented reality technologies are useful in achieving considerable added value. They enable direct, intuitive access to information and fast variance inspection, as the information is available where it is needed. Processes can also be supported continuously and without media disruption throughout the entire process chain.
With the Visual Inspect AR™ (Augmented Reality) solution, FARO® has found a way to use augmented reality “out-of-the-box”, and to apply it effectively in a practical setting and with a variety of additional possibilities.
The monitoring of incoming component parts and outgoing products usually takes place by means of specially-created drawings or simple checklists, which require time and effort to compile.
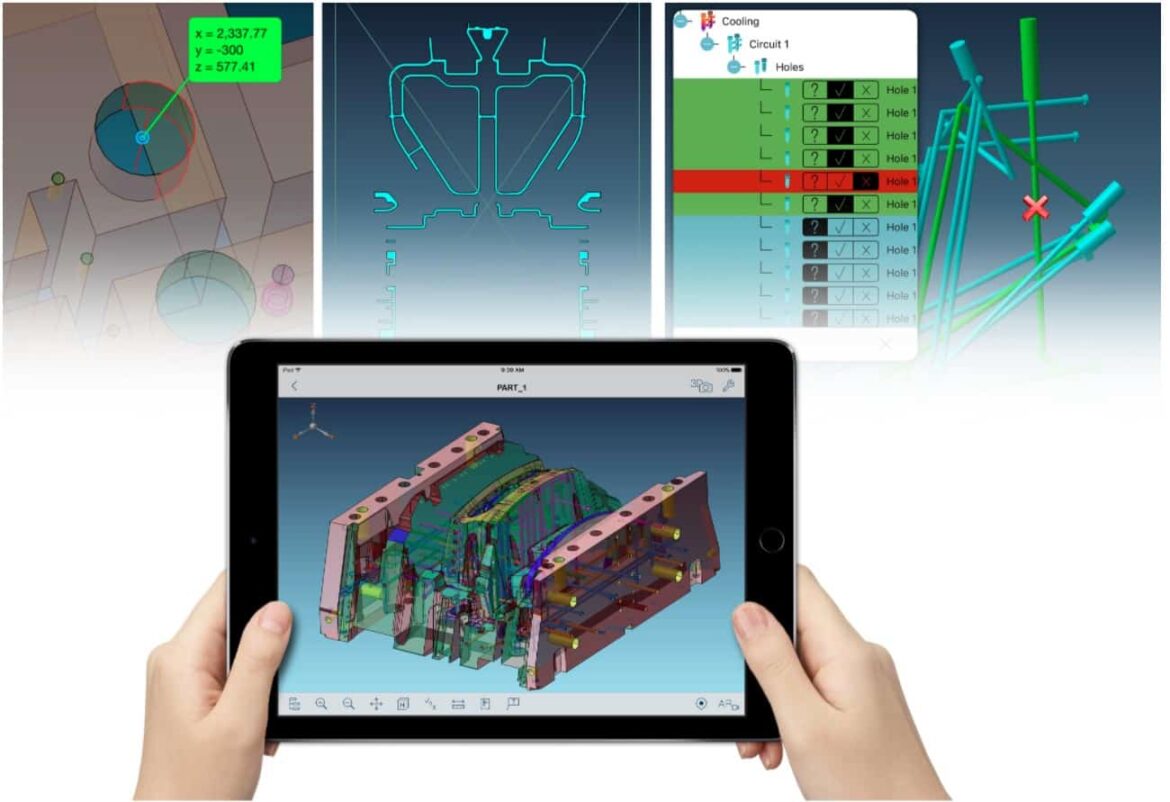
FARO Visual Inspect AR enables CAD (Computer Aided Design) models to be accurately overlaid onto a video image. This enables a direct comparison of the component with the plan or CAD data; any discrepancies can be recognized instantly.
These discrepancies can be documented in the program instantly using photo or video evidence, with the documentation or error report being linked directly to the corresponding geometry. After checks have been made, these reports can be exported as a document “at the push of a button” or transferred straight to the relevant PLM (Product Lifecycle Management) or PDM (Product Data Management) systems. For example, post-processing the results of the checks by manually entering them into systems or laboriously creating PowerPoint presentations, is no longer necessary.
As an additional feature, these checks can be carried out with the guidance of checklists or step-by-step instructions, which provide additional security.
In addition to the pure geometry of the part or assembly, the inspector also has all other necessary information on the device, such as metadata, ISO standards, core data, etc., so no other medium is needed for the inspection process.
This all makes it possible to carry out incoming goods inspections more quickly and easily than ever before.

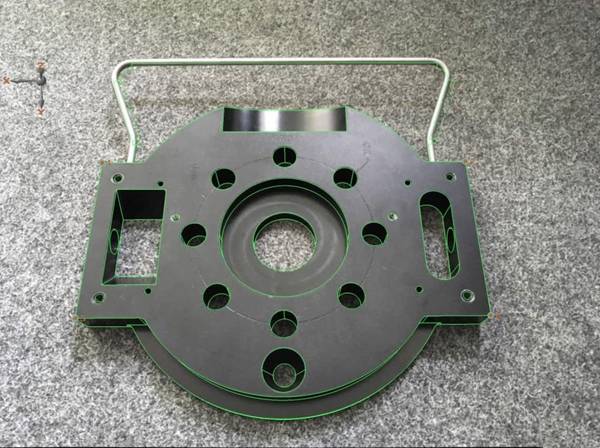
Precise overlay of a workpiece with the CAD target data for verification.
The same applies for a brief inspection after machining. If features such as holes or slots have been forgotten when creating the CAM (computer aided manufacturing) program, they can be checked against the construction data within minutes. It is no longer necessary to re-clamp and set up the part being processed, which saves hours.
The use of this technology also opens new possibilities in the fitting of sub-assemblies, saving time, money, and avoiding errors. Components can be identified directly at the site of installation, their installation position located, and sub-assemblies checked. The creation of 2D documents for the workshop and movements between stationary terminals can also be avoided.
In the area of maintenance, all documents are readily available to the fitter on-site, and installation sites can be identified quickly using the AR overlay. Since all additional information is linked directly to the 3D geometry, this data is accessed simply by tapping a finger at the point on the video image, giving the user access to the necessary parameters.
As design is almost always carried out in 3D these days, the additional creation of 2D drawings for production is not necessary, which again reduces costs significantly. The use of a mobile system eliminates the need for movement between fixed terminals. Significantly fewer systems and licenses for software are needed, as the existing ones can be used more flexibly.
An additional benefit that goes along with the use of Visual Inspect AR is that faster intermediate checks can now be made anywhere and at any time during the manufacturing process. Errors can be detected and rectified at an early stage, thus reducing the rejection rate of finished goods and reducing scrap and rework.
With Visual Inspect AR, FARO offers a new solution that meets the needs of global, flexible production. Visual Inspect AR helps companies make their processes more flexible, more efficient, and more secure, while reducing overall costs.


