Aluminum, an effective alternative to cut down on weight without sacrificing durability, is widely applied in automotive manufacturing. It has been progressively incorporated into automotive engines, doors, hoods, and trunks to reduce vehicle weight.
Due to its lightweight nature, aluminum has replaced steel, a burden on fuel efficiency, and become one of the most effective materials for light-weighting.
The 6000-series alloy aluminum is the most commonly used material for vehicles, which is heat-treated to meet the strength requirements of the customers. A heat-treated aluminum alloy can exceed the strength of some grades of steel while remaining lightweight and malleable.
However, the poor structural durability of aluminum components is often considered their biggest disadvantage. It requires manufacturers to inspect parts precisely to ensure that the parts manufactured to meet stringent requirements.

3D inspection for automotive aluminum castings
Customer Needs
The company in this case specializes in manufacturing parts made of lightweight metals, serving industries such as automobile manufacturing, 3C electronics, aerospace. and more.
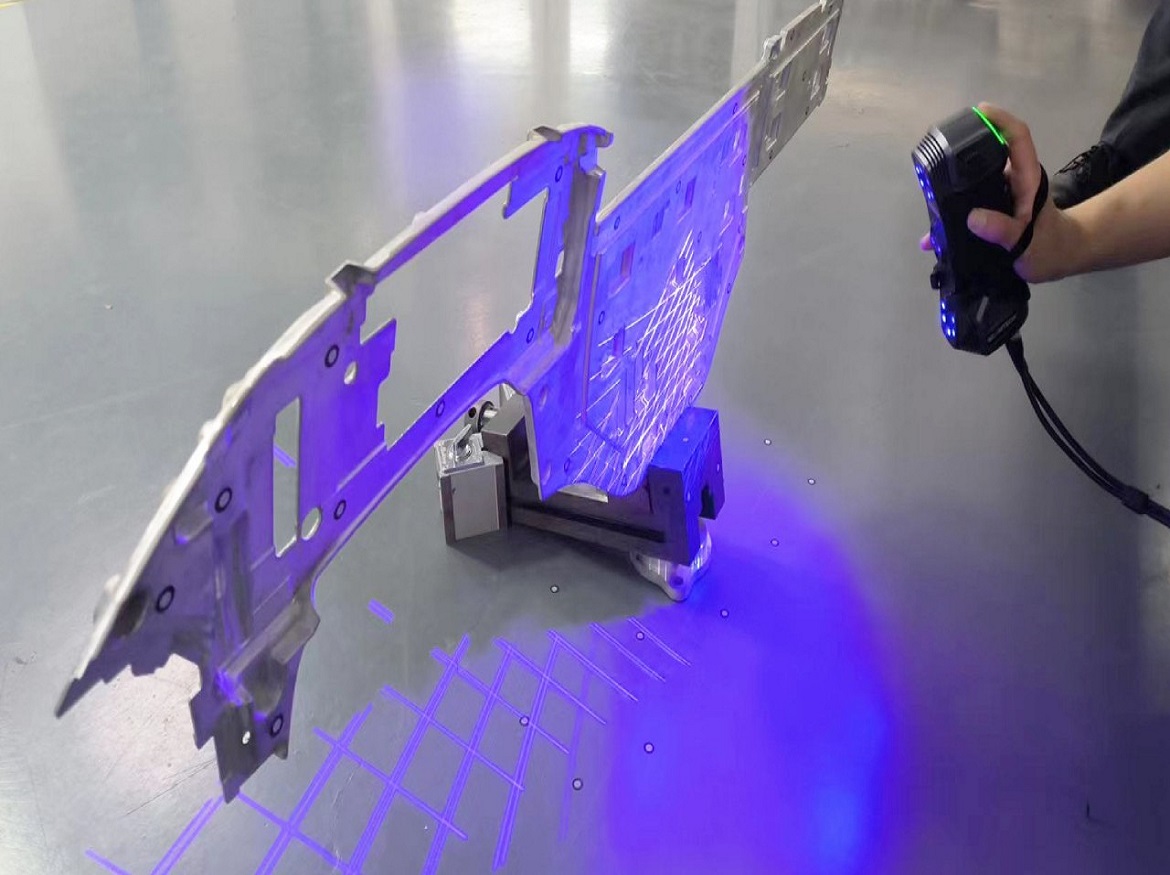
The customer used Scantech’s handheld 3D scanner SIMSCAN to measure the aluminum castings manufactured to identify their deformations, and adjust the parts accordingly based on the data obtained.
What Customer Says
“We used to spend the whole day adjusting a part. Using Scantech’s 3D scanner, we reduced the time of measuring, inspection and adjusting to 1 hour. Besides, we can measure more parts since the 3D scanner can be carried around. It helps us to increase efficiency and optimize inspection workflows.”
Handheld 3D Scanner
Advantages
Lightweight and portable 3D scanner for unlimited measurements
Portable 3D scanner SIMSCAN stands out among traditional measurement methods as it can be used both in lab and on shop floor. It is lightweight (750g) and portable, which can be carried around to cater to different needs, especially scanning in narrow spaces.

Enhanced efficiency to streamline workflows
Traditionally, engineers need to measure a part manufactured to identify its deviations. Based on the measurement data, they adjust the part accordingly by heat treatment. After that, they measure the part again to see whether the finished products meet the requirements. The whole process usually takes more than one day averagely. Workers can only start to work on a new part after they have finished adjusting the old part, which is time-consuming.

It takes only 3 minutes to measure a part by 3D scanning using Scantech’s portable 3D scanners SIMSCAN. Thanks to its sophisticated algorithm, SIMSCAN has greatly increased efficiency for customers.

Except for its fast scanning, its portability allows engineers to measure parts when the part scanned before is under adjustment. It optimizes inspection workflows and saves time.
Full-field inspection with complete data
The SIMSCAN performs well in capturing intricate details due to its shorter distance of two cameras compared to traditional 3D scanners. The shorter camera distance results in a sharper view angle, which ensures that its scanning view is not be blocked.

It is tedious and time-consuming to measure parts with traditional measuring methods like vernier, ruler, and micrometer. A few attributes, such as width, height, and depth, can be measured, while the surfaces’ curvature and concave surfaces are challenging to measure. With handheld SIMSCNA, users can capture full-filed 3D data to get more insights of the product quality.
Intuitive and easy-to-read report
When paired with 3D software ScanViewer, SIMSCAN portable 3D scanner incorporates scanning and inspection into one single instrument. It can compare 3D data captured to original models to generate intuitive and easy-to-read report. In this way, users can use these data to adjust parts with heat treatment.

After heat treatment and re-shaping, the parts are measured again to obtain a detailed inspection report:

Easy to operate for beginners and professionals
Thanks to their intuitive operations, Scantech’s handheld 3D scanners are easy to learn and operate. Scantech offers professional training services to help users get familiar with the instrument to pave the way for smooth 3D scanning. Whether you are a beginner or a professional, you can use these 3D scanners right after the simple training, which helps companies to lower the costs of labor.
It’s reported that the market share of the automobile aluminum casting industry is expected to grow by 20% annually, benefiting from the accelerated development of new energy vehicles and the increased demand for aluminum casting parts.
High-quality 3D scanning measurement solutions will help enterprises in the field of light metal materials to transform and upgrade. Scantech will continue to provide comprehensive 3D solutions for automobile manufacturing, assisting enterprises stand out in the competitive automotive market.


