As the scientific study of measurement, metrology is an important component of numerous industries around the world and many aspects of daily life. Whether it is constructing a building, designing and building a missile system, or virtually anything else, the standards used for measurements in these and other instances must be as exact as possible. As technology has continued to develop over the years, the ability to make measurements that are extremely precise has gotten much more advanced, usually due to the creation of new machines used to check calibrations and dimensions of manufactured parts.
To accomplish this, a variety of instruments and tools known as Coordinate Measuring Machines are used regularly by engineers and others to ensure accuracy and precision in terms of measurement. If you are ready to learn more about CMM and how various categories of these instruments are used to complete specific tasks, here is an equipment guide with everything you need to know.
Coordinate Measuring Machines – CMM
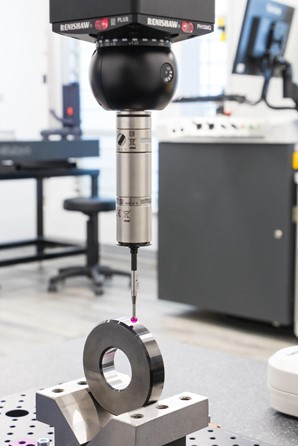
Also referred to as Coordinate Measuring Machinery or simply CMM, Coordinate Measuring Machines can be used to make the measurement process much easier than in years past. Because these machines are able to check various dimensions of manufactured parts in a process that is streamlined and automated, they can more quickly do what used to be done manually by height gauges and micrometers. While the primary use of CMM is to give a precise measurement of the distance between two points located on a 3-D object, it is also important to note that the machines themselves rely on probing systems as well as specialized software and controllers to scan the surface of an item for its coordinates and features.
Cost-Efficiency
Since CMM can take the place of many operations that were often done manually, they have proven to be very cost-efficient in terms of helping manufacturing facilities increase production while decreasing measurement errors that could result in defective parts. Since the machines can be manual or completely automated, they can compare the measurements detected by their probes to the data from the existing CAD file for the part. In doing so, this allows engineers to have a much better analysis of the part’s design and efficiency. In addition, CMM can also play a pivotal role in reverse engineering, since they allow engineers and industrial designers to gain more understanding of items that would have been difficult if not impossible to accurately measure in the past.
Types of CMM
As machine shops have seen numerous advances in technology in recent years, there are now many different types of coordinate measuring machines in use today. Some of the most common include the cantilever, bridge, gantry, horizontal arm, and even portable CMM. Offering various advantages, each has its own distinctive strengths and weaknesses. However, no matter which type of CMM is being used, the basic mechanics of measuring stay the same, ensuring consistency. To gain more clarity as to the specifics of each type of CMM, let’s examine each in more detail.
Bridge
Generally viewed as the most popular type of CMM due to its accuracy and simplicity, a bridge works very well when used in the stamping, molding, and machining markets. Whether using the movable-table or movable-bridge type, a bridge can be relied upon to provide an extremely stable anchor when measurements are required. In most machine shops, a bridge will be used to measure only small to medium-sized parts that can be placed onto a table or slab. While they are usually made to be fixed machines, bridges are also available in portable units, allowing them to be moved around a shop. Also, since a bridge will get plenty of use in any machine shop, it often comes designed with a way cover to give it extra protection from being damaged.
Gantry
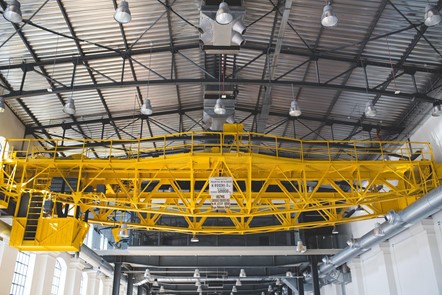
Used in facilities where large and very heavy items need to be measured, a gantry-styled CMM can often be found measuring automobiles as well as construction equipment, large molds, and dies. When a gantry is used, the floor itself serves as the datum. Often the most expensive type of CMM, they are usually found only in larger companies. As for their operation, they are viewed as a very reliable CMM, and gantry operators always have full access to the parts. In addition, since a gantry’s design makes it possible for a machine shop to eliminate the need to lift an item onto a table for measurement, it can be used not only on automobiles and construction equipment, but also large gears.
Cantilever
Considered to be a CMM that is an essential part of any machine shop or manufacturing facility, a cantilever is unique in that it is only supported at one point rather than two. Because of this, it is much less rigid than other CMMs that use two-point support. However, this is not necessarily a bad thing. Though used almost exclusively to measure small parts, a cantilever’s design does allow for a part being measured to be accessed from three sides.
Horizontal Arm
Though very useful in measuring certain items, a horizontal arm CMM is generally considered to be the most cost-effective yet least accurate of all CMMs. When using a horizontal arm CMM, the probes used for measuring are mounted horizontally rather than vertically, marking a stark difference from other CMM. In most cases, horizontal arm CMM are used when it is necessary to measure objects that are long and slender, since these objects would otherwise be almost impossible to accurately measure with other types of CMM. A very common CMM in the aerospace and defense industries, they are also commonly used when manufacturing various appliances.
Portable CMM
As one of the most recently developed types of CMM, portable units have quickly gained in popularity in almost all types of machine shops and manufacturing plants. Completely transportable, a portable CMM can be used anywhere in a building or even in the field if necessary. They are handheld devices with wireless capabilities that allow for both 3-D and geometric viewing of objects. This gives engineers and designers the ability to take measurements wherever they happen to be and relay that information instantly to computers, mobile devices, or other machinery.
Probes
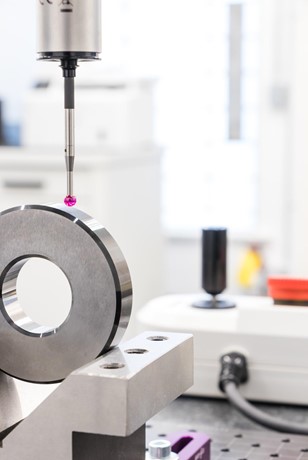
Without probes, there are no measurements taking place with CMM. Though most probes are made to be compatible with almost all types of CMM, there are many differences between the probes used in measuring different items. When using probes, a CMM operator must choose between contact (tactile) probes or non-contact probes. Since individual projects can vary within machine shops, CMM users must be very careful when selecting and using certain probes, since using the wrong style of probe on an item can result in damage to both the probe and item being measured.
Contact Probes
As you may have guessed, contact probes get their name because they have to make physical contact with the item they are measuring. Used for very complex projects where the highest levels of extreme accuracy are needed, these probes can scan an item’s surface point-by-point and thus physically measure the area. In fact, they can be used to measure only a single point or an entire area that will give engineers an in-depth representation, such as when being used to measure a turbine blade. In most instances, either a hard, touch-trigger, or analog probe will be used when contact with an item’s surface is necessary.
Hard Probe
Most often used when measuring curved surfaces, hard probes can be used on complex items of unusual shapes. However, due to the complexities associated with measuring these items, a hard probe may rely on both surface contact and scanning as a way of getting even more accurate measurements. However, this can often produce significant wear and tear on the probe’s tip, so scanning should only be used as absolutely necessary.
Touch-Trigger Probe
The most common type of probe in use, touch-trigger probes can produce contact with an object that is virtually undetectable. As a result, objects don’t need to be affixed to a table. Used to measure surfaces that are hard to capture on video, they can be linked directly with CNC machines and are preferred when engineers need to know there is no touch bias associated with the measurements.
Analog Probes
Analog probes are recommended when measuring irregular shapes or surfaces that are contorted. Relying on continuous analog scanning (CAS) technology to record measurements, analog probes are on three-axis and five-axis machines that allow for a closer scanning motion. They are most commonly used in the automotive and other similar industries where large amounts of sheet metal are used.
Passive or Active
When using contact probes, it is also important to remember they can be either passive or active. When passive probes are in use, they rely on the motion of a machine’s axis to make contact with an item’s surface. However, with an active probe, motors within the probe assembly itself bring the probe’s tip into contact with the surface.
Non-Contact Probes
Whereas contact probes are used to measure large items of all shapes and sizes, non-contact probes are used primarily in measuring parts that are smaller and less-complex. Also, they are used with parts that could get damaged when coming into direct contact with a probe. Using lasers or machine-vision, non-contact probes record measurements by determining the distance between the probe and the object’s surface. Though being able to record measurements much faster than contact probes, they are not considered to be as accurate.
Laser Probes
Using laser probe triangulation that relies on a high-speed laser, laser probes can complete high-speed component measurements in a matter of seconds. Useful in almost any type of industry, they are relied on most often in aerospace, communications, defense, and medical industries, since these industries often have components within machinery that are extremely sensitive to touch and can be easily damaged.
Vision Probes
Like laser probes, vision probes can record many high-speed measurements in a matter of seconds. However, these probes are most often used on small 2-D parts with camera images. Considered to be the most accurate of non-contact probes, vision probes provide fast results that can be crucial when projects are on tight deadlines. Best of all, these probes do not need to be constantly calibrated to maintain accuracy. Instead, they only need to be calibrated one time, making them very convenient when used with machines that have parts which need to be changed out on a regular basis.
Automatic Probe Changers
In some cases, measuring a part that may have a complex design will require the use of two or more types of probes. When this is the case, automatic probe changers are used to minimize the time it takes to switch out various types of styli or sensors. Automatic probe changers are most often used on five-axis machines, since this allows for the use of articulating heads that can more accurately measure both horizontal and vertical surfaces. As an added benefit, these probe changers can also allow machine operators to know their machines are working properly, since the probe changers can be linked to a CMM error map. By doing so, it becomes possible for the machine to instantly correct any system discrepancies between the actual readings and those that were measured.
Direct Computer Control
Though many machine shops still rely on workers to manually operate CMM, more and more are turning instead to direct computer control, also known as DCC. Using software automation and linking of CAD files to the part’s specifications, it then becomes possible to use contact or non-contact probes as needed to take measurements, discover where the part may be out of tolerance, and make corrections prior to completion of the task.
Precision Measuring Tools
Precision measuring tools are another important classification of tools that help measure and maintain quality control. There are many different types that can be used, depending on the kind of measurement that needs to be taken. Some of the most commonly used tools are gages, calipers, micrometers, and bevel protractors. Each one is useful and accurate in its own unique way.
Gage
The handheld gage is one of the most commonly used measuring tools in metrology; they measure specific dimensions such as height, width, radius, thickness, and angle. Some of the popular types of gages include snap, ring, plug, and surface. Snap gages, sometimes referred to as gap gages, are used to check the thickness or diameter of a part. Ring gages are used to measure external dimensions of cylindrical manufacturing parts, and are often used in automotive and machine tool industries. Commonly used in quality control, snap gages allow the user to quickly accept or reject certain parts. They don’t actually measure parts; they are used to quickly check inside dimensions to ensure they meet specifications. Finally, surface gages are used for marking parallel lines, probing surfaces, and transferring measurements. It can also be used to find the center on the round section of a part.
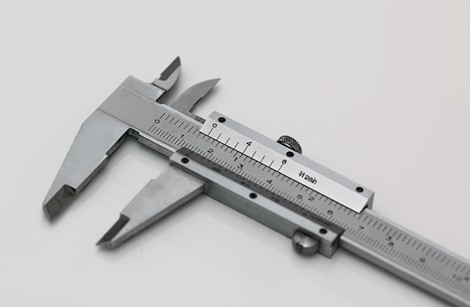
Caliper
The caliper is an easy-to-use tool that measures a variety of aspects, such as length, inner diameter, and differences in level. While they have always been a widespread and accurate choice, the recent introduction of digital calipers have contributed to their popularity. Different types of calipers are used to measure the inside and outside of objects.
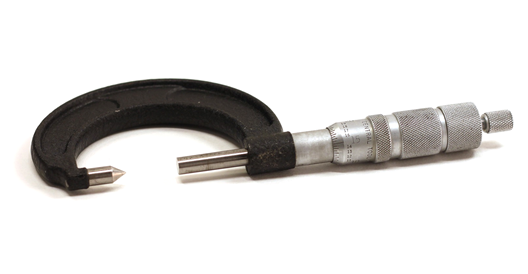
Micrometer
Micrometers are measuring tools used for exceptionally short dimensions of length, depth, or thickness. The right micrometer could even measure the thickness of a sheet of paper. The two most notable parts of this tool are the anvil, which is the hard stop, and the spindle, which is the movable surface. Measurements are taken by enclosing spindle and anvil around an object.
Universal Bevel Protractor
The universal bevel protractor is a simple tool used to lay out, measure, or check angles. It consists of four components: the main body, a base plate, an adjustable blade, a circular plate with a vernier scale, and an acute angle attachment. With the base plate aligned along one side of the angle, the adjustable blade is swiveled to the other side of the angle. Then the clamp is tightened to keep it in position. The universal bevel protractor is very accurate, and it can measure angles to five minutes of a degree.
As the field of metrology continues to have many technological advances come its way, the use of Coordinate Measuring Machines, various types of probes, and precision measuring tools will continue to expand. Because of this, the equipment used will be even more accurate, reliable, and easy to use, leading to increased innovation within numerous areas.


