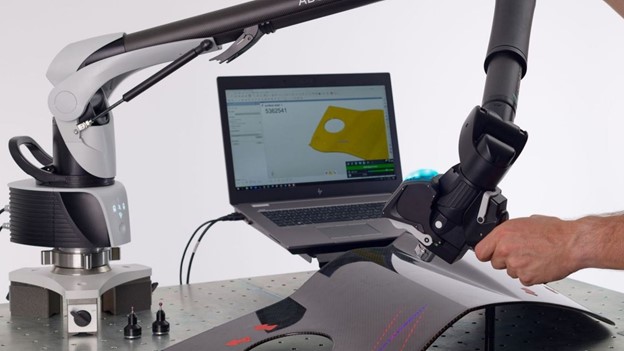
Coordinate measuring machines are defined by their unique ability to intricately and accurately measure the geometry of objects. The development of these machines continues to evolve to provide precise measurements of various objects and suit varying metrology needs.
One of the more recent and innovative developments of these machines is the inception of the portable CMM. Considering that traditional CMMs are large and cannot be moved, portable CMMs offer measurement capabilities that are more flexible, convenient and allow for measurements at the job site.
Portable CMM machines remain one of the most advanced and useful developments in CMM technology. Their complex parts and softwares work together to ensure accuracy and ease of use.
Whether you require measurement services, are looking to purchase a new or used machine, or require retrofits, calibrations, or repairs, CMMXYZ can help you with all of your portable CMM needs.
We sell portable coordinate measuring machines among other types of CMMs while also providing a wide range of CMM services. Our team of CMM specialists at CMMXYZ has the experience and resources to meet all of your metrology needs.
We are proud to be your source for CMM technology and education. Learn more about portable CMMs, what they are, where they came from, what they are made of, how they work, and how we can help you use them.
What Is A Portable CMM?
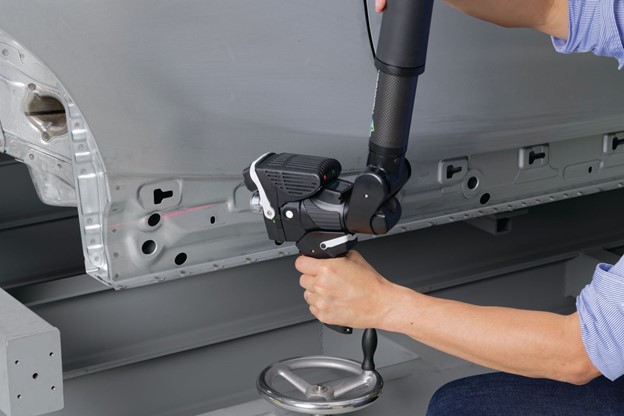
A portable CMM is, as its name suggests, a portable coordinate measuring machine that collects the geometrical measurements of an object. What sets a portable CMM apart from other types of CMMs is the fact that it can be relocated. Unlike traditional CMMs, portable CMMs are lightweight and easy to bring from one location to another, whether across a shop floor or to a lab in another city.
While traditional coordinate measure machines are made with a granite table and a gantry or bridge superstructure, portable CMMs are comprised of an articulated arm or with seven rotary axes and rotary encoders.
According to Canadian Metalworking, portable arms are currently the most popular coordinate measuring machine being sold.
Types of Portable CMMs:
There are two different types of portable CMM machines used within the industry: contact and non-contact. The primary product categories of these portable machines are articulating arms and laser trackers
Articulating Arms
Articulating arms, also known as portable measuring arms, are by far the most popular of these machines. They are relatively inexpensive, extremely lightweight (at less than 20lbs), and can be used either as a tactile or laser device.
The History:
The original product was designed and built in the 1980s by Romer and then widely adopted for industrial measuring tasks when an object was too challenging to move or too inconvenient.
Major manufacturers of articulating arms are Romer (Hexagon MI) and Faro. There are also some smaller manufacturers, such as Kreon in France and Nikon, in the USA.
The Configurations:
There are two basic configurations of these arms: either a six-axis or seven-axis system. Both systems move freely in three-dimensional space, but the six-axis arm is more suitable for tactile work or probing, while the seven-axis arm offers greater movement for arms equipped with a laser.
Portable arms are available in sizes from a 3- to 16-foot (900mm-4.9m) spherical radius. Although the portable arm’s accuracy depends on the operator, the accuracy is quite respectable, in most cases coming in at less than .002 inch with point repeatability in the .00015-inch range.
Just like coordinate measuring machines, there is an accuracy specification for portable arms; namely B89.4.22 and VDI/VDE 2617-9. Within this specification, there is a point repeatability test and a volumetric accuracy test. Just like a coordinate measuring machine, regular calibration is necessary to assess and maintain the accuracy of these machines.
Laser Trackers
Laser trackers, which are usually tripod-mounted, measure the position of an optical target. These trackers are moved by hand to probe the measured part. The spherically shaped targets called retroreflectors are available in many diameters up to 2 inches.
History:
Leica produced the first commercially laser tracker in Switzerland in 1991. Today there are several major manufacturers, including Leica, Faro, and API.
Laser trackers were originally designed for assembly operations in aircraft manufacturing. Optical targets were fitted to both components that were to be assembled, such as wings that would be attached to the fuselage of a large aircraft or assembly of the body sections. In these cases, the laser trackers followed the targets and allowed precision assembly.
Configuration:
Many laser trackers can utilize a three-dimensional handheld probe. This allows the laser tracker to work something like a coordinate measuring machine and, unlike a retroreflector, requires no complex math skills to compensate for the probe radius. Once the laser tracker is equipped with a handheld probe, it can be used as a portable CMM machine with an accuracy of less than 30micron over distances less than 5 m. As a result, this machine has become an extremely versatile tool.
Handheld laser scanners can now be attached to these laser trackers, which enables the tracker to be a portable coordinate measuring machine on the shop floor with the ability to probe and scan. As of now, only Leica can do this. That said, other options are now commercially available, including optical targets for machine tools and robots. This mode is especially interesting because it allows for the calibration of large machine tools and precision positioning of robots or other large devices.
Many of the comprehensive software manufacturers support laser trackers, particularly manufacturers that work with articulating arms. Most notable are PC-DMIS, Verisurf, Polyworks, Spatial Analyser, Metrologic, and Geomagic.
With some models’ ability to measure up to 80 meters at impressive volumetric accuracy, the laser tracker has become the go-to piece of equipment for large part manufacturing and assembly.
White Light Scanning Metrology
White Light Scanning Metrology is the latest development in portable coordinate measurement and scanning. Many white light scanners are used for R&D purposes. However, more and more, they are being utilized for measurement on the shop floor, as they are incredibly portable and generally tripod-mounted. These scanners obtain data by projecting a grid pattern on the scanned component. From this, the optical camera determines the three-dimensional coordinates of the part.
Configuration:
You can utilize white light scanning systems on robots or a transportable boom arrangement. They generally feature 2 to 4 digital cameras and can provide fields of view from 75 mm to 1.5 m. White light systems work like a camera, and each shot can collect hundreds of thousands of data points in a couple of seconds.
Their advantage over other shop floor measurement systems is they are incredibly accurate, in many cases to less than 10 µm, and provide detail on small complex components — which lasers cannot achieve.
Many software products used with articulating arms and lasers boast both scanning and dimensional measurement capabilities.
Optical Portable CMMs
Optical portable CMMs are non-contact CMMs that obtain information by scanning and taking precise images of the object of interest. They are often used to measure fragile or intricate objects that can be easily compromised by contacting a probe.
Handheld portable scanners are the newest variant of optical CMMs. Most are wireless and capable of capturing data from large and small objects. Software used in conjunction with these scanners allows scanned objects to accurately measure features.
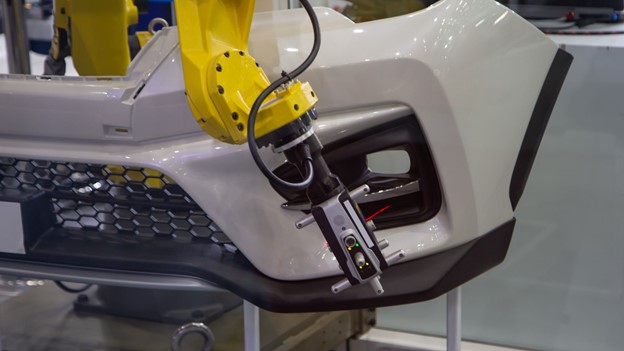
What Parts Are in a Portable CMM
There are various parts of a CMM that work together to obtain and report accurate measurements. That said, the parts of a portable CMM are slightly different from that of a traditional CMM.
Articulating Arm Portable CMMS
Articulated Arms: Portable CMMs use an articulated arm to measure an object instead of a probe that moves on a three cartesian axis like a traditional machine.
Axes: a portable coordinate measuring machine will have a six or seven axis that uses a rotary encoder instead of a linear axis.
Optical Portable CMMs
Arm-Free Scanning System: A portable optical CMM will use an arm-free scanning system to measure an object. This system uses optical triangulation methods and allows for flexibility and freedom to measure around an item.
Compact Linear & Matrix Array Cameras: An optical CMM will use cameras to take intricate pictures of an object to assess its dimensions. These machines have no arms or wires and are smaller than portable CMMs with articulating arms. Such compact parts allow the machine to measure the geometry of all parts at any location.
Software
All portable CMMs utilize software to accumulate, report on, and analyze obtained measurements. Portable coordinate measuring machines are compatible with most softwares used by traditional CMMs.
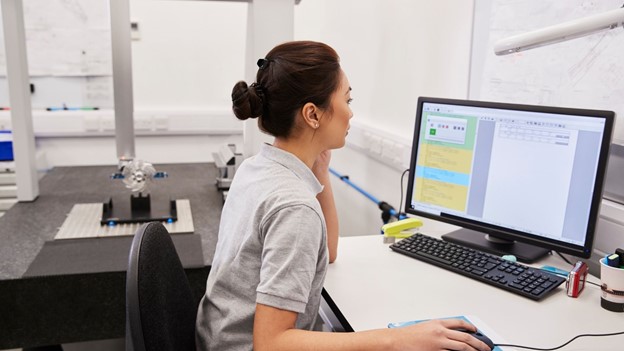
Portable CMM Software
Portable CMMs are compatible with common softwares used by traditional CMMs, including PC-DMIS and Polyworks. That said, there are softwares designed explicitly for portable coordinate measuring machines.
PC-DMIS Portable
PC-DMIS is one of the most widely used CMM softwares in the industry. The PC-DMIS Portable Program is a PC-DMIS software specifically designed for use with portable CMMs. This program provides CMM operators with the tools they need to monitor operations and identify minor issues ahead of time. With PC-DMIS, portable coordinate measures can obtain measurements and allow operators to analyze the results easily.
This application is often used for portable metrology equipment like laser trackers, optical scanners and, of course, CMMs. It boasts a wide variety of scanning techniques that can help support coordinate measuring devices. The software utilizes predefined and free form scanning and utilizes a quick start GUI. The latter uses a unique suite of algorithms that helps align complex parts for measuring.
Shop floor personal equipped with PC-DMIS Portable will find it easy to measure parts with portable CMMs. The program is straightforward to use and requires minimal training for maximum productivity. That said, CMMXYZ offers training programs for a wide variety of popular CMM softwares.https://www.youtube.com/embed/w6Sk7wroeJs
Our Portable Arm Models
We are proud to carry portable CMMs from some of the best manufacturers in the industry. When you work with CMMXYZ, we work closely with you to identify your needs and recommend the type and model of machine best suited to your unique needs.
The Romer Portable Arm
The Romer Portable Arm boasts unmatchable flexibility that allows it to measure objects larger than its measuring span. This arm leapfrogs around larger components to get accurate measurements. The machine also boasts software that allows for the setup and integration of multiple parts to create one powerful inspection program.
You can use various scan heads and lengths of probes with a Romer Arm to measure hard-to-reach areas with either contact or non-contact approaches.
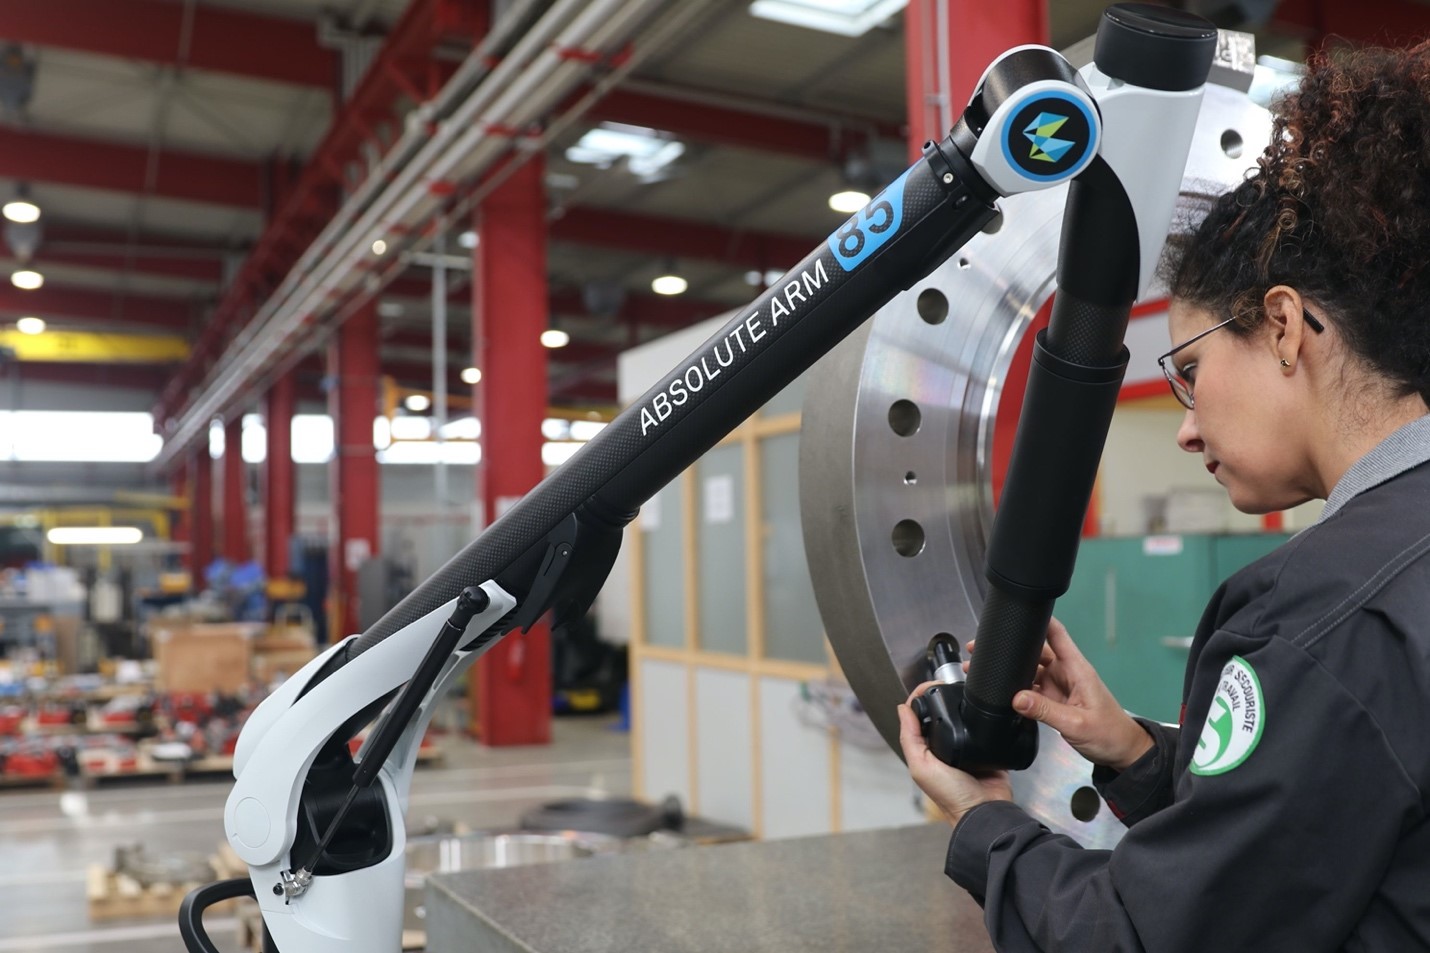
We carry various models of the Romer Absolute Arm. The Absolute Arm is the most mobile of portable CMMs as all of its components can be kept in a hard sided case with wheels. The Absolute Arm is one of the most convenient portable CMM models as it does not require additional time for warm-up or initialization.
The machine is easy to transport in cars, throughout a factory, or even an airport. It is designed for quick disassembly and reassembly and doesn’t require any additional calibration efforts. According to American Machinist, this machine increases the accuracy of a portable CMM by up to 23%.
Absolute Arm 7-Axis:
The Absolute Arm 7-axis Model is a Romer portable CMM with an integrated scanning system. These systems are great for the shop floor, thanks to their inspection capabilities and their ability to scan complex objects. This machine is well suited to reverse engineering and other quality assurance purposes as it can collect thousands of data every second. Portable arms with integrated scanning systems are often used to measure plastic injection moulded components and intricate dye work.
Absolute Arm 6-Axis:
The Absolute Arm 6-Axis is a modular high-end probing platform and the ideal Absolute Arm model for tactile applications. The machine allows for the configurations of different grip shapes and sizes and is incredibly durable. The arm is designed to resist rough environments as it’s carbon-fibre construction enables it to remain strong and stable.
RS6 Laser Scanner
The RS6 Laser Scanner isn’t a CMM, but it is a system that can help elevate portable CMM systems. It is often used with the 7-Axis system. The scanner boasts blue-laser light, systematic high-intelligence, and noise elimination to reduce the machines’ sound when it is in operation.
This Laser Scanner is exceptionally versatile as, thanks to its 3D scanning and lack of degradation, it is used for a wide variety of applications. The laser boasts ultra-wide non-contact measurement that allows it to provide a horizontal scan line. This capability provides more efficient and accurate measurements thanks to its automatic settings, making for a more streamlined and productive production process.

Benefits of Portable CMMs
While many unique benefits come with using a traditional CMM, portable CMMs come with their own set of advantages. At a high level, portable machines are more mobile, affordable, accurate and rugged, making them ideal for modern manufacturing facilities.
Consider the benefits of using a portable CMM whether you rent a machine or buy one used or new:
Portable & Lightweight
Unlike traditional CMMs, these machines are portable and lightweight. Portable CMMs are typically around 20 pounds. This mobility makes it easy to move the machine from place to place, use it on different sites, and adjust as needed.
Can Measure Tricky Objects
These machines are adjustable, making them ideal for measuring items that can’t be moved or have harder to reach areas.
Quality Assurance & Insurance
Portable CMMs boast precise measurement capabilities that make them ideal for quality assurance, inspection and reverse engineering. Assessing objects using a portable CMM can help ensure the accuracy of devices, troubleshoot them, and confirm if they meet any relevant safety codes.
At a high level, portable CMMs offer the flexibility, consistency and accuracy needed to streamline the quality control process.
Operator Control
Due to their size and flexibility, portable CMMs allow operators to have better, more specific control over the machine.
Cost Effective:
Portable CMMs typically cost less than a traditional CMM as they are smaller in stature and require less materials and space.
Speed:
Portable CMMs offer a level of flexibility and control that allows operators to utilize the machine better and measure objects faster.
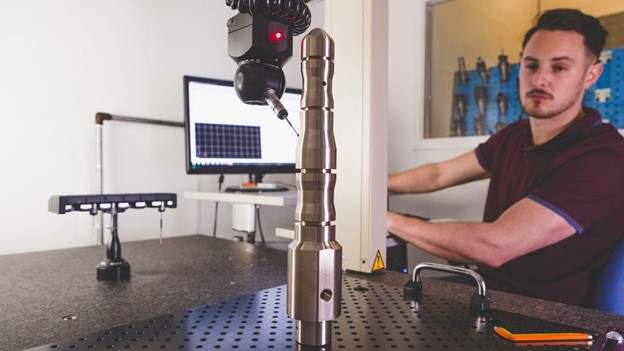
CMMXYZ Portable CMM Services
CMMXYZ offers a wide range of portable CMM services. We provide a full spectrum of CMM services to support the machines we buy and sell:
New Machines: CMMXYZ sells new portable CMMs from leading CMM manufacturers. Browse our new CMMs online to see what models we have available.
Used Machines: In addition to selling new portable CMMs, CMMXYZ also buys and sells used machines. When you buy a used CMM from CMMXYZ, you can have peace of mind knowing that we run all our machines through thorough testing. We test all of our used machines to make sure that they are functioning correctly. We also offer retrofits to ensure that the new owner gets the right device that works like new at a lower price tag.
Calibration: It is essential to ensure that your portable CMM continues to provide accurate measurements, which is why we offer calibration services. We are ISO certified, so you can have peace of mind knowing that we have the experience, knowledge, and equipment necessary to ensure your machine is up to industry standards.
Repairs: If your portable CMM has a problem and needs repairing, we can help. We offer CMM repair services to restore your machine.
Portable CMM Training: CMMXYZ offers various training services to teach operators how to use essential CMM softwares and different types of CMMs. We offer e-learning, remote, and in-class portable CMM training programs for various individuals to use. Our programs are ideal for new operators, specialized departments and those looking to update their knowledge on current CMM technology.
Measuring Services: If you need the measuring services a portable CMM can provide, look no further than CMMXYZ. We offer on-site and off-site portable CMM measuring services.
Work with CMMXYZ
If you require a portable CMM or any of our related CMM services, contact us at your convenience. Our specialists are happy to answer any of your questions, explain our services, and work with you to identify the metrology approach best suited to your unique needs.


