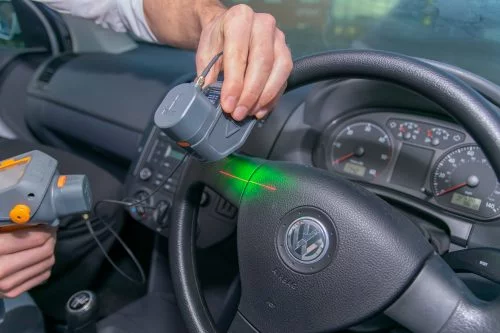
Automotive manufacturers are faced with the risk that if the critical dimensions of this split line aren’t controlled and the component deploys incorrectly, the airbag deploys unevenly or incorrectly and doesn’t protect the driver.
Manufacturers need a tool to quickly and accurately check the integrity of this split line for optimum depth and width of the profile to ensure this safety critical feature doesn’t fail.

Example of a tool to measure air bag split line
GapGun from Third Dimension.
The key advantages:
Proven reliability
GapGun can take measurements of this gap and step profile that are completely repeatable and traceable.
Easy to use and set up
With the ability to pre-program graphical measurement plans on to the GapGun, shop floor operators require minimal training beforehand and simply need to follow instructions on the large colour touch screen. The means easy set up and straightforward implementation for manufacturers.
Quick and adaptable
GapGun’s SPC3d laser metrology software even allows measurement of highly unusual freeform surfaces, with measurements processed in seconds.
No surface damage
With the ability to operate as a completely non-contact device, nothing need ever touch the surface of a part during the laser gauge measurement. This ensures measurement confidence and component integrity without worrying about repeatability or surface damage. Furthermore, for easier positioning, GapGun can also be used in contact with non-marring stand offs.
Completely portable
The GapGun’s lightweight and rugged design can be used completely autonomously. Operators have the flexibility to easily access interior measurements and the GapGun’s clip-on battery pack can operate for up to 8 hours on a single charge with no cable or waist pack restriction. With storage capacity for thousands of measurements, the GapGun is designed to be used on the shop floor for extended periods without need for any additional hardware.
Instant results display
GapGun takes a laser measurement in a matter of seconds with results appearing on screen for operator benefit (including colour coding to indicate tolerance conditions), as well as being stored in a multitude of formats for data handling. Live data feed indicates corrective action, should a measurement fall out of tolerance.
To find out more about metrology and how Third Dimension’s non-contact, precision profile measurement solutions can benefit your business, contact us here.


