In the recently completed “HoloMotion” research project, Fraunhofer IPM has greatly enhanced the established 3D measurement method of digital multiwavelength holography in two directions: On the one hand, components in motion can now be measured with high precision for the first time. Secondly, optical gear measurement using digital holography has been raised to a new level.
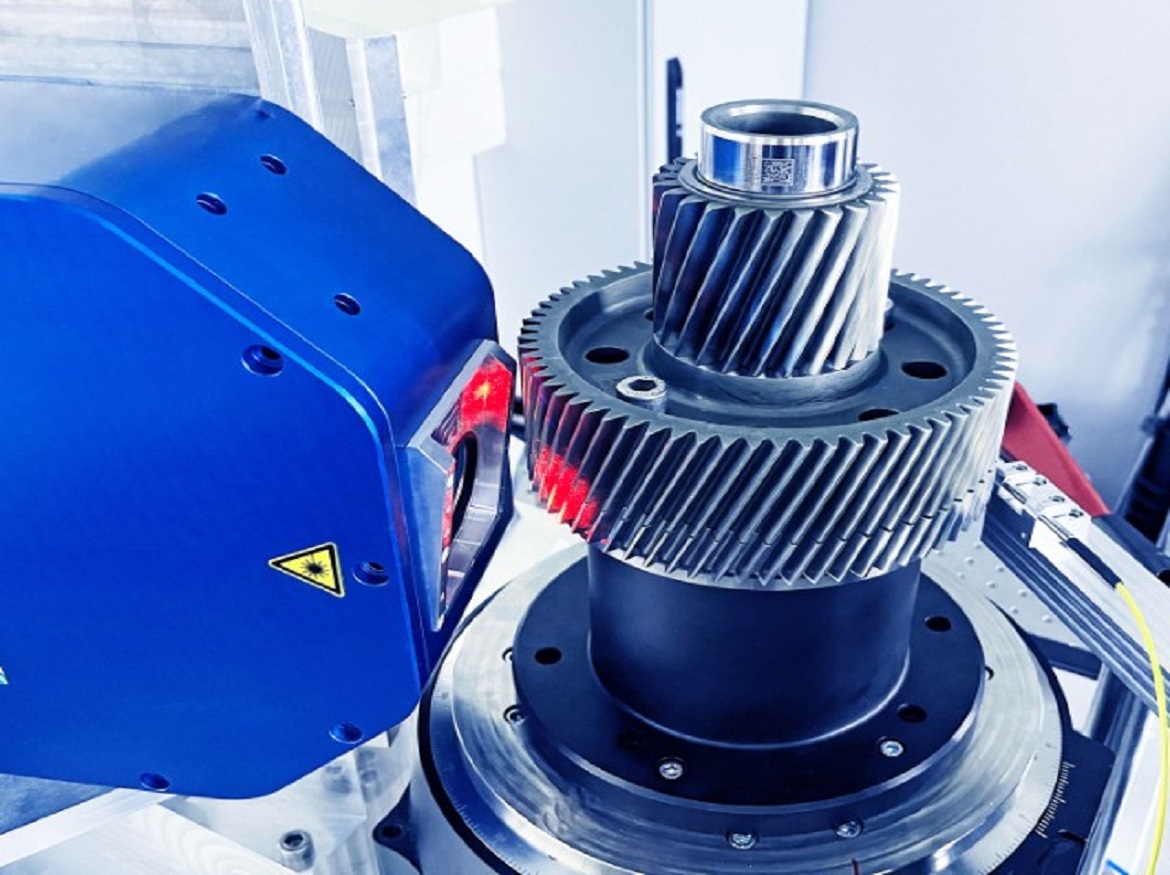
As part of the joint project “Dynamic holographic measurement method for detecting metallic freeform surfaces (HoloMotion)” funded by the German Federal Ministry of Education and Research (BMBF), Fraunhofer IPM researchers were able to demonstrate that digital holographic measurements are also possible on moving test components. The team thus succeeded in exploiting the advantages of interferometry on moving surfaces for the first time. Gear measurement, which is extremely challenging for interferometric measurements due to high inclination angles and low component tolerances, was selected as a sample application for the new method.
Making the impossible possible
In the “HoloMotion” project, the team was able to demonstrate for the first time that digital holographic measurements are possible even at velocities significantly above 10 mm/s. The decisive factor here is the direction of the motion: Movements perpendicular to the optical axis are not critical and still allow precise interferometric measurements. In contrast, axial movements, i.e. movements in the direction in which the method measures most accurately, are critical. Such measurements are very sensitive and even the smallest movements of half a wavelength make them impossible. To compensate for these disturbances, the team first investigated the fundamental relationships and limitations and, based on this, developed successful solution strategies. The result is a patented compensation approach that can even compensate for axial relative motions of significantly more than one wavelength per exposure time. Measurements previously considered impossible thus become possible.
Optical gear measurement using digital holography
Together with the two industrial companies FRENCO GmbH and ZF Friedrichshafen AG, a demonstrator system for optical gear measurement was developed and tested for use close to production. At the Schweinfurt site of the project partner ZF Friedrichshafen AG, it was shown that digital holographic measurement of gears is possible in an industrial environment. As a purely optical process, digital holography has a major advantage over the previously established tactile gear measurement: two-dimensional flank measurements are possible every second.
Advantages for multi-wavelength holography
Fraunhofer IPM has been a technology leader in digital multi-wavelength holography applications for years. The industrial-grade HoloTop sensor developed at the institute for 100% inline inspection of precision components, for example, allows the measurement of up to 100 million 3D measuring points per second. In the “HoloMotion” project, it has now been possible to extend this technology to the measurement of moving objects, thus greatly advancing both interferometric measurement techniques in general and optical gear measurement techniques in particular.
Click on the following link Metrologically Speaking to read more such news about the Metrology Industry.


