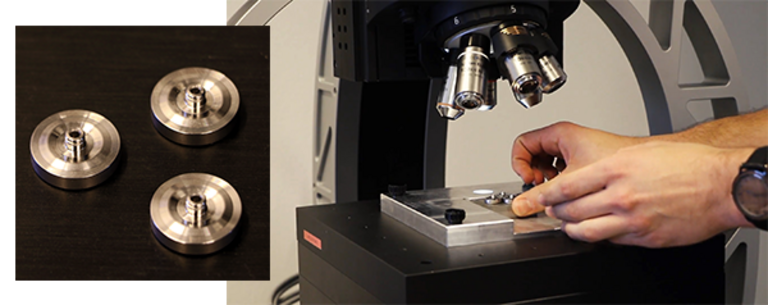
Kendrion, supplier of automotive components, applies Alicona for the dimensional measurement of valves and successfully reduced rejection rates.
Precise measurement accuracy and significant reduction in rejection rates were the main reasons for Kendrion GmbH to choose Alicona. Using the optical measurement technology Focus-Variation, Kendrion is able to check the roundness of valve seats in a repeatable and traceable manner, for optimal sealing. This even applies to small valve opening angles and tolerances in the single-digit μm range.

Stefan Steimle,
Head of Quality Management, Kendrion (GE)
“Our clear objective when purchasing the InfiniteFocus measuring system was to reduce production costs, and we have definitely achieved that. As issues of valve sealing could be positively correlated to the geometrical properties, and then optimized for the affected components, we have been able to significantly reduce the rejection rate in our production.”
High demands on dimensional accuracy and surface quality
In the automotive sector, high demands are placed on dimensional tolerance and contour accuracy. The Kendrion Group develops, manufactures and sells high quality electromagnetic and mechatronics solutions for industrial and automotive applications. The company’s two business divisions, Passenger Cars and Industrial Drive Systems, are both located at the German site in Villingen-Schwenningen. The product portfolio covers high technology components and systems in the automotive sector, which include diesel and petrol engine injection systems as well as engine management and assistance systems.
Micro-precision components for high pressure control valves are amongst the most challenging for quality assurance items at Kendrion, and are subject to the highest demands on dimensional tolerance and surface quality. In order to fulfill these requirements, Kendrion uses Alicona optical 3D surface measurement technology for error analysis and control of manufacturing processes.
![]()
Using Alicona, Kendrion is able to measure the roundness of valve seats in a repeatable and traceable manner for optimal sealing.
Reducing production costs and lowering rejection rates
“Our clear objective when purchasing the InfiniteFocus measuring system was to reduce production costs, and we have definitely achieved that.” explains Stefan Steimle, Head of Quality Management.“As issues of valve sealing could be positively correlated to the geometrical properties, and then optimized for the affected components, we have been able to significantly reduce the rejection rate in our production.”
In addition to producing very fine atomization of fuel, injection systems have a decisive control function in the injection of fuel into the combustion chamber of a diesel engine. The high pressure control valves manufactured by Kendrion regulate the necessary system pressure, in ranges currently extending up to 2700 bar.
Roundness and surface finish of valve seats are measured optically
The precise roundness and uniform surface finish of the valve seat is crucial in ensuring the correct function of the valves. In order that the pressure matches the requirements of the control unit precisely, the contour accuracy of the valve seat must be measured and analyzed for the slightest deviations. This requires measurement solutions that are both flexible and highly accurate. They also have to be suitable for measuring difficult to access geometries and smallest dimensions of valve elements as well as facilitate the analysis of critical surface structures.
“Of course we reviewed various manufacturers when looking for a measurement system. Other methods initially appeared attractive, but did not meet the requirements at closer inspection”, explains Steimle. “Measurements must be performed rapidly, but must not compromise accuracy. This is where Alicona offers the most effective method, and has impressive measurement accuracy even with very tight tolerances.”
![]()
3D measurement of the valve seat in true color and in pseudo color.
“We now measure positions which were difficult to reach with tactile systems”
The high resolution measurement systems also measure deviations in valve seat roundness in the tolerance range of 1-2 μm. This represents a special challenge due to the small opening angle of the valve seat cone (<45 °). Traditional optical measuring systems, which typically measure along the cone axis, reach their limits of the detectable flank steepness with this application. With Alicona, these measuring tasks can be realized, based on Focus-Variation technology that allows for measuring small radii and flanks of up to 87°. Quality assurance manager Stefan Steimle explains: “Alicona allows us to measure geometry at component positions, which were difficult to reach using tactile means. As an example, this includes measurement of the cone axis concentricity relative to the outer cylinder axis.”
Full form measurement as well as roughness measurement by using only one system
Optimum concentricity prevents one-sided wear on sealing surfaces, which requires deviations of the axes to be reliably assessed within a range of <0.0100mm. The InfiniteFocus G5 measuring system allows the component to be measured from different directions. This complete measurement of the contour can be realized using the highly precise Advanced Real3D Rotation Unit. The individual measurements are merged into a complete high precision 3D data set.

Non-destructive measurement of critical parts
In addition, the roughness on the valve seat surface is measured both profile based and area based (ISO 25178). In order to be able to determine whether optimum conditions prevail for flow of the medium through the valve area, the inner cylinder diameter and the edge radius as well as the absence of burrs between the inner cylinder and the cone shape of the valve, are also measured. The decisive factor here is that the entire measurement sequence can be stored in a program and then repeated completely free from operator intervention at any time.


