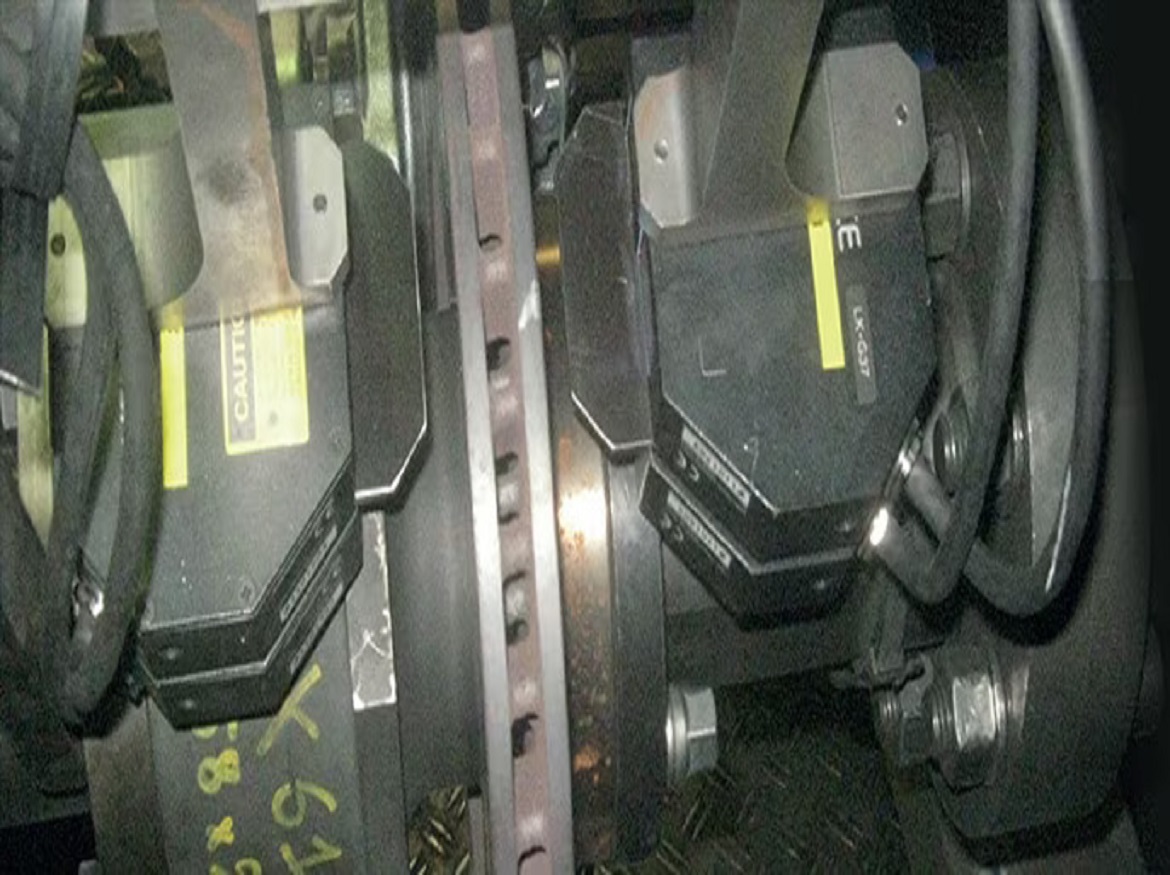
Auto Chassis International uses a custom-built tester to finely measure heat distortion on brake discs. The process is made complex by the fact that the discs rotate at high speed while requiring a measurement accuracy of 0.01 mm. KEYENCE´s LK-G CCD laser displacement sensor enables stable detection despite the glowing-hot reflective metal.
Auto Chassis International uses a custom-built tester to finely measure heat distortion on brake discs. The process is made complex by the fact that the discs rotate at high speed while requiring a measurement accuracy of 0.01 mm. KEYENCE´s LK-G CCD laser displacement sensor enables stable detection despite the glowing-hot reflective metal.A subsidiary of Renault, Auto Chassis International is an OEM specializing in the design, testing, and manufacturing of Chassis systems and components. The company´s plant in Le Mans, France has 2,000 staff members and manufactures vehicle components such as brakes, engine cradles, rear axles, and suspension arms.
“We measure heat distortion on brake discs by placing them on a tester that rotates them at a simulated vehicle speed of 40 km/h. The brakes are applied between 10 and 40 times to make the discs heat up,” explains Jean-Luc Heulot, Braking Engineer at Auto Chassis International.
The temperature of the metal brake discs rises to 650°C, causing them to radiate heat and generate parasitic reflections that further complicate measurements.
The test is conducted to make sure minimal distortion occurs and more importantly, that the discs return to their normal shape at the end of the test. Warped discs can lead to chatter and ‘judder’, or vibrations. A reduction in braking torque can also occur on some models of hand brakes.
“We used to use a capacitive sensor but it created reliability issues that ended up being costly. The problem was that the sensors had to be fitted and removed on a regular basis and they were positioned a few millimeters from the target, which heats up to 650°C. KEYENCE´s LK-G sensors are easier to place and remove and none have failed since being installed two years ago,” adds Heulot.
The LK-G sensor is mounted on a plastic shim, it calibrates itself during the first full rotation and then starts measuring. The tester is fitted with two LK-G sensors on either side for measuring small and large diameters; measurements are taken once every 100ms throughout the test.
The LK-G is a laser displacement sensor that brings together the best in KEYENCE technology to deliver the performance and stability required for such measurements.
It offers the best in non-contact laser measurements – sampling speeds of up to 50 kHz, ± 0.03% accuracy and 0.01μm resolution. The Li-CCD (Linearized CCD developed by KEYENCE) features high-speed sampling that is 25 times faster than conventional models.
A special waveform processor (digital signal processor) processes the CCD signal and delivers high-accuracy and reliable measurements on targets traveling, rotating, or vibrating at high speeds.
One advantage to the LK-G sensor is that it can perform detection under conditions that challenge other laser sensors. In addition to being able to take measurements without being influenced by color, surface texture or stray light, the LK-G delivers excellent performance with translucent or transparent targets and surfaces with multiple reflections.
Specially designed algorithms enable accurate measurements that are impossible with conventional detection methods. ABLE technology detects target surfaces and by intelligently controlling laser emission time, laser power and gain, measurement can be achieved on roughly any surface. ABLE offers an adjustment range that is up to 90 times wider than that of conventional models. Accurate measurements are possible even for targets with highly varied surfaces.
The MRC algorithm eliminates multiple reflections from metal surfaces. When two or more peaks are generated by multiple reflections, the algorithm compares the waveforms to the most recently received light waveform and determines the one that most closely resembles the ‘correct waveform’. In addition, deviations caused by temperature changes are reduced due to the sensor’s highly rigid die-cast body, and signal noise is reduced by the Li-CCD.
“Not only were we impressed by the sensor´s technical capabilities, but KEYENCE provided us with a demonstration before our purchase and assisted us in setting up the sensor so that it quickly delivered the expected results,” concluded Heulot.
Credits: Keyence
Click on the following link Metrologically Speaking to read more such case studies about the Metrology Industry.


