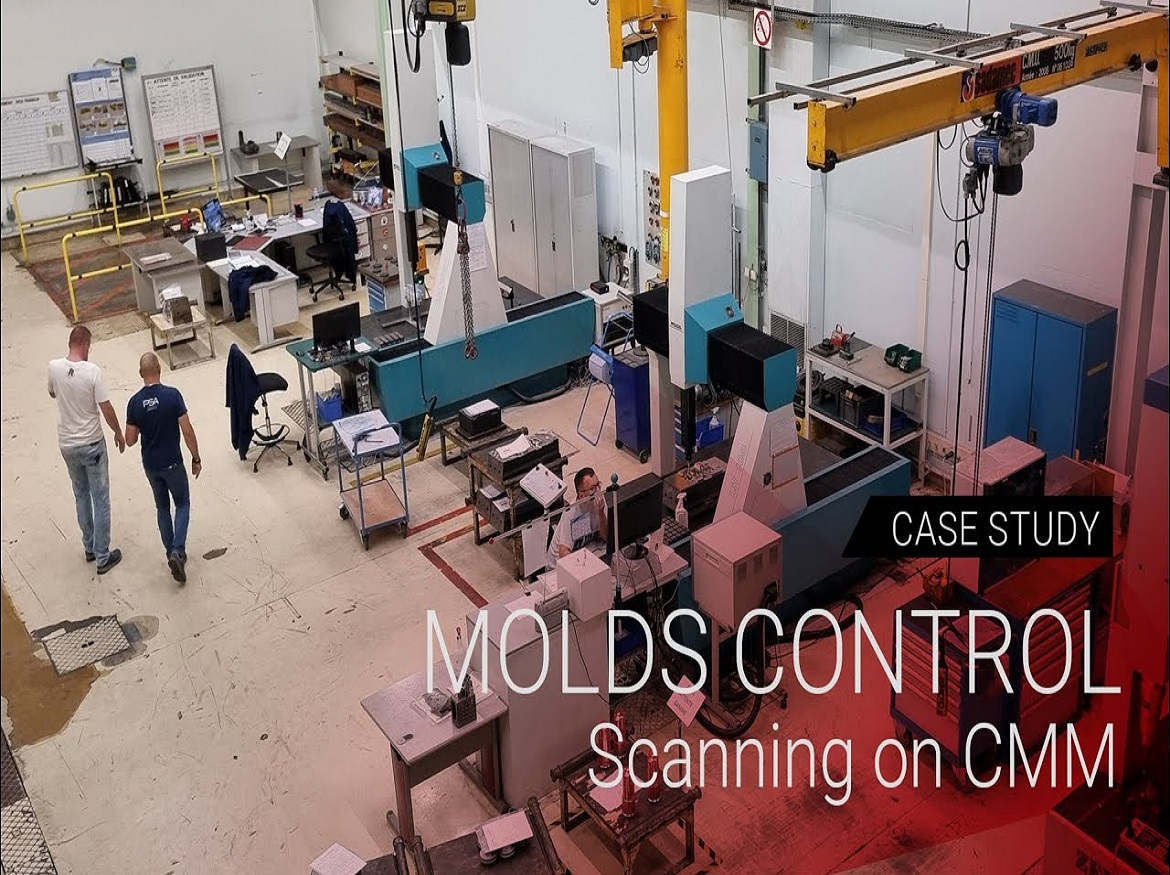
The Mulhouse plant, affiliated with the Stellantis automotive group and employing 178 people, specializes in the manufacturing of tooling, mainly molds for the injection of aluminum under pressure. Equipment designed for forging and stamping is also developed on-site. All tooling undergoes rigorous quality controls to be used with confidence on production lines.
Before the introduction of the Kreon 3D scanner, measurements of tooling pieces were carried out by probing, using three coordinate measuring machines (CMMs): two Wenzel CMMs and one Erowa CMM. However, this method did not cover all parts comprehensively, nor did it detect certain defects.
To improve this situation, the use of a structured light 3D scanner, already present within the company, was considered. However, despite satisfactory measurement accuracy, the slowness of the device made the inspection operations too time-consuming, hindering the production pace and requiring a full-time operator.
Therefore the metrology team looked for other alternatives to directly digitize on CMMs. This led them to discover Kreon 3D scanners, particularly the Zephyr III. The feasibility of integrating the Zephyr III into the measurement process was quickly demonstrated by Kreon experts. The Kreon solution offers several advantages, including the compatibility of Zephyr III with Metrolog X4, the metrology software of the Stellantis group. The teams were also attracted by the efficiency of Kreon experts and the company’s geographic proximity.
To ensure optimal operation of the solution, the implementation of the Kreon scanner required modification the controller and replacement of the CMM rack. Two ACR III tool change racks were also installed to automate the transition from probing to scanning. The inspection is thus continuous, using probing for checking straight faces, holes, and areas with fine tolerances, and the scanner for the overall inspection of the parts’ shape and left shapes.
The inspected parts, with dimensions of up to 800 x 500 mm, are quickly digitized by the Zephyr III 150, thanks to its 150mm wide laser line. Optimization of measurement programs has also increased productivity. New scanning sequences related to scanner management have been added to existing programs, replacing the old probing sequences. This evolution saves time, as it was not necessary to recreate programs entirely.
Despite regular changes in part indices, the scanner trajectory programming does not need to be redefined each time. Significant time savings are facilitated by the seamless integration of Zephyr III into Metrolog X4.
The inspection is now fully automated, and a single operator can handle two CMMs simultaneously.
Franck Hermann, CAM unit manager:
“Kreon’s support was perfect from A to Z. With the Zephyr III scanner, we knew we would save time, and we saved even more than expected.”
Why choose a Zephyr III 150mm scanner with Metrolog X4 software?
- Improved quality process to detect all types of defects
- Complete automation of part inspection
- Complementarity of probing and scanning measurements
- Optimized programming in Metrolog X4
- Overall increase in inspection productivity
- Easy production and distribution of inspection reports
The defects sought on the parts are specific to the manufacturing processes present in the company, namely electroerosion and machining. Wear of the electrodes of electroerosion machines can leave marks on the part, while machining can reveal milling cutter marks and steps. Some mixed assemblies that use both machining and electroerosion can sometimes show fitting defects between parts manufactured by the two different techniques. In general, the shape deviations sought with the scanner are 0.25mm.
Finally, the reports produced after inspections are accessible on the company’s intranet through the Metrolog Viewer software. If the part needs to be reworked, the report is displayed on a screen to guide adjusters in making the necessary modifications to deliver a compliant part. When the piece is delivered, the business driver can also review the report on the intranet before approving the continuation of the project.


