Manufacturing workflows usually produce molds, jigs, parts, based on the theoretical CAD model. However, the deviations can not be avoided between the theoretical model and real production.
Economic growth depends on manufacturing. National power also depends to a great extent on manufacturing power. Nowadays, things as small as screws and buttons, as large as machine foundation and shells, there is an inseparable relationship between goods production and mold manufacturing. The mold determines the shape and size of the parts, and the difference in the mold manufacturing process will cause follow-up errors and imperfections on the parts.

Mold 3D Inspection
Traditional mold inspection is highly dependent on labor. The operator’s experience has become an important criterion for judging whether the mold is qualified or not. This is not only extremely inefficient but also causes serious deviations when inspecting some complex parts and curved surfaces, which greatly affects the progress of product development and redesign.
There is a large-scale mold manufacturer that needs to carry out mold inspection of construction machinery to confirm the machining allowance (the mold needs to retain a certain amount of machining allowance, which will be removed in the subsequent machining). The main difficulties are as follows:
- Excessive machining allowance will increase the workload of mechanical processing. The deficient machining allowance, however, can not guarantee the deviations. Hence, the machining allowance should be controlled within a reasonable range.
- There are many grooves and curved surfaces of the mold, which requires a high detail capturing capacity.
- The mold is very shiny so that the inspection device must have strong adaptability.
ScanTech 3D Measurement Solution
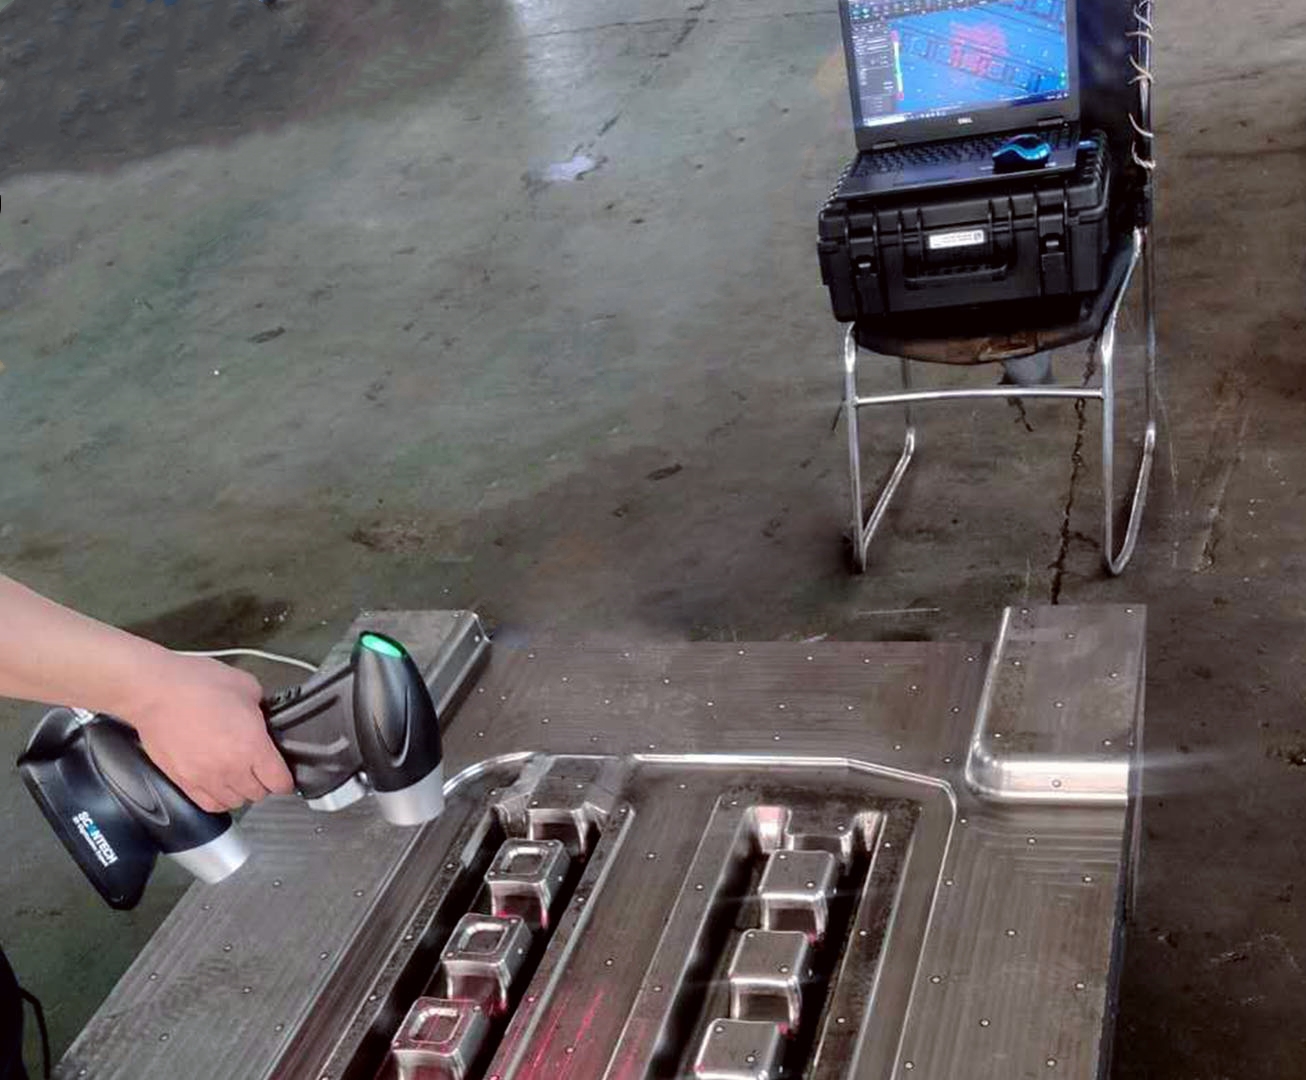
To overcome the inspection difficulties, we use PRINCE 3D scanner to conduct quality control. This 3D laser scanner is beneficial for the mold industry because of its global innovative dual laser scanning mode. The red laser mode performs fast scanning with 480,000 measurements/s and creates a flexible 3D scanning experience. Since the handheld 3D scanner keeps the good detail collection of the structured light 3D scanner, the blue laser mode captures accurate 3D data of shiny or complex surface: 5 blue parallel laser lines reach 0.020 mm of the resolution, easily capturing complicated positions; high adaptability and insensitive to shiny object, delivering 0.030 mm of accuracy.
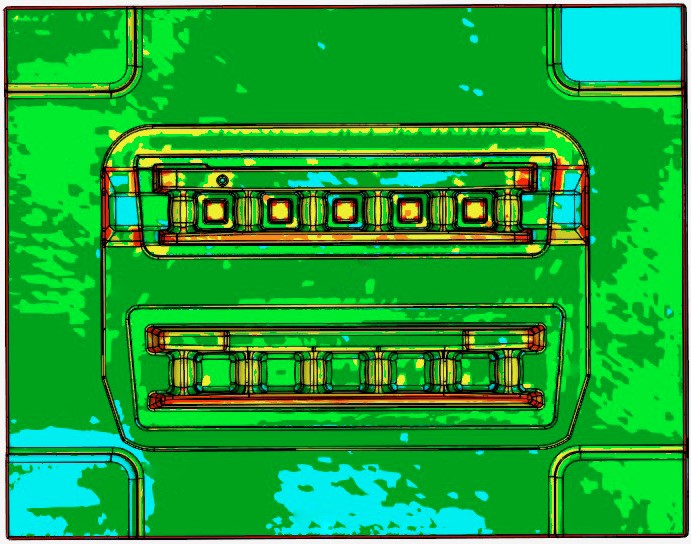
Under the dual laser scanning mode, we can get a precise 3D data and generate STL data quickly. By importing the data into 3D software ScanViewer, the system will automatically calculate the deviation values by comparing it with the original CAD model. That is the way to help the manufacturer get the accurate machining allowance for further product production with high quality and efficiency.
- Use PRINCE red laser mode to scan the mold and get 3D point data; blue laser scan mode for detail collection.

- Get an intuitive color map by comparing the 3D scanned data and the original 3D model. Therefore, precise analysis and adjustment in the product re-development process will be guaranteed.

STL data

Color map
The 3D design, simulation, inspection, and reconstruction of molds are indispensable for contemporary manufacturing. ScanTech will continue to focus on 3D digitization as a pivot to promote the intelligent manufacturing industry.
To know more, check Scantech.


