Dark and/or reflective parts such as boss wheels and graphite electrodes are very common among the machinery industry, but these parts present a real challenge for 3D scanning. They can disturb the response to laser signals and result in noisy point clouds.
The secret behind dark and reflective parts
To find out why it is difficult to scan these parts, we need to first think about the principles of 3D scanners. Optical light-based 3D scanners emit laser beams onto objects, which deform when they hit the surface of the object. The deformation is then reflected into the sensor of a scanner, which calculates the distance from the object to determine its positions in space.
- When the scanner casts lasers onto dark surfaces, the laser energiesare mostly absorbed resulting in a low reflectance.
- Whencasting lasers onto reflective surfaces, these lasers will diffuse off the surface and result in point clouds with significant noise, as shown in figure 1.
 Figure 1
Examples of 3D scanning
Let’s take a graphite electrode as an example to find out more details about 3D scanning of dark surfaces. Graphite electrode, made from calcinated needle coke and coal-tar pitch, is widely used in electrolysis as an excellent conductor. Because of the composition of the materials, the light is absorbed, and it appears dark. We scanned this part using a traditional 3D scanner. See what happens.

Figure 2: Graphite electrode
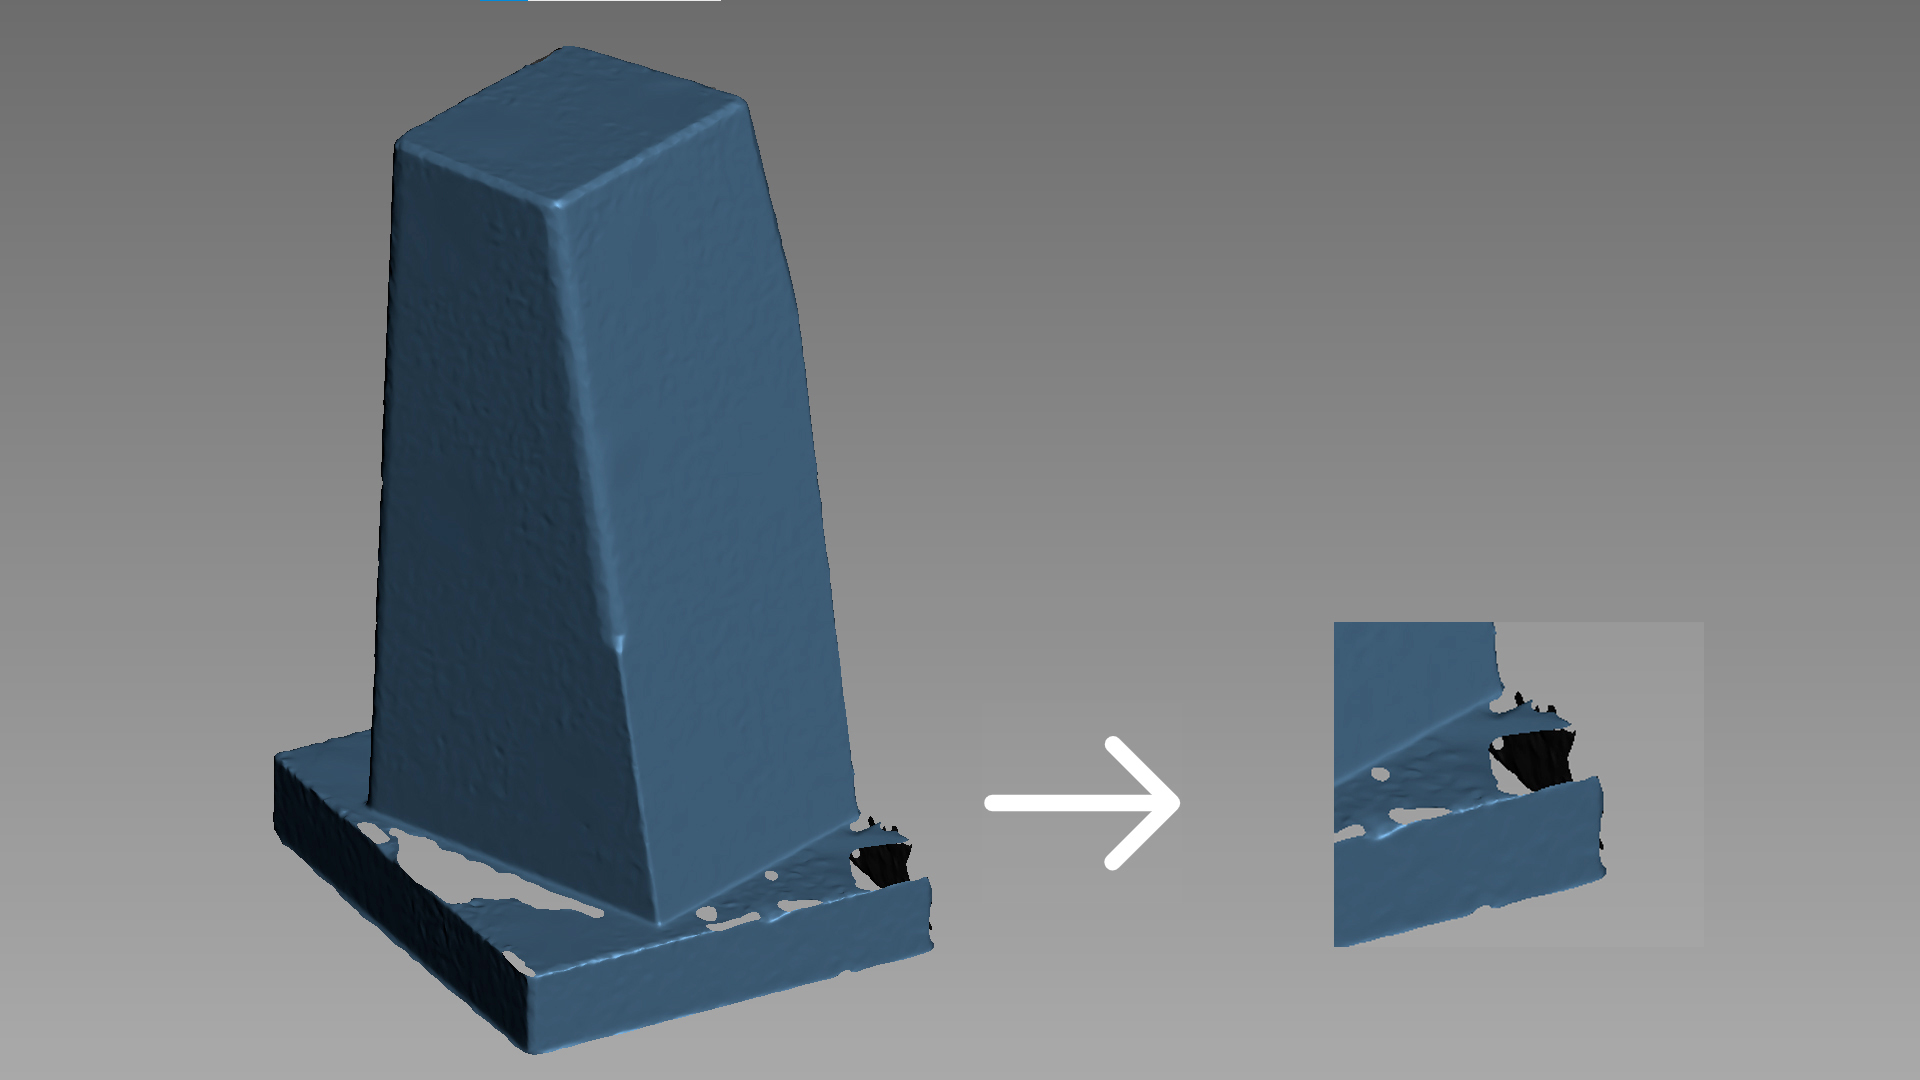
The lasers were absorbed by the dark surface, which resulted in long exposure times and longer scanning times. As shown below, some of the geometry and features of the graphite electrode are missing in the mesh file, especially the angles in its base (Figure 3).

Figure 3: Mesh file of a graphite electrode (with large amount of noise)
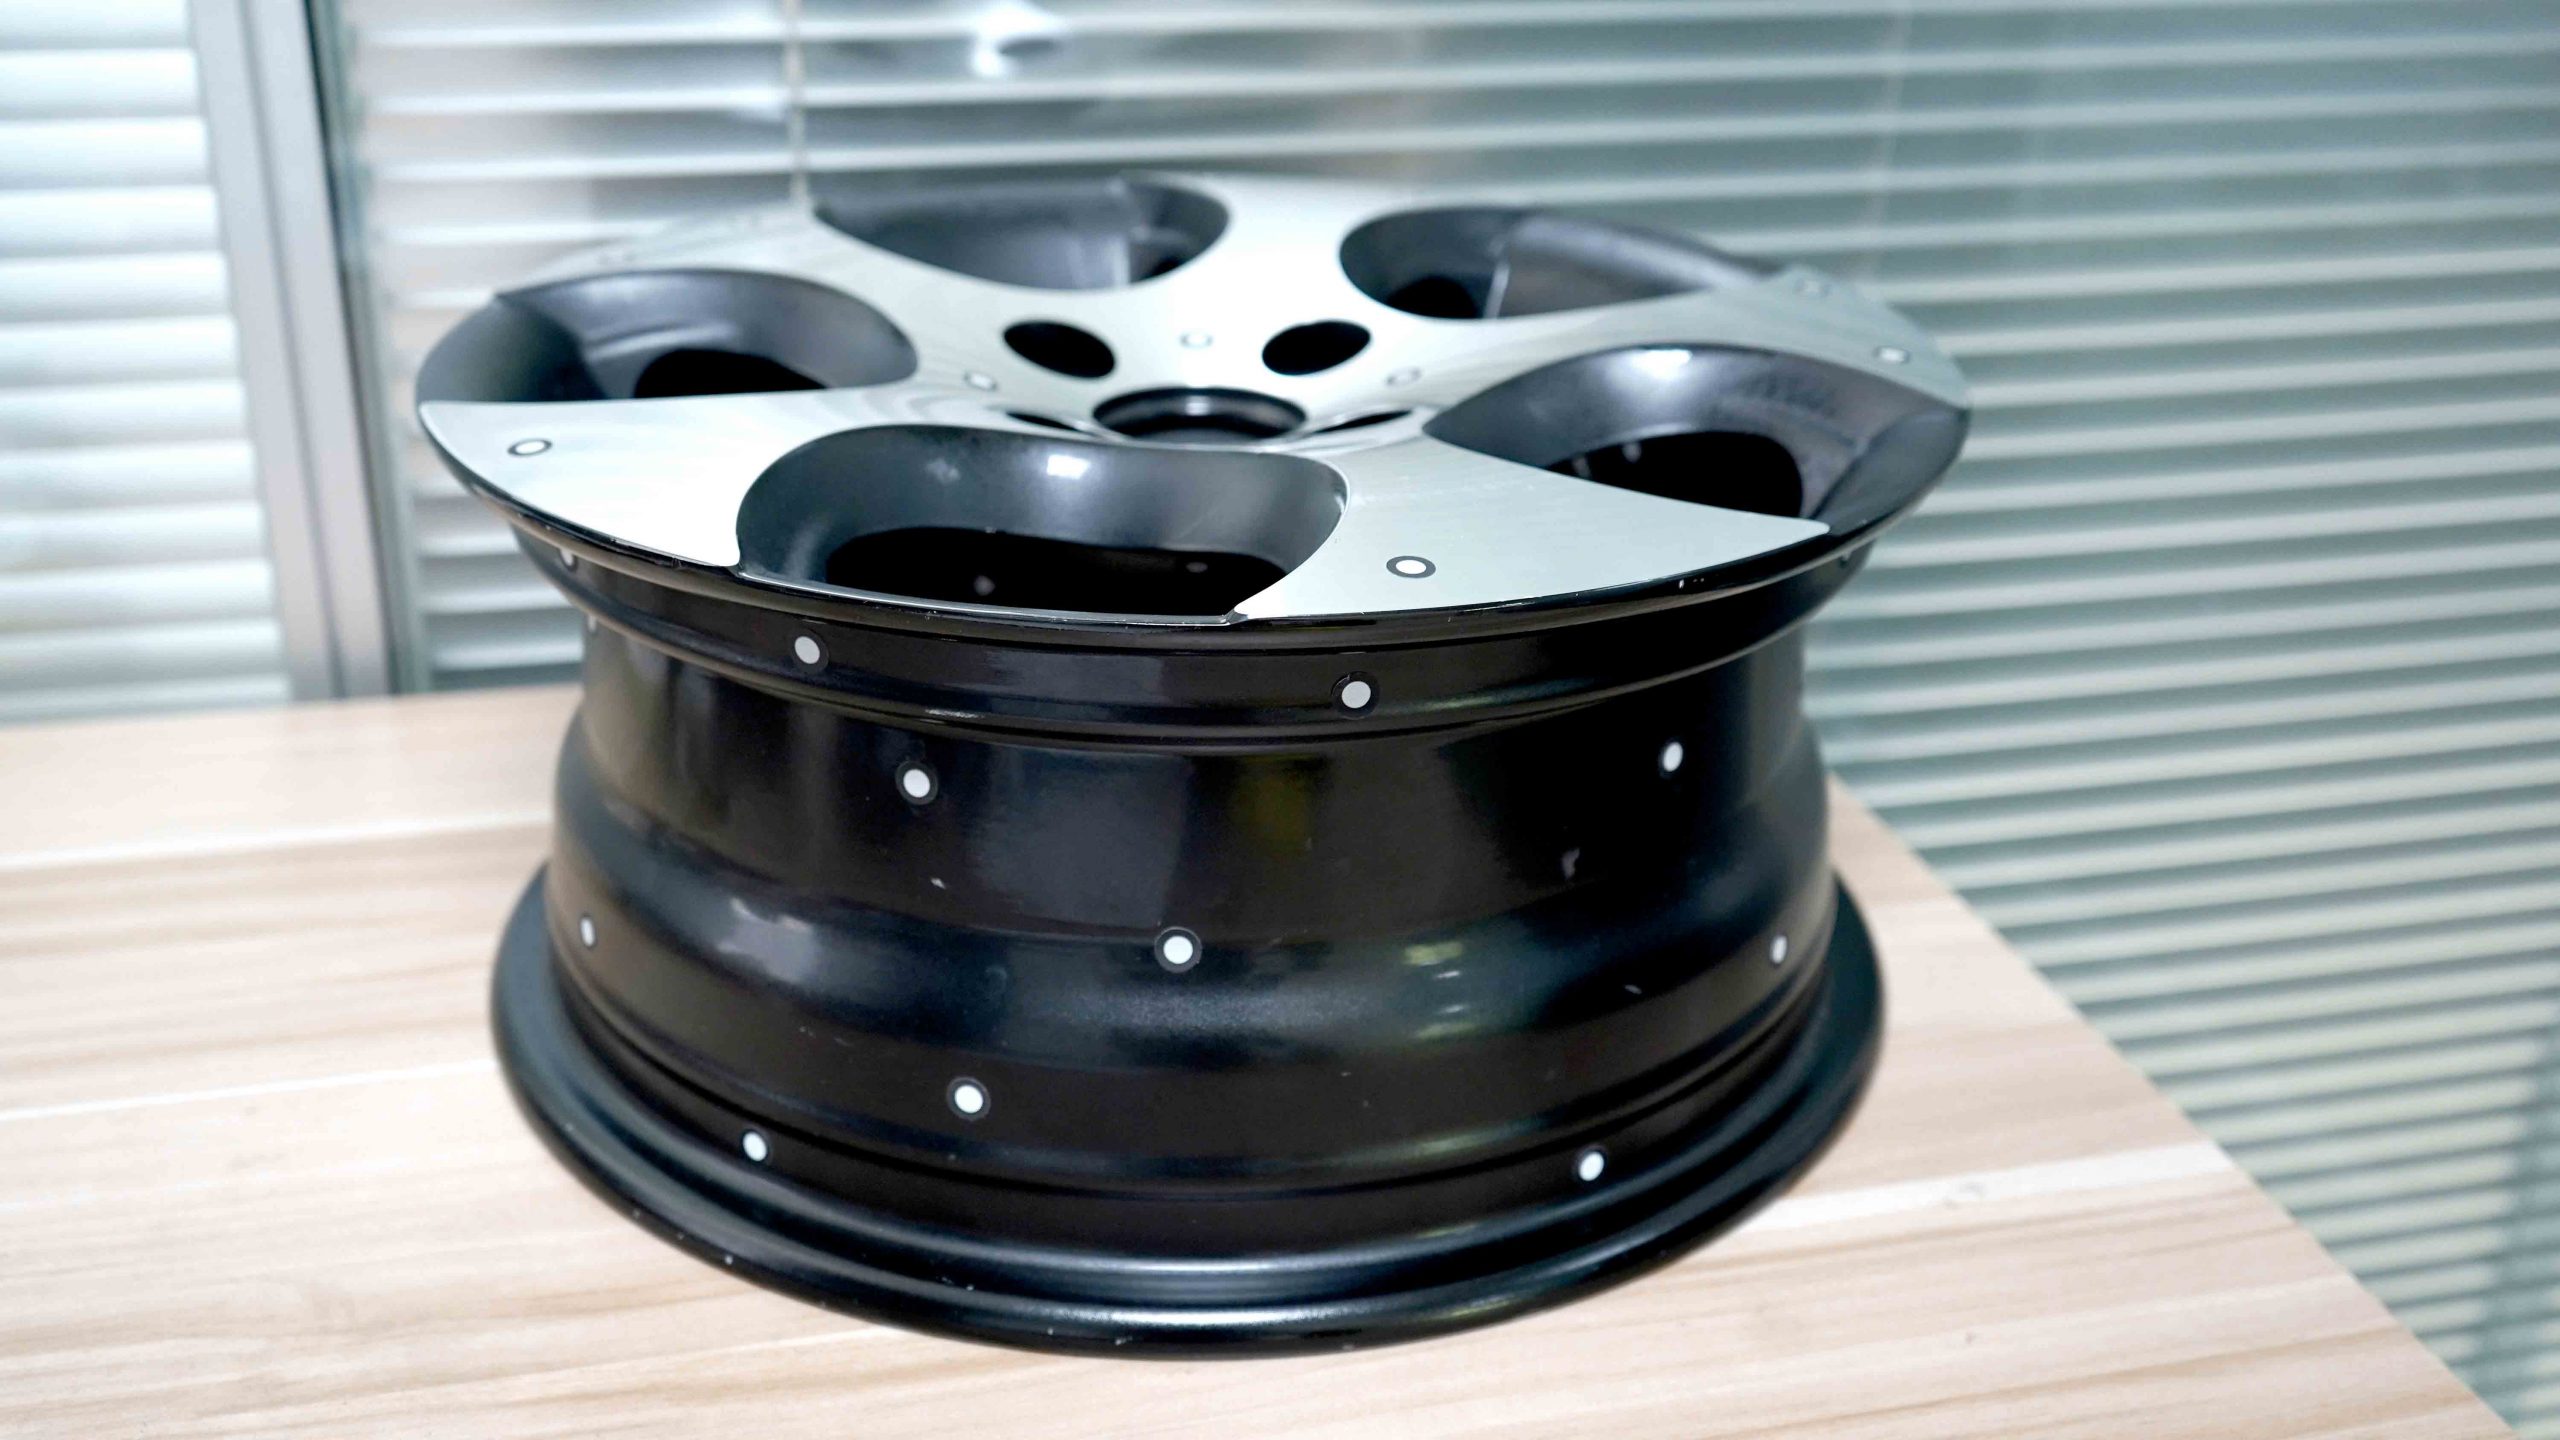
 Figure 4: Boss wheel
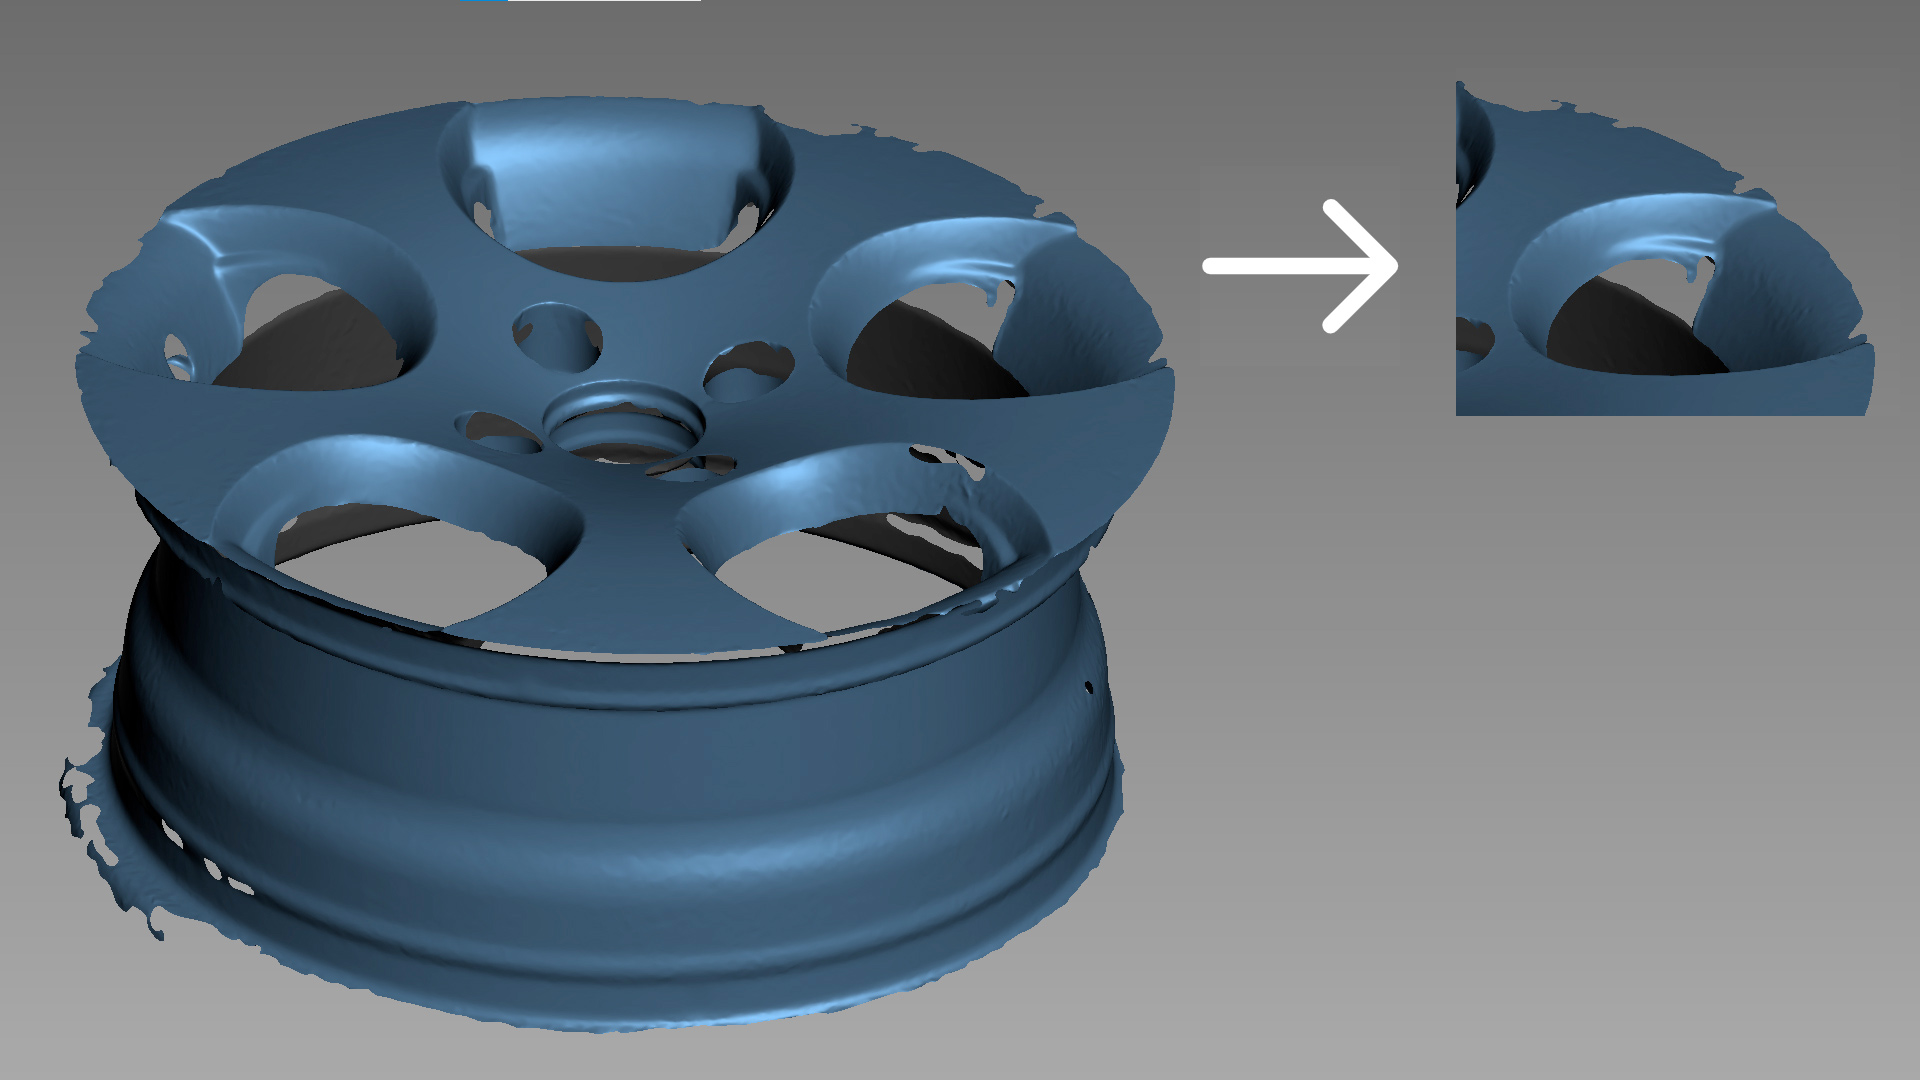
This is a boss wheel with both dark and reflective surfaces. When scanning the boss wheel, we find that its glossy top reflected most of the lasers in unpredicted directions leading to a high reflectance. The 3D scanner failed to capture details such as the edges and circles. In some cases, the pictures captured by the camera would even look over-exposed. The scanning result is shown below:

Figure 5: Mesh file of a boss wheel (with large amount of noise)
Ways to overcome the challenge
There are ways to overcome the challenges posed by reflective and dark surfaces. In the case of reflective surfaces, you can apply talcum or baby powder to the part before scanning, which will assist in obtaining a good scan. Besides, you can orientate the scanner to get an appropriate angle and distance. However, orientating the scanner from time to time would be burdensome and time-consuming. For dark surfaces, setting a higher exposure can help adapting to the object’s finish. This method cannot be used without compromising the accuracy and resolution.
How can Scantech help?
A metrology-grade blue-laser scanner is a better way to overcome this challenge. Blue lasers can perform better on highly reflective surfaces due to their shorter wavelength and very small, focused laser points that they produce. Scantech’s KSCAN-Magic is one of the first 3D scanners that combines blue lasers with infrared lasers into a single instrument. The following mesh file shows how this scanner performs:

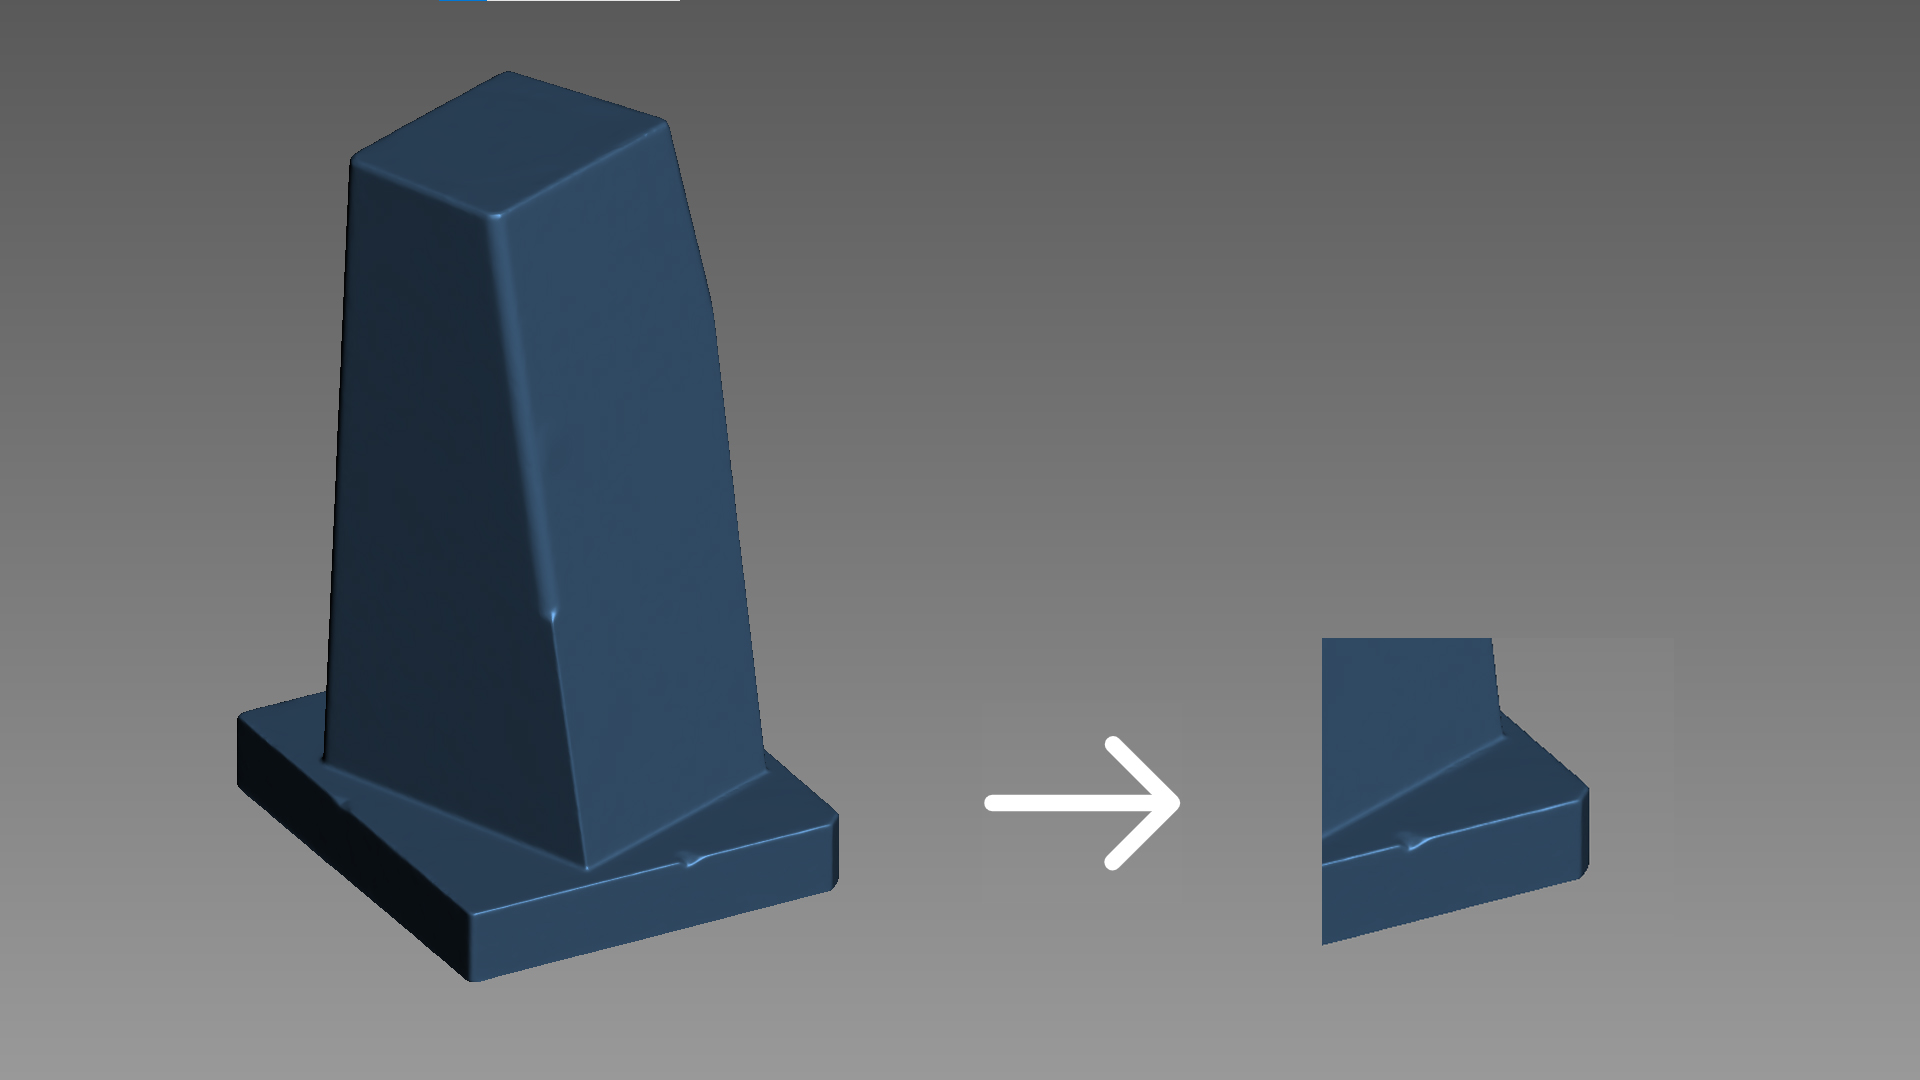
Figure 6: Mesh file of a graphite electrode (with low noise)

Figure 7: Mesh file of a boss wheel (with low noise)
As we can see in this picture, the mesh file of this graphite electrode, as generated with 3D scanning, is of high resolution and low noise. Its edges, curves, and surfaces can be vividly captured. Besides its blue lasers for high-precision scanning, the KSCAN-Magic is equipped with specialized modes for the scanning of reflective and dark objects. These modes are supported by its self-developed algorithm.
If you are interested in this topic, click the video below to find out more.
For more cases about KSCAN-Magic, please visit:
https://www.3d-scantech.com/inspect-and-maintain-a-large-scale-planet-carrier-gear/
https://www.3d-scantech.com/application-story-speed-up-initial-sampling-inspection/
https://www.3d-scantech.com/application-of-kscan-magic-3d-scanner-in-railway-bridge-inspection/


