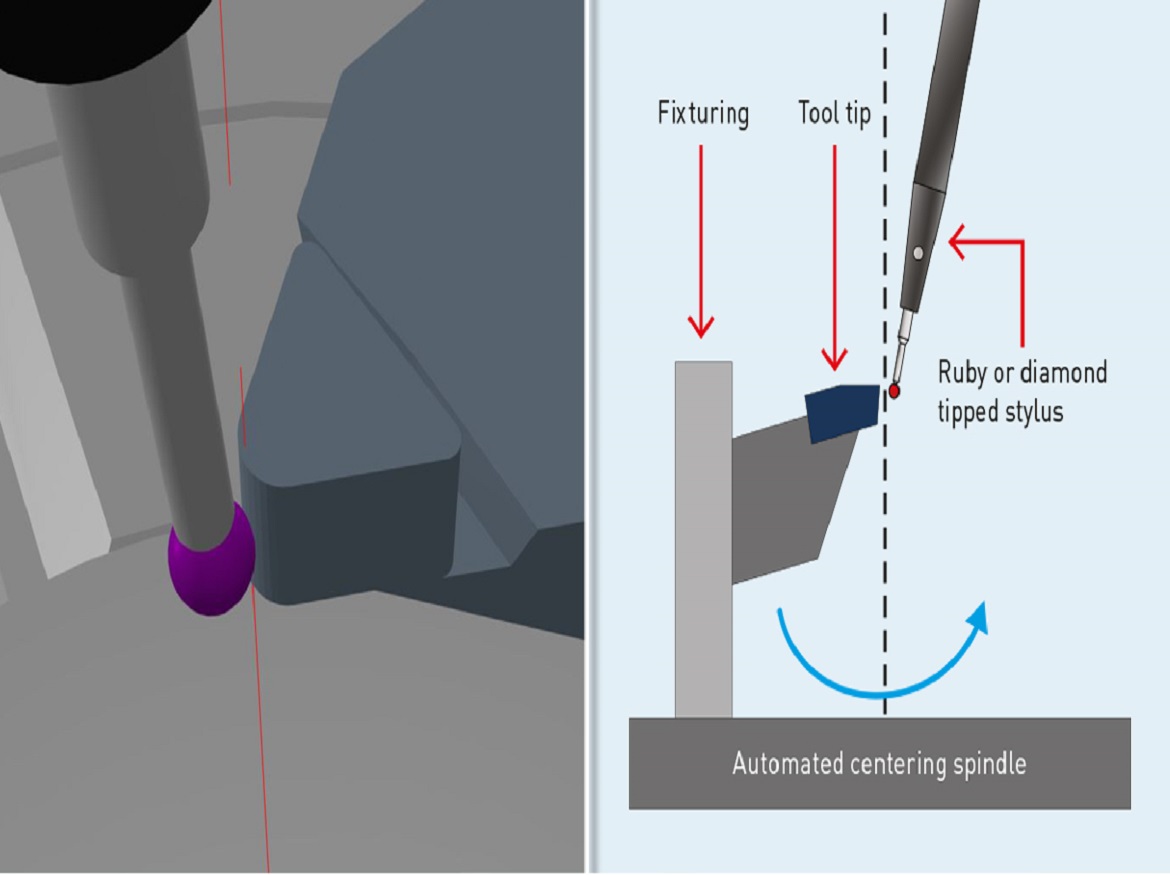
In the field of optics manufacturing, precision is of utmost importance to ensure high-quality optical surfaces. Single-point diamond turning (SPDT) is a commonly used technique to manufacture optical components with high precision. SPDT involves using a diamond tool to cut and shape the optic surface with sub-micron-level accuracy. However, one challenge in SPDT is the potential for error or waviness on the diamond tool tip, which can be transferred to the optical surface and affect the final product’s performance. To address this issue, manufacturers can employ advanced metrology tools, such as the Talyrond® 595H, to characterize the form error of the diamond turning tips and improve their manufacturing process.
The Talyrond® 595H is a highly accurate form measurement instrument that is widely used in the optics industry. It utilizes advanced interferometric technology to measure form errors and waviness on precision surfaces with nanometer-level resolution. The instrument’s high precision and repeatability make it ideal for characterizing the form error of diamond turning tips used in optics manufacturing.
One of the key advantages of using the Talyrond® 595H is its ability to accurately measure the form error of diamond turning tips in a non-contact manner. The instrument uses a stylus probe that gently touches the diamond tip surface and measures its form error without causing any damage or wear to the delicate diamond tool. This non-contact measurement ensures that the tip’s original shape and form are preserved, allowing for accurate characterization of the form error.
The Talyrond® 595H provides a wide range of measurement parameters that are critical for evaluating the form error of diamond turning tips. These parameters include roundness, straightness, flatness, parallelism, and perpendicularity, which are all essential for assessing the tip’s performance. The instrument’s high-resolution measurement capability enables it to capture even subtle form errors and waviness on the diamond tool tip, providing valuable insights into the quality of the cutting surface.
By characterizing the form error of diamond turning tips using the Talyrond® 595H, manufacturers can gain valuable information to optimize their process and improve the quality of their optical components. For instance, if the form error on the diamond tip is found to be beyond acceptable tolerances, manufacturers can take corrective actions such as reconditioning or replacing the tip to ensure the optic surfaces produced are within specification. This can lead to improved product performance and increased customer satisfaction.
Furthermore, the Talyrond® 595H allows manufacturers to monitor the wear and degradation of diamond turning tips over time. With continuous use, diamond tips can wear out or degrade, resulting in changes in the form error and performance of the optic surfaces. By periodically measuring the form error of the diamond tip using the Talyrond® 595H, manufacturers can track the tip’s condition and plan for timely replacements, minimizing the risk of producing subpar optical components due to worn-out or degraded diamond tips.
In addition to improving the manufacturing process, the Talyrond® 595H also aids in research and development efforts in optics manufacturing. Manufacturers can use the instrument to study the effects of various cutting parameters, tool geometries, and materials on the form error of diamond tips. This can help them optimize their cutting processes and develop new techniques to further enhance the precision and quality of their optical components.
In conclusion, the Talyrond® 595H is a valuable metrology tool for characterizing the form error of diamond turning tips used in optics manufacturing. Its high precision, non-contact measurement capability, and wide range of measurement parameters make it ideal for evaluating the form error and waviness on diamond tips with nanometer-level accuracy. By utilizing the Talyrond® 595H, manufacturers can optimize their manufacturing processes, and improve products.
Click on the following link Metrologically Speaking to read more such blogs about the Metrology Industry.


