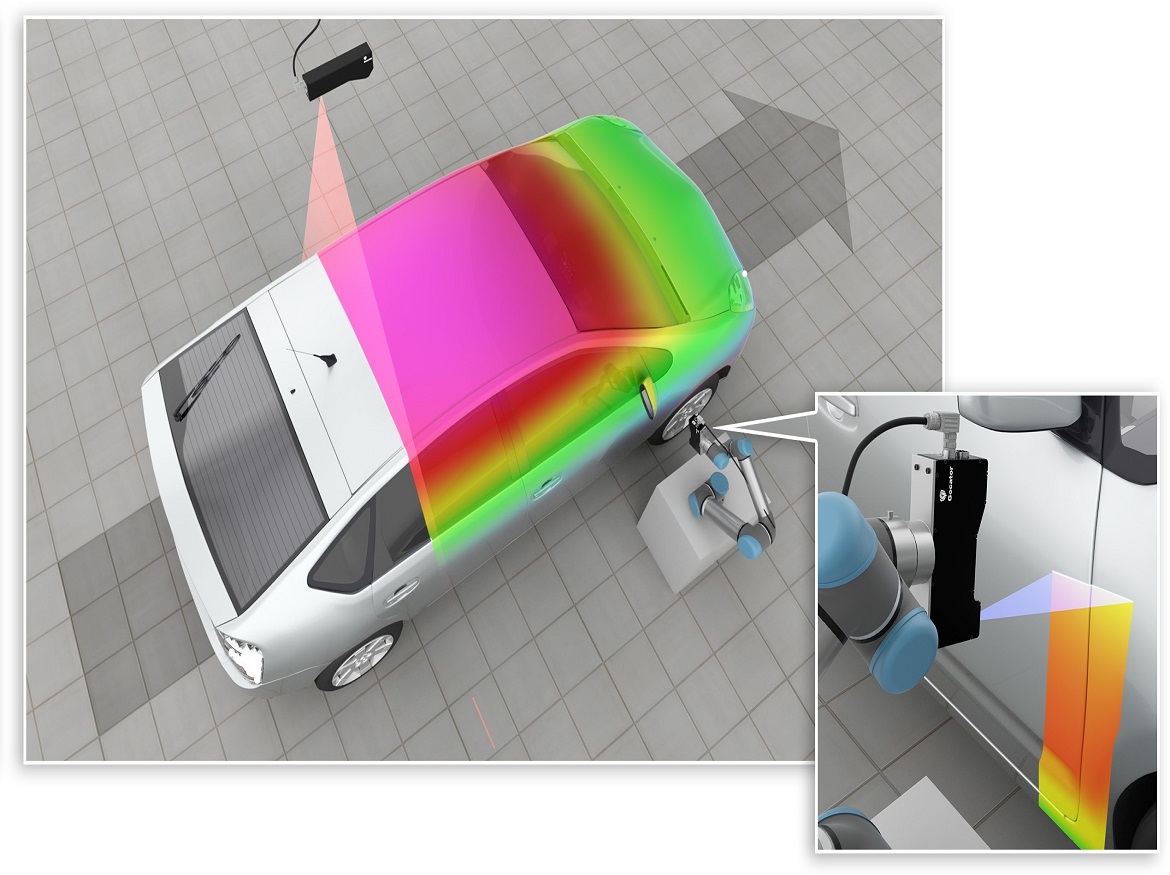
LMI provides the automotive industry with cutting-edge gap and flush measurement capabilities.
For example, in a common sensor setup for gap and flush measurement applications, users can deploy a downward-facing, ultra-wide field-of-view Gocator 2490 to determine the six degrees of freedom of the vehicle. That 6DoF alignment information is then relayed to a robot arm, which allows for the deployment of a buddied blue line Gocator 2440 blue laser profiler to take precise gap and flush measurements.
Leverage blue laser profiling for ‘cleaner’ scan data
Measuring surfaces like headlights, windows, and glossy white or black paint can be a challenge for traditional red line laser sensors. Red line laser sensors perform better on lower reflectivity or matte surfaces, particularly on fast-moving targets. However, for specular or shiny surfaces, the red light becomes distorted, resulting in a ‘speckle’
effect.
In contrast, the shorter wavelength of the blue laser sensor produces much less speckling, resulting in lower noise levels, typically by a factor of two to three compared to red laser sensors.
Benefit from multi-sensor networking
Buddied sensors are networked to automatically generate a single, high-accuracy 3D scan of the target. This dual multi-sensor network configuration also solves any potential occlusions on the surface of the scan target. Scanning and inspection happen continuously and with no external processing (e.g., PC) or controller required, as the vehicle moves down the assembly line. Using two networked blue laser sensors allows the user to scan further into the gap, generating more complete and precise measurement data as a result. The process of combining and aligning multiple
sensors is simple by using the built-in alignment procedure. With the combined 3D point cloud dataset, the user can easily apply the gap and flush measurements onboard the sensor in real time.
Achieve high-speed, high-precision measurement and inspection
Depending on the surface quality, this system can capture up to 60 measurement points per minute, taking 0.5–1 second per measurement point, including evaluation. These scans are extremely detailed, measuring not only gap distance to the tenth of a millimeter but also the shape, smoothness, and curvature of the surface.
With this data, many measurements, including calculations and pass/fail decisions, are made, allowing for a high level of quality assurance.
Out-of-the-box, robotcompatible gap & flush solution
Each LMI smart sensor leaves the manufacturing floor after undergoing rigorous, multi-step factory pre-calibration, ensuring accurate measurements right out of the box. These sensors are compatible with many major robot brands, including Universal Robots, Yaskawa, KUKA, Kawasaki, Fanuc, and ABB. Handeye calibration, which translates the sensor’s 3D data to the robot, is simple and built into each sensor.
Using the wide field of view 2490 along with the paired blue line 2440s on a robot arm, the system is able to provide a comprehensive in-line robotic vision solution for gap and flush inspection.
Credits: LMI3D
Click on the following link Metrologically Speaking to read more such blogs about the Metrology Industry.


