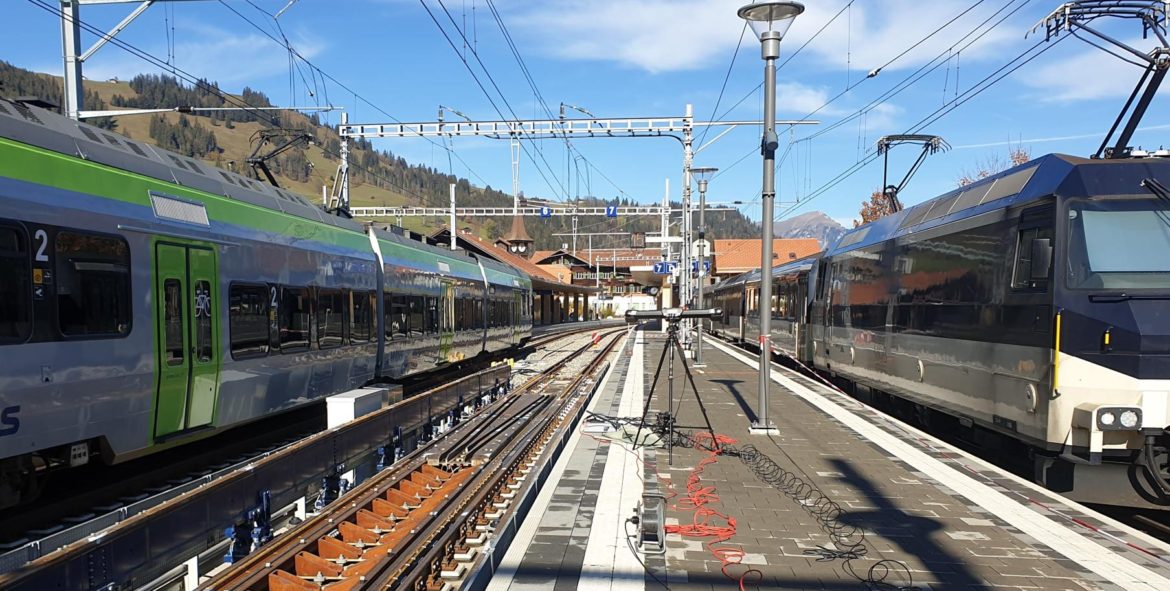
In addition to the standard-gauge route network, there are numerous meter-gauge railways in Switzerland, especially in the Alps. A bogie exchange for gauges of 1000 mm and 1435 mm was specially developed for the GoldenPass Line. As a special feature, the height of the bogie geometry is also changed when changing gauges, so that the entry height of the wagons is adapted to the different platform heights in the narrow-gauge and standard-gauge networks. The gauging system is set up in Zweisimmen station and the trains are gauged at slow speeds (15 km / h) as they enter and exit the station.
The project
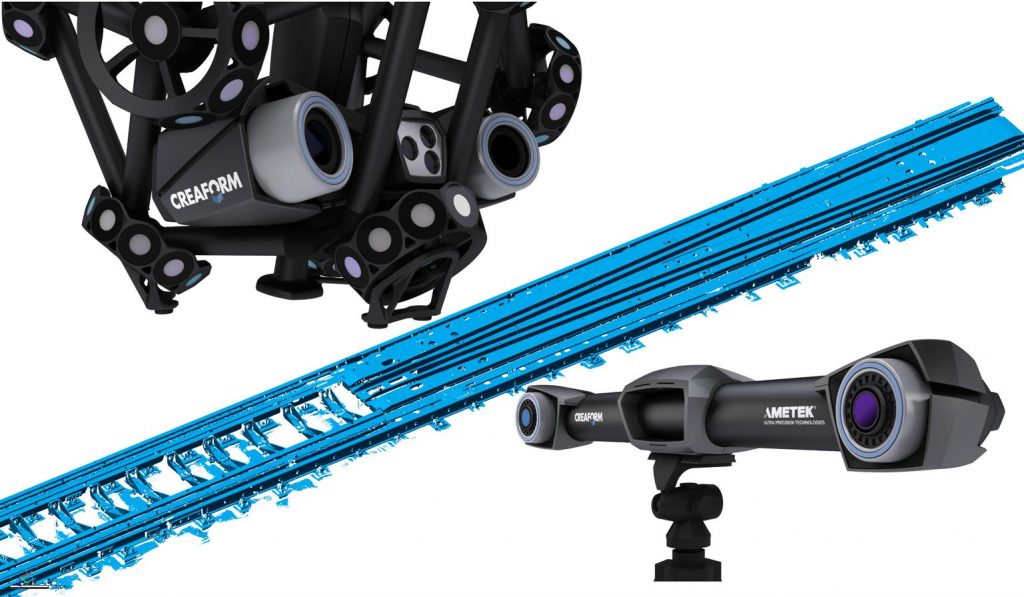
Prose AG is responsible for the development and construction of the system in Switzerland and has commissioned the measurement technology service company SCAN IT 3D GmbH to record the entire system in Zweisimmen with a 3D scanner. A scan carried out in the open air always involves particular risks. If it rains or snows, the scan cannot be performed. It was decided to scan during the night, as the route runs directly in an east-west direction and the sun would otherwise have hindered the scanning. The Creaform MetraSCAN 3D and HandySCAN 3D were used for the acquisition.
SCAN IT 3D has been using Creaform measurement technology for several years. Once calibrated, the scanners are usually insensitive to temperature fluctuations. However, since this particular project required the scanners to be used in autumn from early evening until late at night, the temperature fluctuations were immense, and the scanner had to be calibrated several times.
In preparation, the system was equipped with around 150 magnetic targets, on which the scanner was oriented. The scan took 10 hours with two people. Approx. 30 million measuring points were generated during the acquisition. With such a large number of measurements, it is possible to make a statement about the entire system. This measurement can also be used at a later point in time to determine how the system has changed over time.
Alignment of the scan data in Control X and CAD comparison


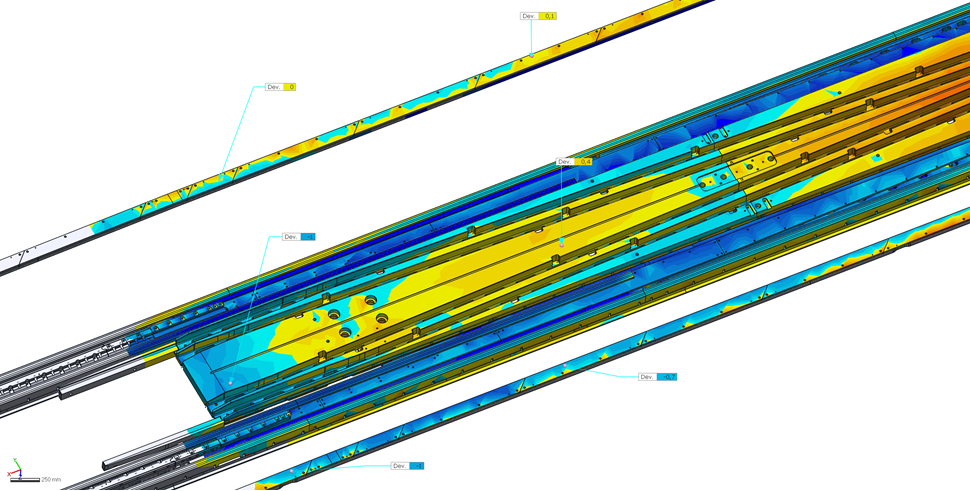
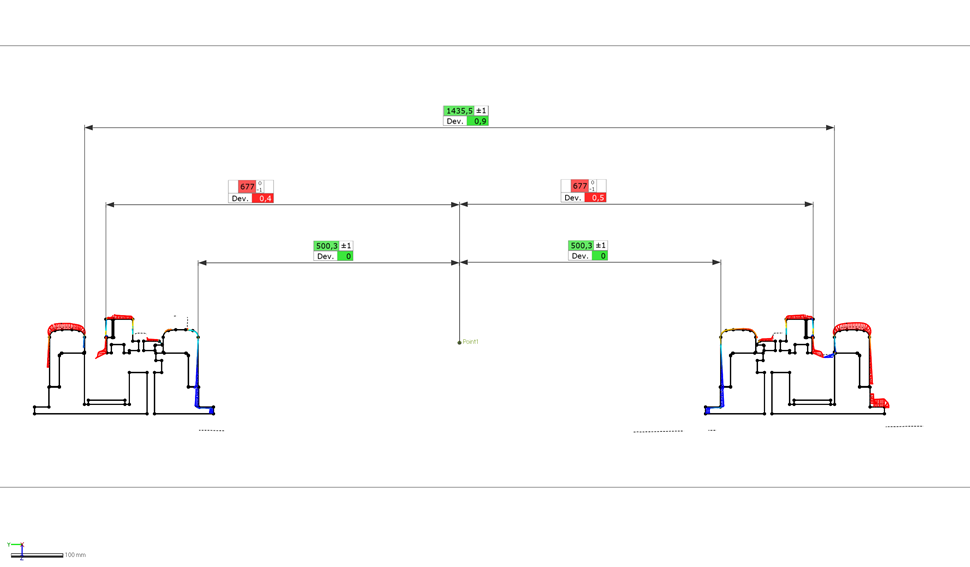
The scan data were then compared with the CAD data of the construction provided by PROSE AG in Control X. During the comparison, the tolerances were determined according to the drawing specifications and compared with the specifications. For the assessment of the entire system, the deviations were provided in the form of color maps.
In the sections in which the dimensional tolerances were determined, the deviations were shown with the help of whiskers for control and better understanding. The whiskers exaggerate the deviation by a defined factor so that a clear understanding can be very quickly achieved.

Thomas Mihatsch, Managing Director of SCAN IT 3D GmbH explains: “We have been using Creaform 3D scanners for our service projects for years and are completely satisfied with the systems. This project was new territory for us and was also very extensive. It has shown us that photogrammetry systems are also very useful for large-volume projects and can increase the accuracy of the measurements. ”
About SCAN IT 3D GmbH
SCANIT 3D GmbH, based in Schliengen, Switzerland, offers services for measurement technology, reverse engineering and process optimization.
https://scanit3d.ch


