By Thermwood Corp.
In the cornfields of southern Indiana, Thermwood Corp. is making unique large-scale additive manufacturing (LSAM) equipment. LSAM machines produce large- to very-large-sized components from reinforced thermoplastic composite materials, creating industrial tooling, masters, patterns, molds and production fixtures used in the aerospace, automotive, foundry, and marine industries.

The LSAM process is a unique mix of machine design and material science. Workers lay down a large bead of thermopolymer at room temperature. The company describes this as essentially an exercise in controlled cooling—polymer cooling, not print head output, determines print speed. Print head output determines how large a part can be printed in the layer time available. LSAM print heads are available that can print well over 500 lb (228 kg) per hour, which makes very large parts possible. Thermwood makes LSAM machines in work area sizes from 10 × 10′ (3.05 × 3.05 m), up to 10 × 100′ (3.05 × 30.5 m). The machines both print and trim thermopolymer components.
The process is dubbed vertical layer printing (VLP). Using large print beads plus Thermwood’s patented compression wheel, it creates solid, fully-fused, virtually void-free printed structures. These structures can sustain a vacuum in a pressurized autoclave at elevated temperature without the need for expensive coatings.

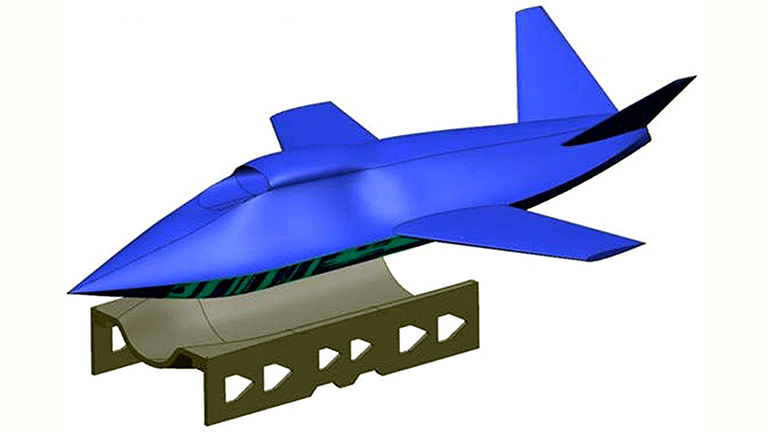
In 2019, Boeing, on behalf of the Air Force Research Laboratory (AFRL), contacted Thermwood, based in Dale, Ind., to evaluate LSAM’s ability to reduce the time and cost of fabricating autoclave-capable tooling to make composite aerospace components. The initial demo tool would be for fuselage skin for an AFRL concept.
LSAM’s main attraction for autoclave tooling was speed—the ability to produce a complete tool in days compared to the weeks or months required with conventional machining. The LSAM equipment also could print large components, thereby reducing assembly time and cost.
Boeing and AFRL 3D-printed a section of a large tool to evaluate LSAM functionality. The mid-scale tool (4′ [1.22 m] in length vs 10′ [3.05 m] for the final tool) was printed on Thermwood’s LSAM demonstration machine using a 40-mm print core running 25 percent carbon fiber reinforced polyethersulfone (PESU).

The initial test tool had the same width, height, and bead path as the final mold, incorporating all major features of the final mold, but compressed in length. The mid-scale tool set a milestone achievement as the first high-temperature tool printed using VLP. It required 5 hours and 15 minutes print time with a print weight of 367 lb (166.5 kg). After final machining, the tool was probed for surface profile and tested for vacuum integrity. The tool passed the room-temperature vacuum test and achieved dimensional surface profile tolerances. The full-scale tool will weigh 1,400 lb (635.03 kg) and require 18 hours to print. Boeing and the Air Force are carefully documenting all operational parameters of the project to transition the technology to production programs.
Manufacturing such parts efficiently is a breakthrough, but a critical portion includes measuring them to confirm a good part, maintain quality control, and confirm conformance to customer and industry (in this case, government) standards. Large parts like the AFRL tooling do not have the luxury of being taken off production equipment, transferred to a coordinate measuring machine (CMM) for measurement, then returned to the LSAM for adjustment and finishing.
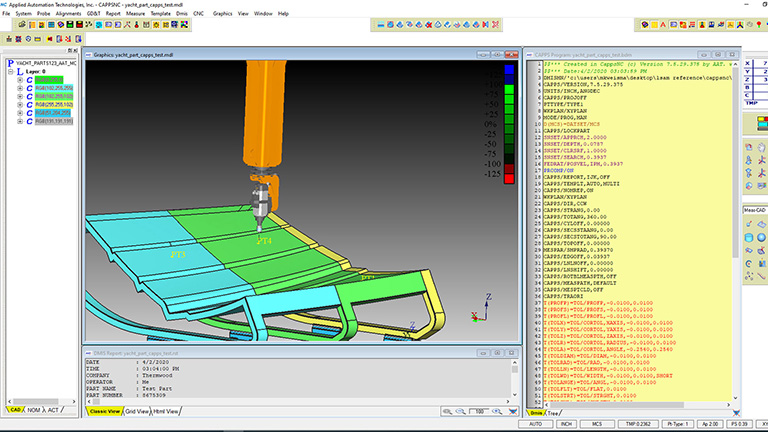
In Thermwood’s case, advanced measurement software such as CAPPSNC from Applied Automation Technologies Inc., Rochester, Mich., enables machine tools themselves to perform measurements like a CMM and use that real-time feedback to adjust machining parameters, such as work offsets, as they change. CAPPSNC provides capabilities to quickly develop measurement programs offline and run these programs directly on CNC machine tools in a similar fashion as a CMM.
Measurement results are used to adjust machining process parameters—such as calculating precise work offsets, dynamic tool compensation, and other critical data feedback—in an automated process, together with providing part inspection and SPC reports without the need to take the part off the machine.
CAPPSNC connects with the machine tool via an Ethernet cable and can read and write to any controller parameter. It also has a live connection with the machine tool controller. The software converts the calculated metrology data it collects into machining parameters and updates the controller. It runs outside the machine tool controller yet works as part of the machining process. Using such closed-loop feedback to provide correction for the machining process allows the system to be self-adapting to factors that affect the machining process and part quality.
Collecting metrology data, converting it into meaningful parameters and distributing it to the systems that can use it reduces the cost to make parts.
The benefits of this measurement approach realized at each stage of the part-making process are:

Pre-Process: Preparing part setup on the machine before starting the machining process can be challenging, costly and time-consuming. Automation that quickly measures a part location can eliminate the need to have expensive fixtures and manual part setup. Parts that requires a six-degrees-of-freedom coordinate setup are particularly difficult to set up with the standard work offset. A part measurement that produces a best-fit coordinate system can automatically be converted into a work offset that locates the part in 3D space and gets the machine ready for processing.
In-Process: Many variables may affect finished part quality during machining. Cutting tool wear—as well as the actual cutting tool shape under pressure during the cutting process—affects how the part form will be generated. Although there are other methods of calculating tool wear and offsets, these are static methods and do not include tool deformation under cutting pressure. Final shape and size measurement can help calculate dynamic tool offset for these changes. An automated, cut-measure-cut, closed-loop, metrology-controlled process can achieve parts that are always in tolerance regardless of the complexity of their shapes.

Post-Process: Data collected by many machining centers can be visualized for how actual manufacturing throughout the factory is working. Intelligent algorithms that can work with the data can calculate optimum manufacturing parameters, ultimately creating a factory-wide artificial intelligence (AI) system.
“By printing large components and trimming them on the same machine, Thermwood is accomplishing exciting results,” said Chris Affer, senior applications engineer for Applied Automation Technologies. “Many process parameters can affect the final part. CAPPSNC helps adjust production in real time and refines the part in space so more good parts are produced.”
Added Duane Marrett, Thermwood vice president of marketing, “We have customers that require accuracy of point location on their components and measuring in place. CAPPSNC is comparable with our machine control, which we supply and program ourselves, and it generates G-code that allows us to add automated measuring processes and process adjustment to our production.”
Data-driven manufacturing is a relatively modern term that emphasizes a fundamental truth: Data is the lifeblood of manufacturing and the source of process improvement. Adaptive machining is the process whereby metrology data generated at the machine tool is collected and fed back to the NC control to automatically refine machine tool processes in real time. For new production systems such as LSAM, adaptive machining is an enabler of both high-quality parts and process improvement.
For more information from Thermwood Corp., visit
www.thermwood.com or phone 812-937-4476.
For more information from Applied Automation Technologies Inc.,
visit www.aat3d.com or phone 248-656-4930.


