Standardized System
Explorer for Efficient Automated Measurement
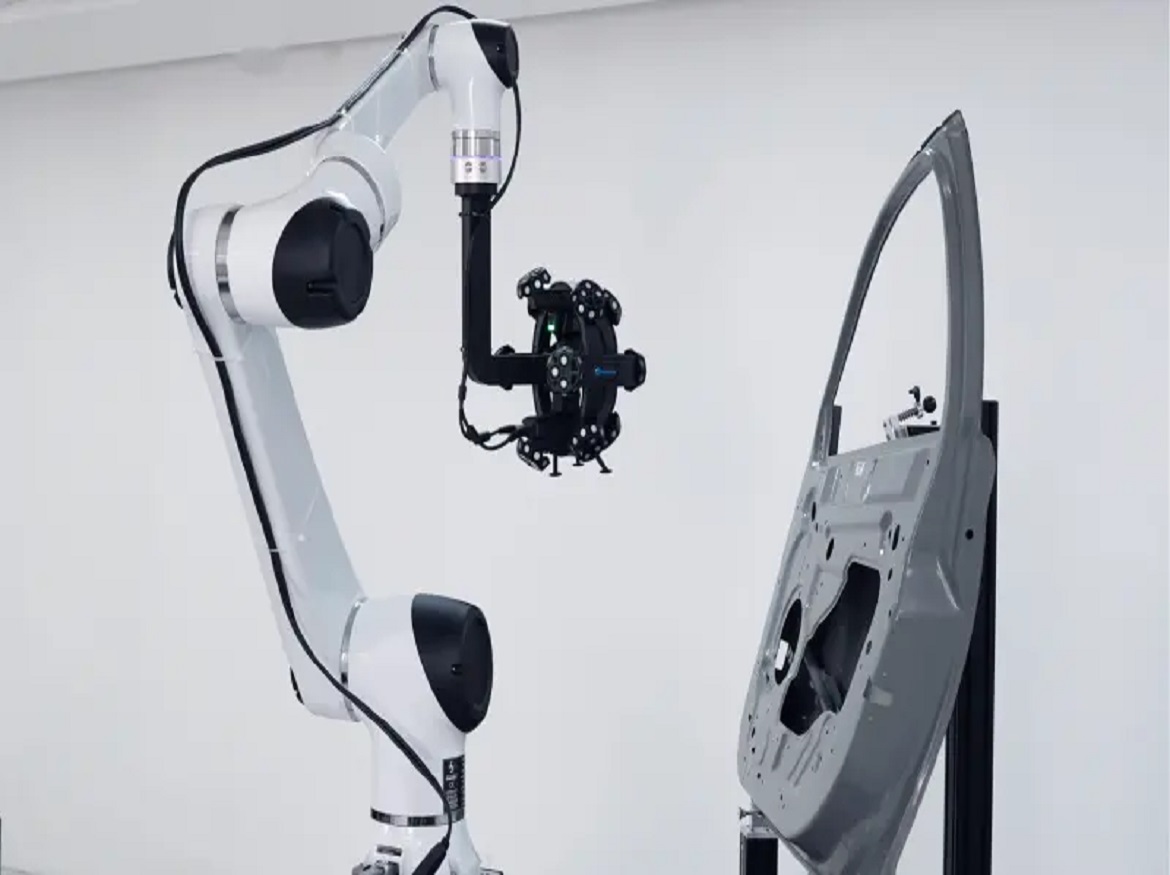
Scantech, a global 3D measurement company that specializes in the development, manufacturing, and sales of 3D scanners, introduces the latest optical automated 3D measurement system AM-CELL C200 for medium-sized parts, taking automated measurements to the next level.
To lower the threshold of automated measurement, our engineers and designers strive to craft this standardized product AM-CELL C200 with modular design and easy operations, which is user-friendly for both engineers and operators.
Introduction of AM-CELL C200
It is essential to identify, analyze and eliminate quality issues in the shortest amount of time for manufacturers so that they can take corrective actions and ensure the quality of manufacturing. AM-CELL C200 fits well in manufacturing applications.

Its modular design allows for easy transporting and speedy assembling, which can be installed within 2 days. The cell is crafted with an active safety system, and servo-mechanists with force feedback to avoid safety hazards.
It can be powered by easily-accessed mains electricity and is safe to work directly alongside the operators, which is ideal for applications on the shop floor, in CMM rooms and in educational settings.
With precise measuring results and intuitive GD&T deviations, it can accelerate production, inspection, and repair processes. It offers an automated measurement solution for full life-cycle quality control, giving companies the possibility to increase automation, enhance intelligent manufacturing and upgrade the business.
Features of AM-CELL C200
Lightweight Standardized Product
AM-CELL C200 is a standardized 3D solution to measure parts for product development and inspection, whose weight is only 30% of that of its previous generation. Its components can be integrated to form the final system easily within 2 days by one operator.
This plug-and-play solution supports labor-free automated measurement and manual robot teaching for quick path planning, which lowers the threshold for professional operations.

Modular Design and Flexible Layouts
Thanks to its modular functional design and small footprint, C200 can be deployed in L-shaped, I-shaped, T-shaped, and separate layouts to fit in various working areas. Its standard interfaces can be connected with different external devices to enable flexible measurements.
Its cobot can work with multiple positioners so that operators can change the part on one positioner while the others are working. Therefore, manufacturers can minimize downtime, significantly increasing measurement efficiency.

Innovation to Keep You Safe
The system is crafted with an active safety system. Its robot and turntables are equipped with servo-mechanists with force feedback to avoid safety hazards.
There is no need for a physical fencer as it comes with ten-grade collision detection. Therefore, human operators and the measurement system can share the workplace without compromising safety.

Intelligent 3D Optical Measurement
C200, compatible with Scantech’s TrackScan-P series optical tracking 3D systems, can automatically measure parts without sticking targets. Thanks to its enhanced stability, users can measure hundreds of parts efficiently and stably with reliable and repeatable results.

C200 allows users to inspect edges automatically and its sophisticated gray value measurement ensures precise results. Users can obtain accurate 3D data of closed features such as holes, slots, and rectangles of stamping parts and machined parts on the site.
• Accuracy of up to 0.025 mm
• Measurement rate of up to 2,600,000 mps
Information-driven Quality Control
C200 can work with different MES systems and various automated quality control software used throughout industry production.
With a one-button-start, users can invoke templates, calculate data, generate inspection reports, and analyze the statistics to gain insights that can boost production efficiency and ensure precise quality control.
• For R&D: C200 features a measurement rate 5 times faster than that of traditional CMM, which is essential to accelerate the research and development, reduce the time of ramp up and speed up the time-to-market of new products.
• For Manufacturing: It supports single-part inspection, multiple-part inspection, and trend analysis of batch inspection. This way, users can monitor the evolution of batches, forecast the trend of defective products, reduce the rejection rate, and ensure the stability of manufacturing.

Vast Applications Deliver New Experiences
• Maximum Object Size: D=Ф1500mm
• Object Payload: 200KG (medium-sized parts)
• Power Supply: Mains electricity
Shop Floor: The measurement cell allows for on-site measurement on the shop floor regardless of lighting and temperature variations. It can measure parts precisely under harsh conditions on the shop floor.
CMM Room: The system can safely and steadily run without special requirements for settings. Physical fencer is optional depending on the requirements of the users.
Educational Settings: With multiple programming methods, teachers and even students without much expertise can learn how to operate the measurement cell safely in a short timeframe.
It shows our commitment to creating a talent cultivation ecosystem in the way of industry-university-research integration.
About Scantech
Scantech is one of the earliest high-tech companies starting to research and develop handheld 3D visual measurement devices across the world. Our products are sold to more than 50 countries and regions, serving over 5000 enterprises.


