Weatherford International Ltd. is one of the world’s largest and most dynamic oilfield service companies. Headquartered in Houston, the company employs more than 34,000 people worldwide, operating in more than 710 locations and in more than 100 countries around the world. The company’s Edmonton, AB, Canada facility designs and manufactures two products for petroleum production operations—progressing cavity pumps used in the production of oil after the well is drilled, and fluid power sections.
The Challenge
To meet the demands of the booming world oil and gas drilling industry, Weatherford has ramped up production and with it the need to improve the efficiency of their inspection operations.
Weatherford products support operations by major petroleum producing companies throughout the world. The company’s Edmonton, Alberta facility designs and manufactures two products for petroleum production operations—progressing cavity pumps used in the production of oil after the well is drilled and fluid power sections. The fluid power section is the motor that provides the power to drill the well. To help improve production efficiency, the company sought a new, more efficient way to inspect fluid power sections, which have a very complex geometry and are difficult to inspect using traditional methods.
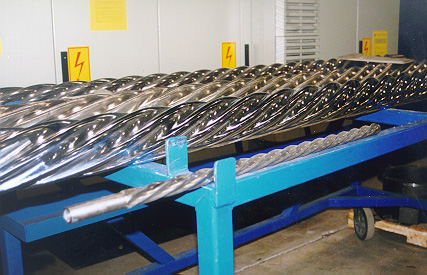
In the past, the company had established a procedure that required four people—one from manufacturing, one from quality control and two from engineering—to dimensionally inspect the fluid power sections after machining. The inspection process for these large, helically curved components—some nearly 20 feet in length—took approximately one hour to gather the dimensional data and manually compare it to the original design created in CAD software. Machine offsets were relayed to the shop floor, where changes were made in the machining process. Another section of the same component was machined, and the inspection process was repeated on this section to determine if the corrections had improved the dimensional accuracy of the workpiece.
“This was a very time consuming process. Plus, we had to restrict our inspection operations to normal business hours since that was when the engineering department was available to compare the measured geometry with the CAD drawing,” Wayne Pilgrim, Weatherford Senior, Project Engineer.
The Solution
In 2005, the company re-evaluated its approach to inspecting these parts with the object of finding a more efficient method of gathering and analyzing dimensional data. Part of that program was the installation of PolyWorks® 3D metrology software from InnovMetric Software, a full-featured metrology software that automates and streamlines many of the operations associated with gathering and comparing dimensional data with design intent.
“Operators have found PolyWorks easy to use. The automated features of the software really set it apart.” Travis Chometsky, Weatherford Product Designer
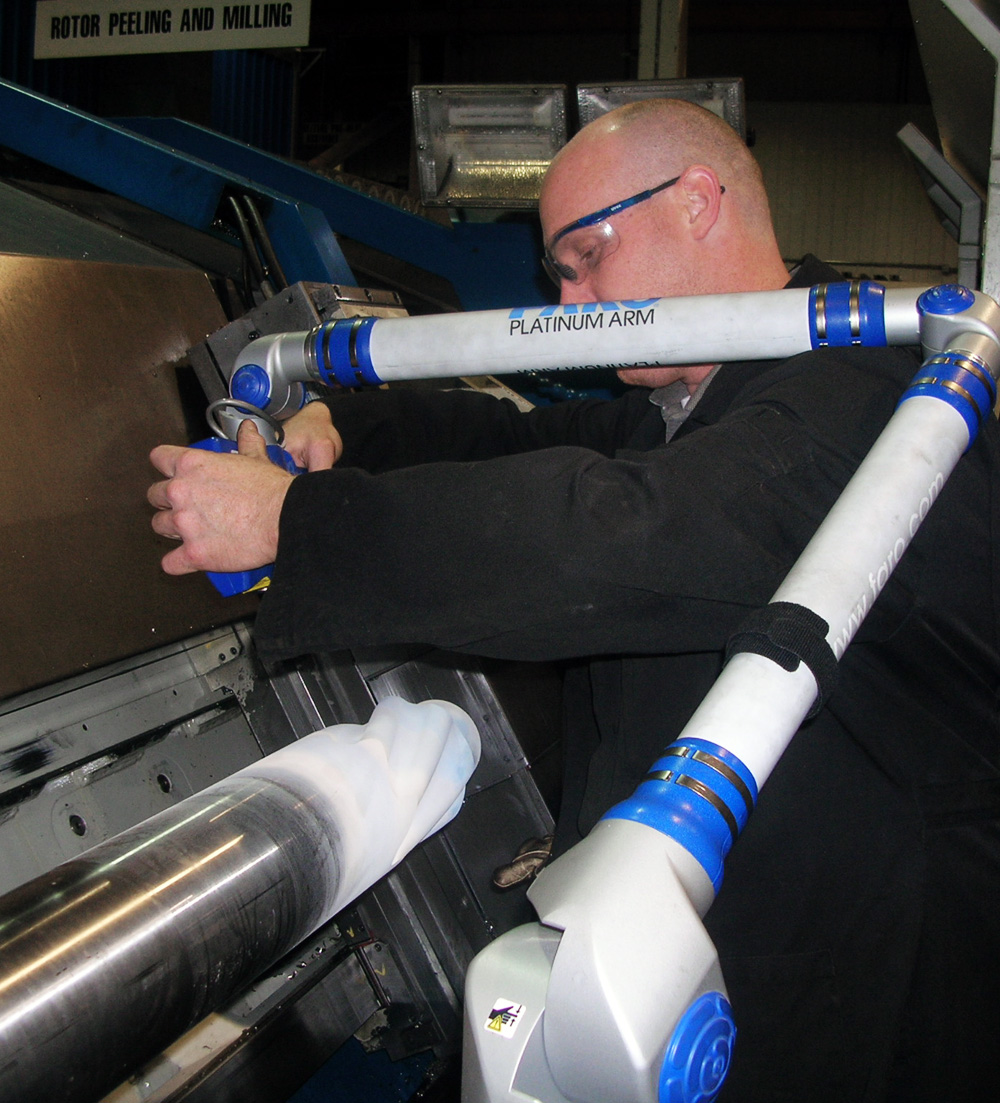
The PolyWorks|Inspector™ software solution is used in conjunction with a FARO Laser Line probe mounted on a high precision Faro Platinum Arm. The hardware/software combination cut inspection and analysis time in half and reduced the number of people required for the operation from four to two. In addition, the manufacturing group can now operate independently and work a 24-hour per day shift.
Collecting Point Cloud Data
In practice, the FARO Laser Line probe collects dimensional data at a rate of up to 19,200 points per second. In the 10 to 15 minutes of the inspection routine for the Weatherford fluid power sections, a point cloud of millions of data points is collected to create a highly detailed dimensional picture of a part feature.
“We let the PolyWorks software do the work—the mathematics—of determining how to take the proper cross section,” Pilgrim said. “Because of its auto alignment capabilities, PolyWorks software assures consistent results, eliminating operator influence during data gathering.”
The company uses an in-process inspection approach on a batch basis. “For example, if a batch of five parts is being produced, operators will perform the PolyWorks / FARO Laser Line probe inspection process on the first piece and then use the same CNC program to make the next four with no PolyWorks / Faro laser inspection,” said Pilgrim. “We inspect the finished product only if it is considered questionable by other inspection methods.”
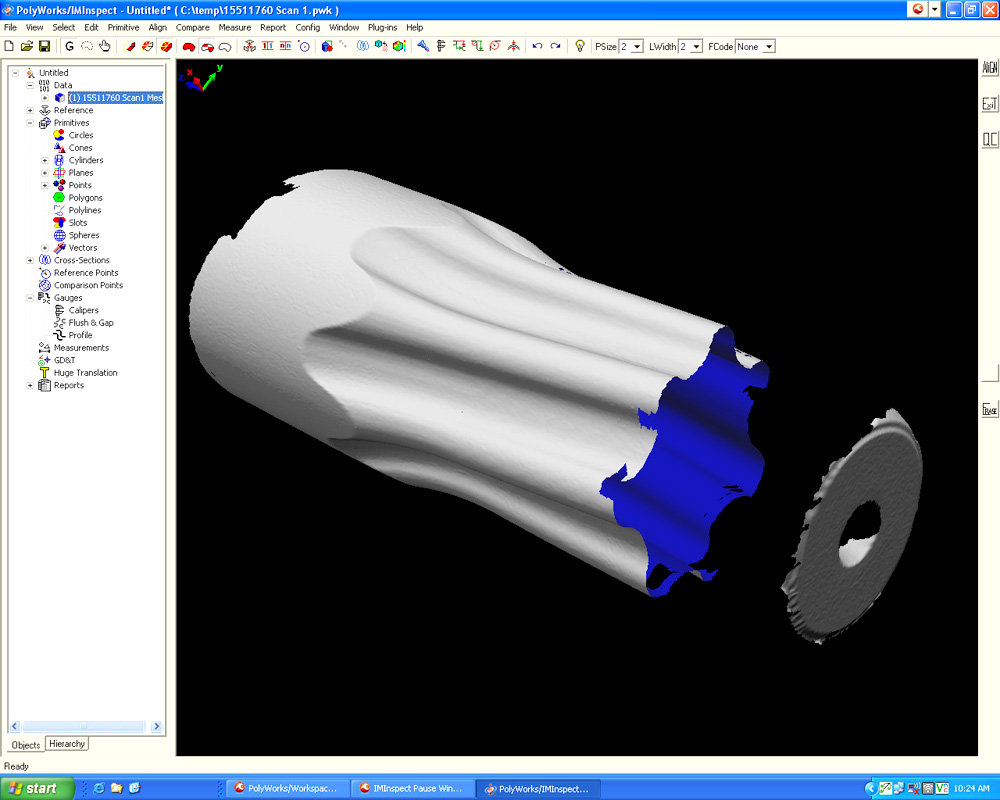
The inspection process for the fluid power section components is always the same. After the first machining cut on a new fluid power section model, a raw data point cloud is collected through the 3D scanning process. From the point cloud, the PolyWorks software creates a mesh that is loaded into the PolyWorks|Inspector module. Using PolyWorks’ data-to-CAD alignment techniques, the operator aligns the mesh with the reference object, a ProENGINEER file imported into PolyWorks, to register both models in the same coordinate system. Once perfectly aligned, the operator specifies a cross-section where the data-to-CAD comparisons need to be performed.
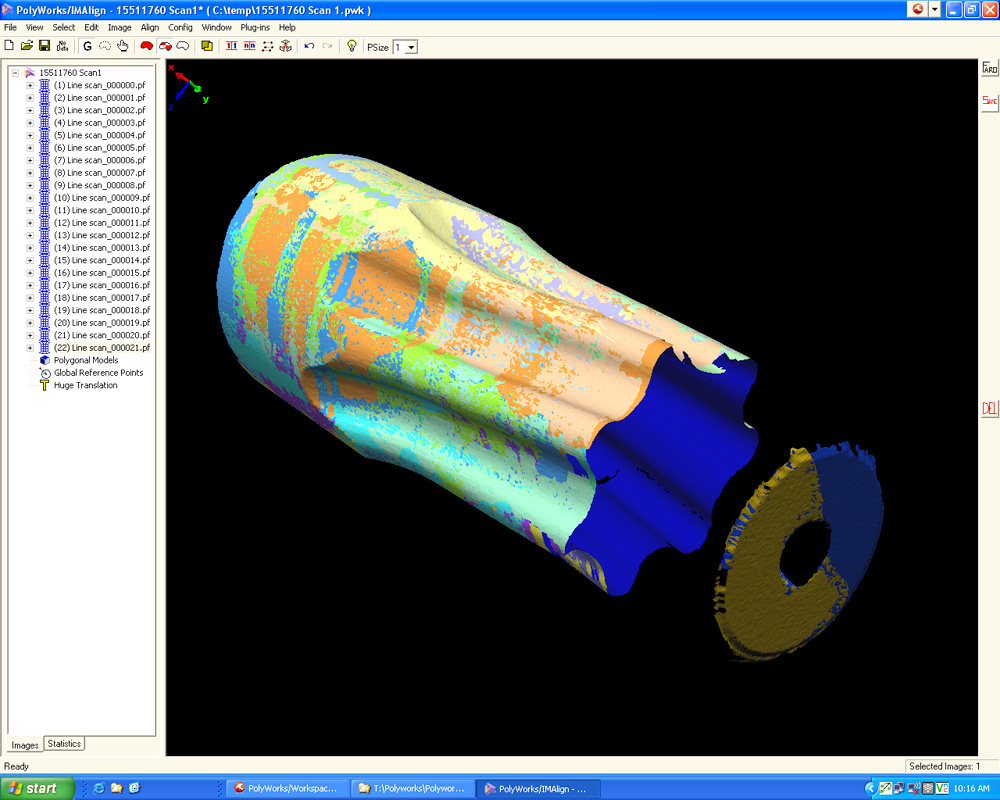
Alignment of multiple scan passes.
The Benefits
For each cross-section selected, PolyWorks automatically compares the data model to the reference (CAD) model and computes a series of measurements including: standard deviation, max error, min error, etc. PolyWorks also creates a PDF report of the results of the data-to-CAD comparison. From this report, the machine operator makes adjustments. Another section is machined and scanned again to determine if the adjustments have brought it closer to design intent.
“You don’t need a lot of programming experience to be able to quickly set up a process. The macro programming language is easy to use and records actions in a command window. We’ve shown that this approach to inspection can save time and money in manufacturing operations and we’re ready to help other departments implement this approach as well,” stated Chometsky. Thanks to powerful macro-programming capabilities, operators do not have to manually perform all of the alignment and comparison tasks in PolyWorks for each new part. In one mouse click, the complete inspection process, from alignment to comparison and report generation, can be automatically performed for every section that is scanned.


