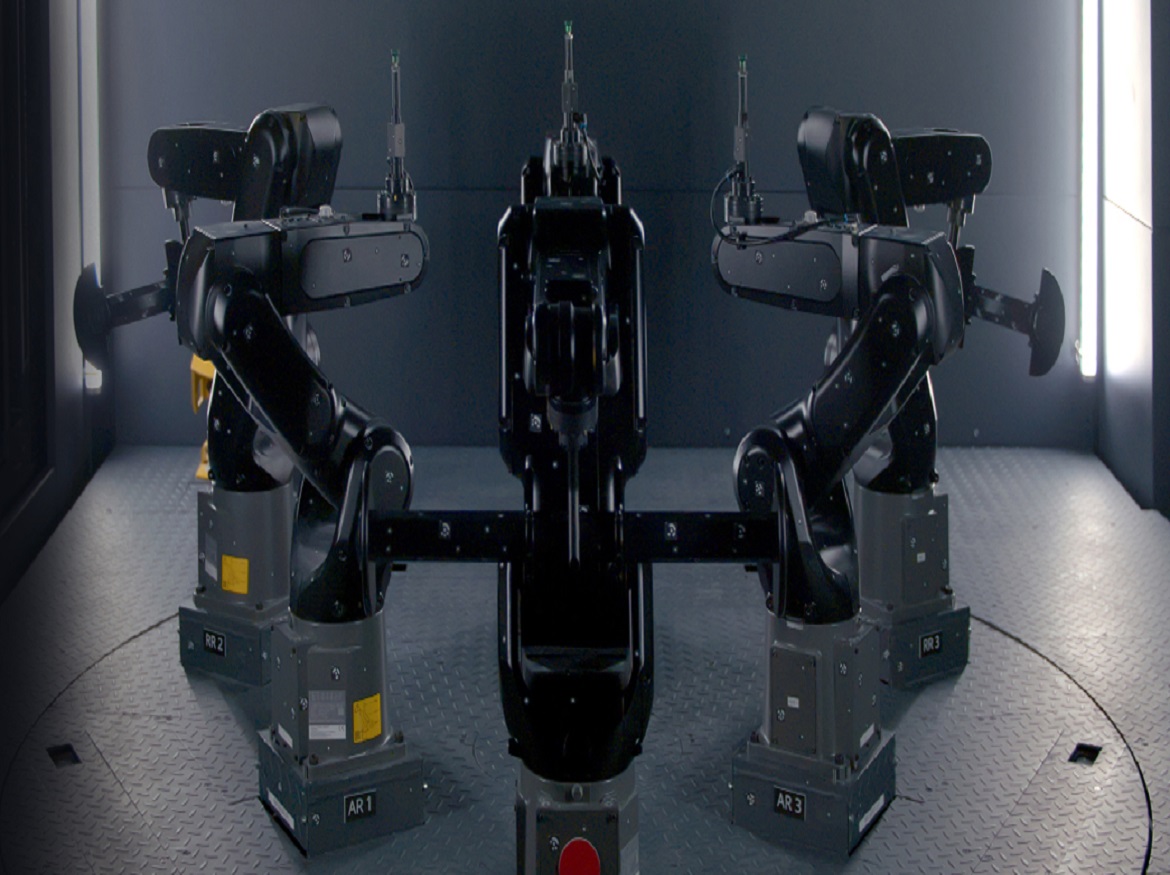
What metrology experts have been dreaming about for decades is coming true with this new development:
The wish to replace mechanical fixtures becomes a reality with PRAFS + Virtual Clamping.
Thousands of different components can be placed on this completely flexible fixture with repeatable accuracy and complete accessibility. Always arrange the component horizontally. The component modification simply needs a brief period of time. There is no need to retool the machinery. Automatic measurement technology is used.
ATOS ScanBox
Fast, automated measurement
The ATOS ScanBox delivers totally automatic surface variances between the nominal and real data during the production and manufacturing process.
PRAFS von P3D
One fixture for thousands of components
The fully flexible, programmable PRAFS component fixture is built on a number of robots; component-specific measuring or clamping devices are no longer necessary.
GOM Virtual Clamping (VC)
Virtual clamping of components
Physical clamping is replaced with virtual clamping (VC), which also computes the surface- and feature-based deviation between nominal and real data and exports the results in various formats.
The perfect upgrade for your 3D measurement technology
The most common materials used in traditional mechanical clamping systems are steel or aluminum. These clamping techniques are no longer necessary thanks to virtual clamping (VC). VC can be completely integrated into a ZEISS ScanBox and is based on a pneumatic holding mechanism that can be used everywhere, such as PRAFS. A virtual clamping device can be used to physically clamp sheet metal, die cast, or plastic components using the algorithms of the ZEISS program “GOM Inspect Pro” and a FEM model of the corresponding component.
With just one pneumatic mechanism, many different components are held in place. The range of component sizes is 300 mm to 2,000 mm. On the PRAFS, the components are placed manually or automatically. There is no need for additional part-specific contact and clamping components.
As a result, additional component-specific fixtures are not needed and operator impact is greatly diminished. Whether photogrammetry or calibration is required, the measurement system decides and starts it automatically.
Changed over in one minute and immediately ready for the next measurement
Money is time! The fixtures themselves should be set up as quickly as possible, of course. A significant portion of the time is spent on providing, assembly/disassembly, retooling, and, of course, logistics and storage. With classic fittings, the largest cost element is unquestionably the fabrication of the various clamping fixtures. PRAFS drastically reduces the time and money needed for this.
The main connection between PRAFS-HMI and the ZEISS software is PRAFS-EMUSIM. A virtual PRAFS clone called PRAFS-EMUSIM enables offline planning, storing, and management of PRAFS robots.
PRAFS
The perfect upgrade for your 3D measurement technology
With PRAFS, the level of automation/digitalization and, thus, repeatability can be greatly increased. This has a specific impact on the frequency of measurements along a production line, in the measuring room, and in tool or prototype construction. The expenses associated with designing, producing, and storing component-specific physical measuring devices, and modifying measuring fixtures are removed.
Your advantages!
- Higher repeatability (reproducibility)
- Increased flexibility and variability
- Extremely short setup times
- Offline programming of the PRAFS setups
- Measurement by a metrology expert or worker
- The operating time is much more effective
- Easy, fast change management
- Storage of several thousand PRAFS setups
Click on the following link Metrologically Speaking to read more such blogs about the Metrology Industry.


