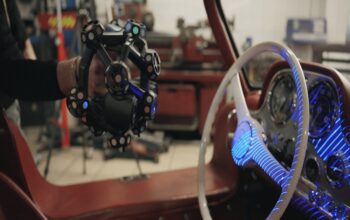
Brake discs are among the safety-relevant components in the vehicle and must withstand several million braking operations without damage. For this reason, EV car manufacturers must ensure that the components do not have any defects, such as cracks in the material, and should be within tight dimensional specifications when they are installed in the vehicle to minimize the risk of accidents, and to improve noise, harshness, and vibration (NHV) performance. However, quality testing of brake discs has been challenging up until now. Because the inspection systems often work with contact sensors and can only inspect one side at a time, two machines are usually required for a complete inspection, which unnecessarily lengthens the quality inspection process. Although the inspection systems are often supplemented with matrix cameras, these only ensure a 2D inspection, which means that superficial and possibly harmless cracks or dust particles cannot be distinguished from deeper defects. In contrast, DWFritz’s ZeroTouch® metrology and inspection platform uses 3D scanners that measure the brake disc in a single inspection process lasting just a few seconds while the analysis software creates a digital twin based on the measurement of millions of data points. The system can be integrated directly into the production line and can operate without much intervention, eliminating time-consuming loading and unloading processes.
As major car manufacturers such as VW plan their EV roadmap, vehicle brakes will have to meet much higher standards. EV motors deliver significantly higher torque to the drive train, because of which cars have rapid or superior acceleration. To ensure vehicular and pedestrian safety, it is imperative that brake discs are of superior quality to enable safe braking distances, which is a key metric. Maintaining tighter tolerances in 3D enables superior manufacturing that in turn gets better braking distances, and improved NHV performance. Surface defects on brake discs are currently inspected by a combination of manual and associated inspection instruments, which can result in quality escapes. Since brake discs rotate at a particularly high speed, even the smallest geometric errors on these components can lead to vibrations and an adverse NHV profile. The result is lower effectiveness and higher wear, which in turn negatively affects driving safety.
Brake disc inspection used to require several machines
Until now, manufacturers have faced major challenges with the quality inspection of brake discs. ”Tactile sensors and 2D cameras are commonly used to inspect the geometry,“ reports Dave Mendez, general manager and vice president of the ZeroTouch business unit at DWFritz Automation. “However, conventional touch sensors are not capable of inspecting both sides of the brake disc at the same time.” Therefore, to accomplish this, two machines are installed one adjacent the other. In addition, the sensors can only randomly inspect the brake discs by following a discrete circular line on the brake disc and checking it for material defects. Hence, there is a risk of defects being overlooked, as the inspection device only checks a limited part of the surface. The same applies to the subsequent inspection using matrix cameras: Since the visual inspection systems only record the surface in two dimensions, a manual visual inspection by a quality management (QM) employee is usually still necessary to determine if the pores, dents and scratches on the surface are negligible or the brake disc must be treated as a defective part.
Operating multiple inspection systems also requires more labor and time. The positional calibration of the machines must be particularly accurate so that the measurement of parameters such as brake disc thickness or parallelism of the same test part is as precise as possible on both systems and the underlying reference system. A reference system is the base coordinate system in relation to which the part measurements are made. Key reference features are used as datums across multiple machines, and these enable measurements to be matched up or be properly calibrated. In addition, the loading and unloading process often has to be carried out manually. Finally, the machines are supplied with touch sensors, 2D or QR code cameras from various manufacturers, which doubles the effort, starting with the ordering of the equipment and ending with training and regular maintenance.
Non-contact inspection process generates digital twin from millions of data points
So how can the precision of the inspection process be optimized while reducing the time and effort required? DWFritz Automation, a U.S.-based developer and manufacturer of equipment for automated, high-speed non-contact inspection, has adapted its ZeroTouch® measurement platform specifically for the inspection of brake discs. The ZeroTouch Rotational (ZTR) Metrology system checks all relevant parameters in a single inspection process and can be integrated directly into the production line with an optimal footprint. All process steps can be automated, including the loading/unloading of the part into ZeroTouch. The brake disc is loaded into the system by a pneumatic loader, gantry system, or by a robot and is positioned on the measurement platform. This platform rotates as multiple sensors scan the brake disc from various sides during the measurement process. ”In order to be able to check the brake discs as precisely as possible for defects, we use up to 6 strategically positioned non-contact sensors,“ explains Mendez. ”These scan the brake disc and create a 3D model accurate to the micron within just 20 seconds, based on the measurement of millions of data points.“
Industry-proven analysis software then compiles an accurate 3D model of the brake disc based on the measurements from the individual scanners. This is checked in real time for geometric errors or defects on the surface by comparing the test object with a reference model. During this process, flatness and parallelism, or waviness, are checked, and even deeper damage is reliably detected. The very precise measurement process also ensures that dust particles, for example, are identified to eliminate confusion with superficial defects, which reduces false alarms. If there are excessive differences between the nominal and actual values, the system issues a warning and automatically sorts out the defective part, thus reducing the probability of installing a faulty brake disc to virtually zero.
Space savings through fewer inspection systems
By inspecting all important parameters in a single operation, and with the ability to analyze multiple SKU’s with various shapes and sizes, ZeroTouch eliminates the cost of purchasing multiple additional machines. Conventional measurement methods use at least two systems, tactile or otherwise, as well as a system with matrix cameras. ”ZTR offers our customers the best return on investment for in-line production for brake discs, while keeping a small floor footprint, and high throughput, Mendez explains. “It is also well suited for offline inspection applications, where for heavy parts, ZTR can be outfitted with a pneumatic part loader/unloader.” The time savings are also noticeable during commissioning, as employees only have to operate and, if necessary, maintain a single system. In case of queries, a competent contact person is available from DWFritz, so there is no need to contact several manufacturers at the same time and coordinate time-consuming appointments with technicians for potentially more complex machine problems or maintenance tasks.
Another advantage is the lower susceptibility to errors and high repeatability compared to conventional testing methods. Since ZeroTouch scans the test part completely in one measuring process, the brake disc does not have to be repositioned, unlike systems relying on contact sensors, which subsequently results in time savings and a lower risk of error. ”Our objective was to develop a system that can quickly and reliably distinguish incorrect parts from correctly produced parts in a single inspection process, with as little additional effort as possible for the manufacturer. We succeeded in doing this with the ZeroTouch Rotational Metrology platform,“ Mendez concludes.
Further information on ZeroTouch can be found on the company’s website at www.dwfritz.com.
Established in 1973, DWFritz Automation designs, builds, and supports engineer-to-order automation systems and high-speed, non-contact metrology products, in addition to providing world-class build-to-print manufacturing capabilities to clients. DWFritz Automation is part of The Sandvik Group of companies.
Image material:
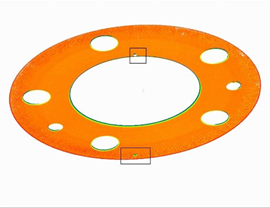
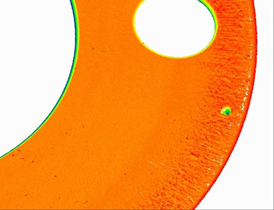
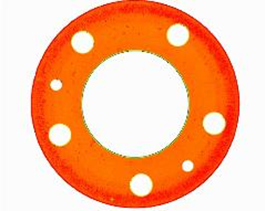
Image-ID: disc-brake-defect-2.jpg, disc-brake-defect-3.jpg, disc-brake-defect-4.jpg
Caption: Brake discs are among the safety-relevant components in the vehicle and must withstand several million braking operations without damage. For this reason, car manufacturers must ensure that the components do not show any defects, such as cracks in the material, when they are installed in the vehicle in order to minimize the risk of accidents.
Source: DWFritz Automation
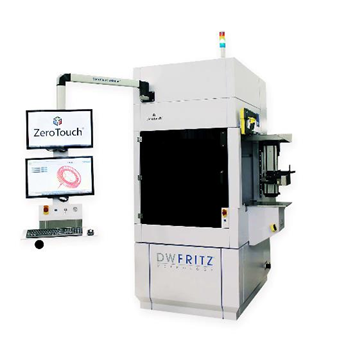
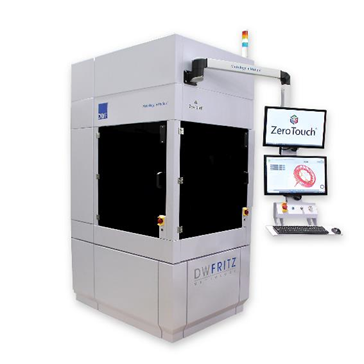
Image-ID: zerotouch-ztr-hero-left.jpg, zerotouch-ztr-hero-right.jpg
Caption: DWFritz Automation, a U.S.-based developer and manufacturer of equipment for automated, high-speed non-contact inspection, has adapted its ZeroTouch measurement platform specifically for the inspection of brake discs.
Source: DWFritz Automation
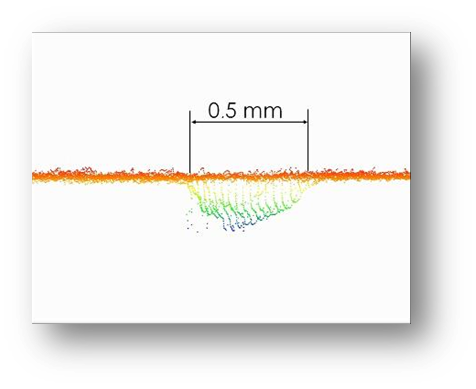
Image-ID: disc-brake-defect.jpg
Caption: A high resolution zoomed image showing a surface defect captured by ZTR.
Source: DWFritz Automation
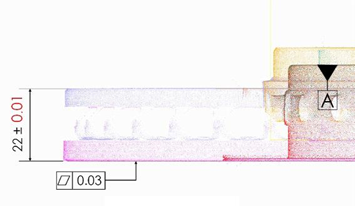
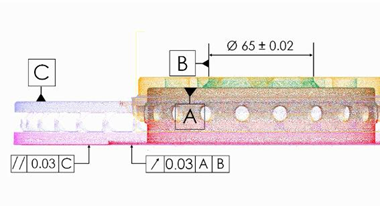
Image-ID: disc-brake-dimensional.jpg, disc-brake-dimensional-2.jpg
Caption: Image depicts a high-density point cloud of a part of the brake disc overlayed by GD&T’s of critical dimensions being measured by the ZeroTouch Rotational Metrology Platform.
Source: DWFritz Automation
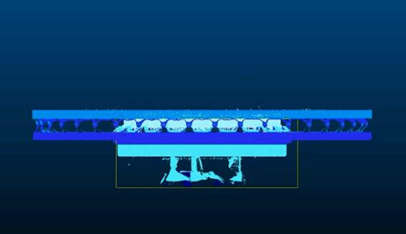
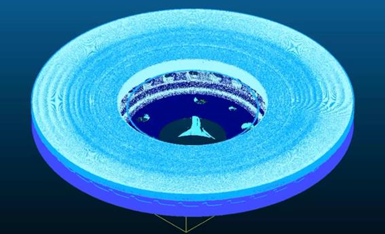
Image-ID: point-cloud-1.jpg, point-cloud-2.jpg
Caption: DWFritz’s ZeroTouch metrology and inspection platform uses 3D scanners that measure the brake disc in a single inspection process lasting just a few seconds while analysis software creates a digital twin based on the measurement of millions of data points.
Source: DWFritz Automation
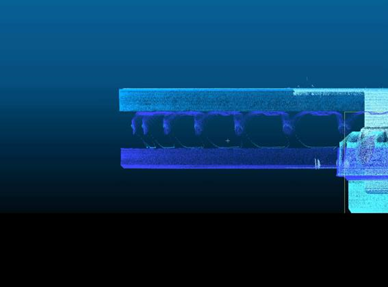
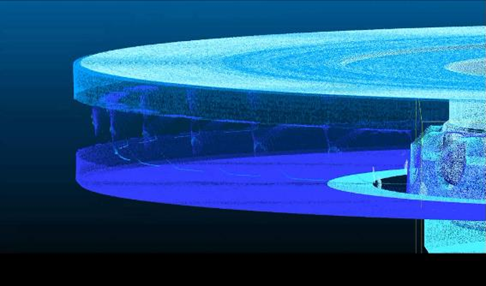
Image-ID: point-cloud-3.jpg, point-cloud-4.jpg
Caption: Industry-proven analysis software then compiles a 3D model of the brake disc based on the measurement point clouds from the individual scanners. This is checked in real time for geometric errors or defects on the surface by comparing the test object with a reference model.
Source: DWFritz Automation


Image-ID: point-cloud-5.jpg, point-cloud-6.jpg
Caption: During the inspection process, flatness and parallelism, or waviness, are checked, and even deeper damage is reliably detected. The very precise measurement process also ensures that dust particles, for example, are identified to eliminate confusion with superficial defects, which reduces false alarms.
Source: DWFritz Automation
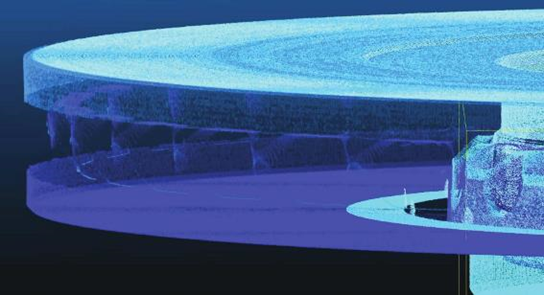
Image-ID: zerotouch-brake-point-cloud.jpg
Caption: If there are excessive differences between the nominal and actual values, the system issues a warning and automatically sorts out the defective part, thus reducing the probability of installing a faulty brake disc to virtually zero.
Source: DWFritz Automation
More information for readers/viewers/interested parties:
DWFritz Automation
9600 SW Boeckman Road, Wilsonville, OR 97070, USA
Tel: (800) 763-4161 or (503) 598-9393
Email: info@dwfritz.com
Online: www.dwfritz.de
More information for editors
ABOPR Pressedienst B.V.
Stefan-George-Ring 19, 81929 Munich (Germany)
Tel.: +49 (0)89 500315-20, Fax: +49 (0)89 500315-15
Email: info@abopr.de
Online: www.abopr.de


