Ensuring that measurements aid the broader industrial and scientific communities that depend on them.
New employees at the National Institute of Standards and Technology (NIST) are often surprised to learn that our agency is part of the U.S. Department of Commerce. How could this be? On the surface it seems that the missions of the two organizations couldn’t be more different. The Department of Commerce would appear to be concerned with, well, commerce, while NIST is well known for its Nobel Prize-winning scientific and technological work.
But the connection can be explained through our agency’s mission statement: “To promote U.S. innovation and industrial competitiveness by advancing measurement science, standards, and technology in ways that enhance economic security and improve our quality of life.”
One of the primary ways we fulfill our mission is through the delivery of calibration services. A simple and simplified example of a calibration is the calibration of a mass scale. To calibrate the scale, you weigh an object of a known mass (called a “calibration artifact”) and adjust the scale until it reads out the same amount of mass you put on it. Although actual calibrations are much more involved than that, this is their essence. We offer a wide variety of calibrations, including measurements of familiar quantities like mass and time as well as lesser known but equally important quantities like thermodynamic and optical properties.
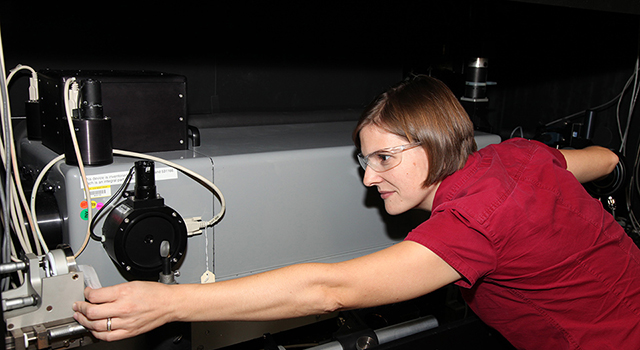
In the lab making an adjustment to the Reference Transmittance Spectrophotometer (RTS). The RTS is the national reference instrument for regular spectral transmittance measurements of nonfluorescent samples at room temperature. Credit: G. Cooksey/NIST
Organizations that depend on these calibrations include state weights and measures laboratories (the people who ensure fair commerce by testing things like gas pumps and grocery scales), military and defense agencies, national laboratories, manufacturers, universities, and technology industries. These groups rely on us to provide well-characterized measurements of their calibration artifacts, which they can use to verify the accuracy and precision of their own instruments, thereby creating an unbroken chain of calibrations to specified reference standards, such as the International System of Units (SI). Those who can demonstrate this chain of calibrations, or traceability, earn the confidence of their customers because they know the stakeholder does work based on quality measurements.
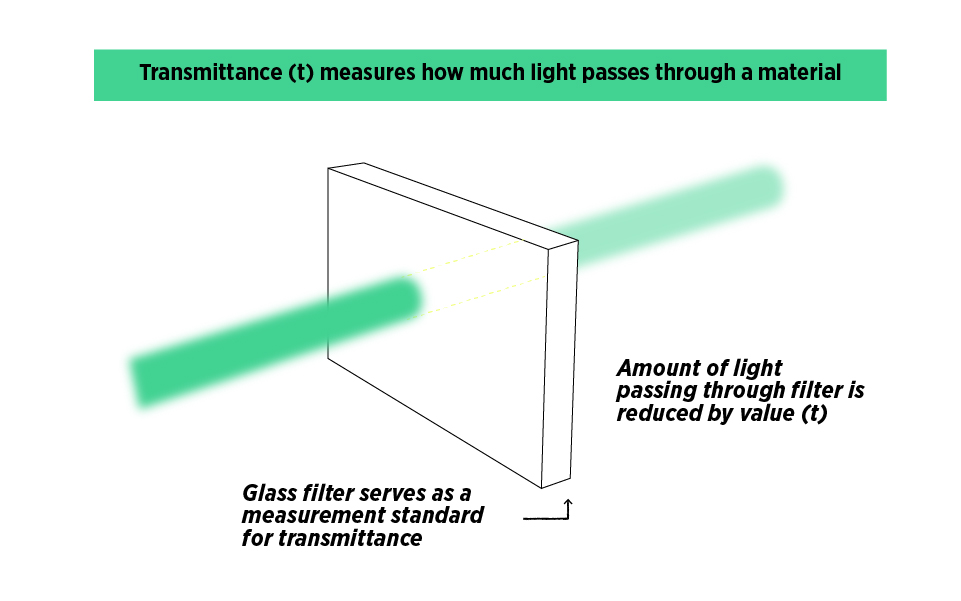
My job at NIST involves managing and providing the calibration service for an optical quantity called transmittance. Transmittance is a measure of how much light passes through a material. These measurements are important for a wide variety of science and technology applications, such as development of thin films and coatings; glass and instrument manufacturing; development of remote sensing technology; and diagnostics for chemical, biological, and pharmaceutical analysis.

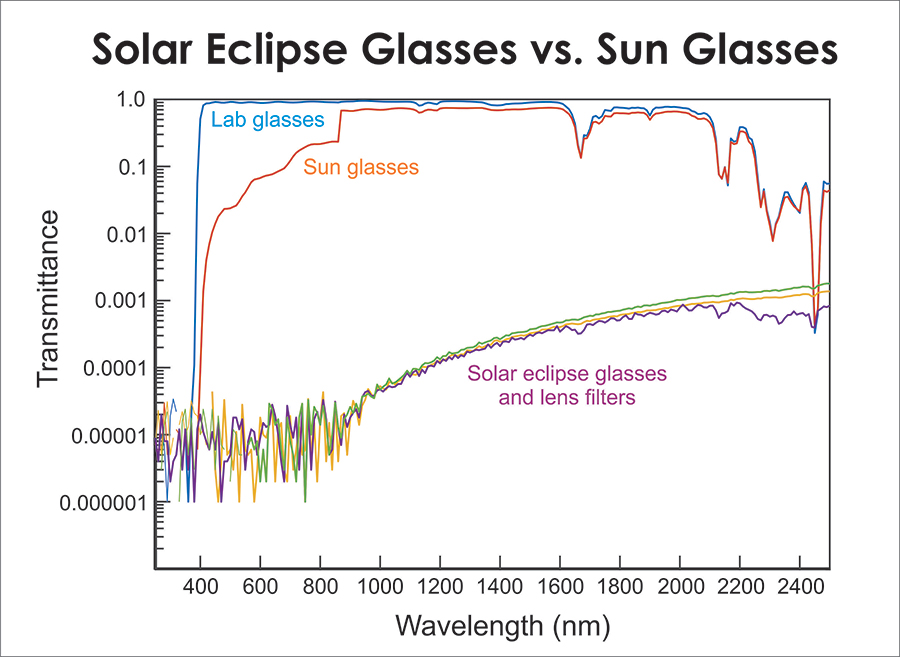
The transmittance spectrum of clear lab glasses, typical sunglasses, and solar eclipse glasses that I collected in 2017. The material and/or coating in sunglasses are designed to reduce the amount of light, or brightness, that your eyes see. A transmittance spectrum would also show that sunglasses block a significant amount of light in the UV wavelengths compared to the visible wavelengths. Solar eclipse glasses hardly let any light through at all. Credit: C. Cooksey/NIST
A common product that makes use of my work are sunglasses. The sunglass material and/or coating is designed to reduce the amount of light, or brightness, that your eyes see. A transmittance spectrum would also show that sunglasses block a significant amount of light in the UV wavelengths, which are harmful to your eyes.
Calibration providers like me take pride in the measurements we provide. We work diligently to make sure that the quality of the measurements is high, and the uncertainties associated with those measurements are tolerable for our customers. Even though transmittance measurements are not as well known to the public as mass or time measurements, I still find great satisfaction in delivering the calibrations that my stakeholders depend on, and that contribute to U.S. innovation and industrial competitiveness.
One of the greatest opportunities that NIST calibration providers have is to participate in international measurement comparisons with NIST’s counterparts. These comparisons give NIST and other countries the chance to determine if our measurement scales agree with one another. Agreement between measurement scales is important because it gives countries confidence in the products they buy from one another. For example, when the United States exports corn to Mexico, that country has confidence that the amount of corn it receives, in terms of mass, is correct because a kilogram measured in the United States is the same as a kilogram measured in Mexico.
The comparison of international measurement scales is organized by the Bureau International des Poids et Mesures (BIPM), which is located in a southwestern suburb of Paris. The BIPM uses a framework described in the Mutual Recognition Arrangement (MRA) of the International Committee for Weights and Measures (CIPM) that has been signed by more than 100 institutes from around the world, including NIST.
The framework outlines a system of comparisons that are overseen by BIPM’s Consultative Committees, which are composed of technical experts from around the world. The committees arrange comparisons for key measurement quantities at two levels. The first level is the key comparison, which includes a limited number of countries. Its primary purpose is to establish the key comparison reference values (KCRVs), the scale everyone needs to measure against to make a meaningful comparison. The second level is the regional comparison. These comparisons have wider participation, although they are often focused on a particular region of the world, such as the Americas. Regional comparisons thus serve to more broadly link the participants’ results to the KCRVs from the key comparison.
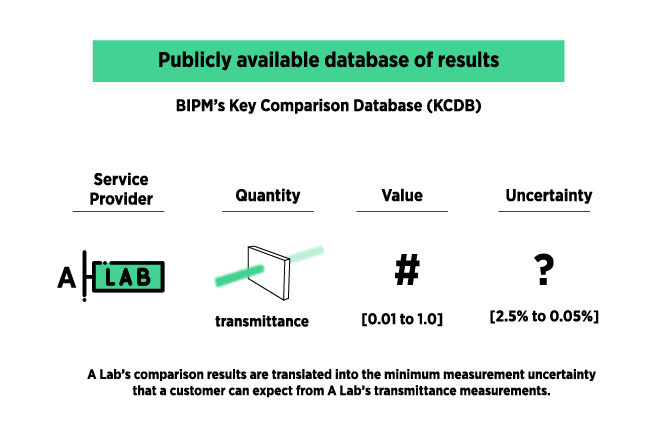
In this way, participating countries determine how well their measurement scales agree with other countries. The quantification of their agreement with the KCRV is called degree of equivalence. The BIPM publishes a database that lists the degrees of equivalence, and its corresponding uncertainties, for each country’s measurement capabilities. This is how, for instance, we know that a kilogram measured in the United States is the same as a kilogram measured in Mexico.

Credit: B. Hayes/NIST
My personal experience with an international comparison of measurement scales began in 2011. Planning for the key comparison of the transmittance scale was in full swing, and I participated as a member of the task group responsible for developing the protocol for the comparison measurements. This task is critical because comparisons are infrequent, typically occurring on a 10-year cycle, and the comparison must produce unambiguous results for a set of meaningful parameters.
Technical issues with the glass filters that would serve as the standards for the comparison delayed the start of the measurements until 2013. I completed two rounds of measurements, the first in early 2013 and the second in late 2013. This was the fun part of the comparison. Every day of measurement was exciting. The measurement process itself felt familiar. Because transmittance is the measure of how much light passes through a material, it is a combination of two measurements: how much light you shine on a material, and how much light you measure coming through the material. The ratio of those two measurements is the transmittance. However, my awareness of the importance of the measurements and their results to NIST’s international standing was acute.
The measurement phase of the comparison was followed by a lengthy period of data analysis, documentation, and review. There was a tremendous amount of data to process and keep track of for the country managing the comparison. Results had to be communicated clearly to non-native English speakers, and responses to inquiries and reviews often took more time than expected. But it was a happy day for all the participants when the final results were published in early 2017.

Credit: B. Hayes/NIST
Following the completion of the key transmittance comparison, I led the regional comparison among Brazil, Colombia, Mexico, Taiwan, China, Thailand, Canada, and the United States. Both Canada and the United States served as the “linking” laboratories that link the regional comparison results to the key comparison results so that all the results are on the same scale. This effort required me to do many more measurements, have a more detailed understanding of the data analysis, and do a significant amount of communicating with my regional counterparts. The measurements were completed primarily in 2017. The report is in the final stages of review and will likely be published in 2021.
Participation in both the key and regional transmittance comparisons has given me the opportunity to deepen my knowledge of how to make high quality transmittance measurements. I have learned more intimately how the measuring instrument works, what factors contribute to the measurement uncertainty, and how to assess and estimate uncertainties.
It has been a gratifying and eye-opening experience to participate in these comparisons. I have enjoyed meeting and working with my colleagues from around the world, all of whom use their expertise to ensure that measurements aid the broader industrial and scientific communities that depend on them. It is far beyond what I learned in graduate school. Then, measurements were important for validating hypotheses and establishing oneself as a scientist. Now, I know that high quality measurements are critical for underpinning our economic transactions and propelling innovation.
ABOUT THE AUTHOR

Catherine Cooksey
Catherine Cooksey is a research chemist in the Sensor Science Division at the National Institute of Standards and Technology (NIST). She is responsible for maintaining the national scale for transmittance as well as conducting and managing transmittance calibrations. In 2018, she received a NIST Bronze Medal Award for establishing an accurate database of human skin reflectance measurements for wavelengths ranging from the shortwave infrared to the ultraviolet spectral region and a Judson C. French Award for vastly improving the NIST reflectance measurement services. Additionally, Cooksey serves as division quality manager. She has a Ph.D. in chemistry from the University of Washington in Seattle.


