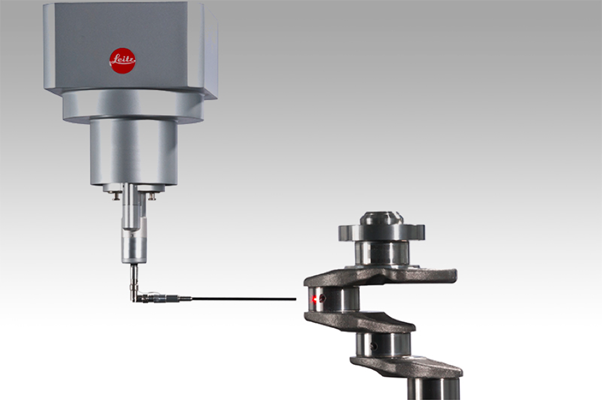
For a coordinate measuring machine to operate with maximum efficiency, each of its components must work in tandem to accurately measure the physical geometry of an object. As the development of these machines continues to evolve, advanced measuring components and features offer new possibilities for increasingly complex metrology needs.
One of the most recent and significant advancements in CMM development is the conception of the non-contact CMM. As its name implies, non-contact CMMs boasts the unique ability to measure objects with lasers, imagery or sensors, instead of direct contact. This technology provides manufacturers with a dynamic, thorough, and efficient way to measure the geometry of fragile or intricate objects.
The popularity of these machines continues to rise across various industries due to their reduced inspection time and lowered manufacturing costs. Its ability to rapidly collect data and comprehensively collect points on an object allows users to obtain detailed and accurate information about complex surfaces.
Whether you’re searching for a new or used machine, looking to upgrade your system, or in need of repairs or measuring services, our team of metrology specialists at CMMXYZ can help you with all of your non-contact CMM needs.
We’re proud to be North America’s leading independent measurement solutions provider. Learn more about the details of non-contact CMMs, their essential components, the variety of models available, and the right time to use them.
What is a Non-Contact CMM
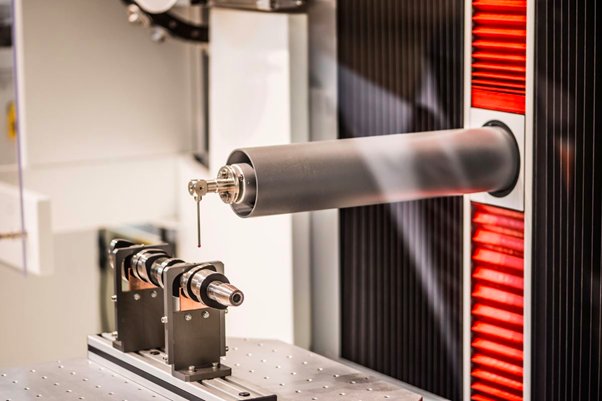
A non-contact CMM is a coordinate measuring machine that can determine the geometrical measurements of an object without ever making contact. This metrology platform uses cutting-edge sensor systems that hold lasers or cameras, specific software and lighting tailored to the application. Non-contact CMMs are growing in popularity for their flexibility and rapid processing rate.
Unlike non-contact CMMs, traditional coordinate measuring machines use mechanical probes to detect the measurements of an object. While mechanical probes are effective, reliable, and provide the most accurate measurements, non-contact CMMs are a favourable choice for measuring fragile items or objects requiring measures from a variety of unique angles. Some objects are unable to withstand a mechanical probe without becoming damaged, which is why non-contact machines are often used as a helpful alternative.
Non-contact CMMs are also available as portable devices. Portable arm systems traditionally carried only a probing system — but over the past few years, they now carry a laser for measurement on the shop floor, where rapid data collection is required. This makes them ideal for higher valued parts, including turbine blades or medical implants.
Essential Parts of a Non-Contact CMM
The parts of a CMM can range in size and functionality. However, they’re all designed to work together simultaneously to capture the shape of an object accurately. Every facet of a non-contact CMM is integral to the functionality of the device.
The Structure
The structure of any CMM measuring unit is its foundation, and the same rings true for the innovative, new non-contact machines. In the early days, the base of a coordinate measuring machine was primarily steel and granite. As the technology advanced, the materials to build the structure followed suit. Builders now incorporate supplementary materials like ceramic and silicon carbide.
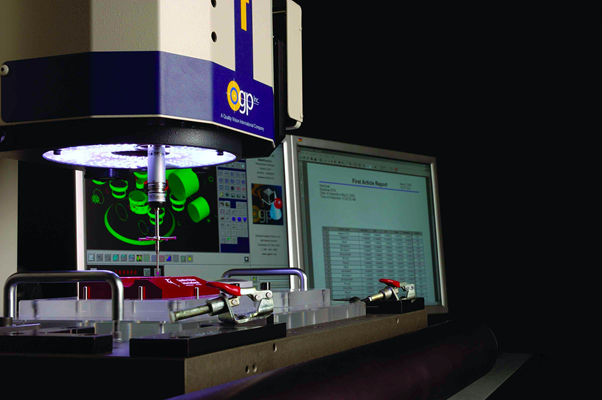
Video measurement CMMs or optical measurement CMMs incorporate the movable X, Y and Z table where the component resting surface is glass. This allows light to pass through the perimeter of the part and can be easily measured by the camera system mounted on the z-axis. Because of the addition of laser probes and touch probes, and the basic camera system, these machines are now termed multi-sensor measurement machines. They can switch between probing systems as the need arises.
The Probes
Non-contact scanning is an advanced measuring method that offers manufacturers more flexibility in their metrology ventures. Looking back at the history of CMMs, this technology has come a long way from the initial two-axis measuring machines from 60 years ago. In recent years, the advancement of CMMs has grown exponentially to include portable and non-contact machinery.
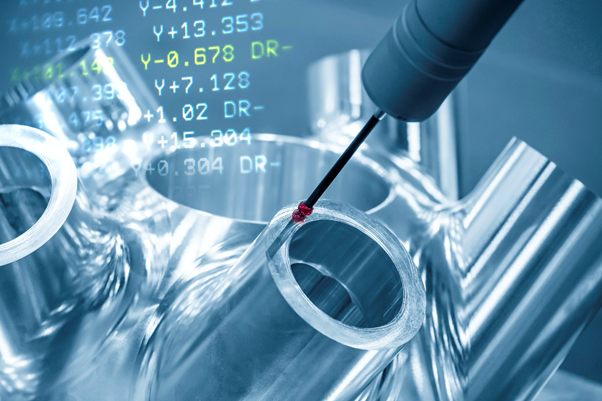
Non-contact probes can capture thousands of points, providing accurate measurements without compromising the structural integrity of the object in-use. These probes are designed to measure the geometry of an object without ever coming in direct contact. Using this advanced probe technology involves the point triangulation of high-speed lasers, laser lines and white light scanning.
Laser Scanning Probes
Laser scanning probes use a laser to examine the dimensions of an object and digitally reflect them. Like touch-trigger probes, laser scanning probes calculate subtle points without ever making direct contact with the item. Lasers are often a popular choice among manufacturers for their flexibility and their ability to fit into any type of CMM.
White Light Scanning
On the other side of the equation, white light scanning can accumulate data faster than any other piece of metrology technology. Smaller components will benefit from these scanners since their system can be automated for consistently accurate measurements. This portable measurement tool can also handle a large volume of objects that require continuous and repeated inspection of one part of the product.
The Controller
A CMM controller aims to maintain accuracy and intricacy by identifying and housing the machine’s mathematical error map. The controller directs information from the laser or scanner to the software, allowing for variable running speeds for non-contact CMMs.
The Software
The software used for non-contact CMMs is vastly different from what you would find with traditional machinery. Programs for non-contact CMMs like laser scanner software are advancing, as the machine itself comes with a unique set of data and measurement standards.
Non-contact CMM software can create measurement plans that can be set up efficiently to inspect multiple parts of an object.
Contact vs. Non-Contact CMMs
Coordinate measuring machines have existed for more than 50 years. Since that time, these machines have continued to advance in size and capabilities. As their quality and innovation continue to strengthen, more and more customers are considering non-contact CMMs for their precise metrology needs.
Investing in the right technology is a critical component of the manufacturing process. When choosing the best equipment, manufacturers can decide between contact and non-contact CMMs. Each machine operates with its own unique features and comes with its own set of benefits and drawbacks.
Newer coordinate measuring machines now offer multi-sensor capability to switch between the touch probe, a laser probe or a camera system through a probe change rack mounted on the machine bed. The new geometric software packages allow a complete hands-free exchange of various probe types without operator intervention.
Traditional Contact CMMs
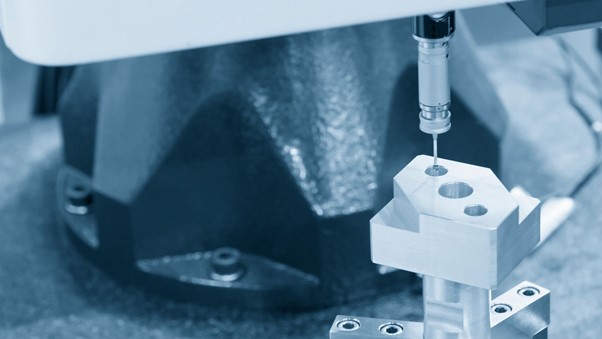
The traditional CMM directs the touch probe to make direct contact with the object being measured. Touch probes are highly sophisticated devices triggered by the deflection of the stylus when the part is contacted. Touch probes are highly accurate and are the mainstay of the modern coordinate measuring machine.
Scanning probes are now becoming much more sophisticated in that they embody optical sensing within the probe body. This measures the bending moment as the stylus makes contact with the part and allows the machine to guide the probing system while maintaining full contact with the part. Here, hundreds of data points per second can be measured this way to an extremely high degree of accuracy.
Traditional CMMs offer highly accurate measurements, which many manufacturers will benefit from. With the advent of scanning probe systems, they now can measure components on a non-contact basis.
Non-Contact CMMs
Non-contact measuring methods are growing in popularity across North American industries. Automotive manufacturers, aerospace engineers, and medical technicians are all being drawn to non-contact CMMs due to their rapid measuring software and their ability to adapt to complex surfaces.
Since non-contact sensors measure surfaces with zero physical contact, it allows the measuring machine to measure delicate or malleable objects for high-volume applications. Non-contact CMMs gather thousands of data points per second, allowing the manufacturer to better picture a component’s adherence to specifications.
Types of Non-Contact Sensors
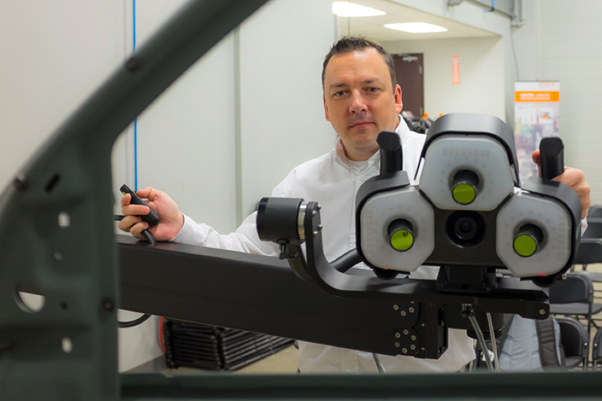
Sensors are an essential component of non-contact CMMs because they allow for accurate monitoring, detection, and reaction to specific and often sensitive objects. Non-contact sensors are able to function without making physical contact with the item, ideal for breakable or malleable products. These sensors typically rely on white light or camera systems rather than physical contact. As the demand for non-contact CMMs increases in industries ranging from automotive to aerospace, there are three commonly-used sensors used to operate non-contact machinery.
Laser Scanning
Laser systems are designed to measure complex and sensitive objects with maximum precision when mounted on a CMM. This allows the CMM operator to switch between the touch probe system and the laser making the CMM a multisensor system. This is especially helpful when large surfaces must be measured and quantified.
New laser scanners are continuously undergoing development to meet the unique and growing needs of manufacturers. Because most components are designed on CAD, there is an increasing need to scan large areas with radical transitions and present visual answers in point cloud data. 3-D laser scanners obtain data utilizing a laser stripe that sweeps over the part being measured. They work exceptionally well on all surfaces being measured, irrespective of the surface itself, regardless of matt or shiny surfaces.
White Light Scanners
White light scanners are becoming increasingly popular when measuring components that require a high degree of accuracy. They are typically tripod mounted with the part being measured, located on a rotary table. For high detailed scans, white light is absolutely the way to go on smaller components. Furthermore, this type of scanner is not typically mounted on the z-axis of a coordinate measuring machine. Still, there are examples of this type of implementation on the market today.
Optical Sensors
Optical sensors are setting a new standard for optical measurements, especially when it comes to con-contact CMMs. They offer customers additional benefits, including advanced precision and measurement flexibility for challenging surfaces.
These sensors are commonly used to measure industrial applications. Several models use white light lasers to measure matte, coated, and reflective surfaces. These versatile sensors are also ideal for measuring objects with plastic, glass, and additional transparent materials.
Vision Sensors
Video sensors are becoming increasingly popular because of their ability to quickly measure parts that conventional coordinate measuring machines cannot. This is due to extremely small feature sizes or small flat parts that touch probes cannot reasonably measure.
Many video coordinate measuring machines utilize a CCD camera combined with an LED lighting source to provide maximum contrast to components that cannot be accessed by conventional touch probe technology. Indeed, for a small part measurement (less than 300 mm in X and Y), they are the fastest and most accurate method currently being utilized.
When to Use a Non-Contact CMM
Medical Devices
As the demands of the medical industry evolve, technology must evolve along with it. The need for precise and detailed measuring devices is growing rapidly, and non-contact CMMs are becoming increasingly popular in the medical industry. Medical devices are becoming smaller and more complex in shape, which means traditional CMMs and their contact probes can compromise the structural integrity of these sensitive devices.
Non-contact video and multi-sensor systems offer optimal measurements for sensitive objects with complex surfaces, including implants and prostheses. The intricacies of non-contact CMMs provide medical professionals with the advanced measuring tools they need to carry out the functions of complex medical devices.
Aerospace
Aircraft manufacturers are turning to non-contact CMMs because they offer a higher production rate with lower operating costs. Manufacturers can meet the growing demands for airplanes and aerospace technology with the help of these efficient and accurate sensors. While traditional CMMs still have their place in the industry, particularly for non-prismatic shapes, non-contact technology is beneficial for the complex areas of the plane, including wingspans, trailing edges, and turbine blades.
Sensitive Surfaces
Many industries are benefiting from using non-contact CMMs and their automated sensors for measuring sensitive and complex surfaces. Non-contact platforms operate with advanced lasers, sensors, cameras, and software to calculate the dimensions of unique surfaces ranging from medical devices to aerospace structures.
Reflective and mirror-like surfaces require optical measuring tools that will refrain from making any contact with the object itself. A non-contact CMM is able to measure delicate surfaces using several sensors and acquiring images from multiple angles.
Used Non-Contact Machines
When it comes time to purchase a coordinate measuring machine, newer isn’t always better. At CMM, we offer a wide range of used CMMs for sale, including laser trackers, probing systems, and non-contact sensors.
Each of our used machines undergoes a rigorous quality check to ensure accuracy and optimal performance capabilities. Our technicians ensure every component of a used CMM is functional, including but not limited to probing systems, air-lines, bearings, and cablings. We provide each model’s size and software, so our customers can choose the right tools for the job.
Work with CMMXYZ
Canadian Measurement-Metrology Inc. is proud to be a leading independent measurement solutions provider and has been serving customers across North America for more than 30 years. We guide customers through finding the right measurement tools and software for their projects. We can help you understand what you need to know about portable CMMs, conduct training courses, and much more.
Our team of professional metrologists has the tools and trained insight to select the right equipment for your industry. We boast a quick response time and minimum turnaround, maximizing the profits for our customers.
If you require a non-contact CMM or would like to learn more about our services, don’t hesitate to contact CMMXYZ. Our team of metrology specialists is available to answer any of your questions, make product recommendations, or schedule an on or off-site visit. We’ll work closely to identify the right metrology machine or repair service for your needs.


