This content was originally written and published by the KREON3D team on their website. Reproduced here from https://kreon3d.com/3d-scanner-zephyr-iii-50-specially-developed-for-small-geometries/
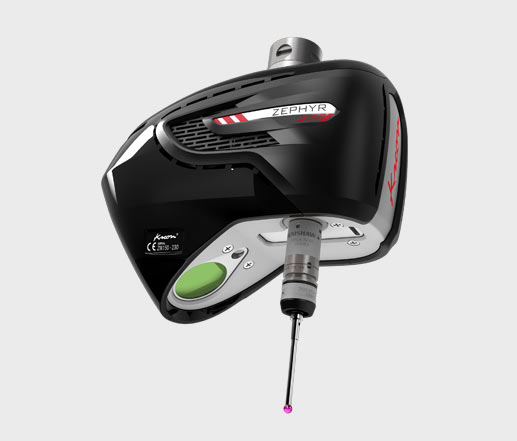
Zephyr III 50 3D Scanner meets increasingly demanding quality requirements for manufacturing and finishing.
The Zephyr III 50 is a 3D scanner designed for high-quality digitization, at outstanding resolution and precision, for small geometries. With its accuracy of 5 µm, it captures parts in minute detail – and much faster than traditional probes. For all its precision, it offers uncompromised speed: its high acquisition rate lets it move quickly, ensuring decisive gains in productivity. And with an exceptional resolution of 15 µm, the Zephyr III 50 can handle the very finest 3D details. Engraving, bores, threads, edges, ribs, and grooves are where it comes into its own.
The Zephyr III 50 is backed by Kreon’s almost 30 years of experience in integrating 3D scanners with CMMs. Via Metrologic or Pantec controllers, it can be combined with a wide range of CMMs in the marketplace. Metrolog X4 or Polyworks software is used to control its movements and analyse its measuring data. Machine programming and simulations based on scanned data can be performed offline, so production equipment remains operational all the time. Typically used with a multi-orientation head, the Zephyr III 50 can scan all faces of a part quickly and easily.
Whatever the application or type of part, the Zephyr III 50 scanner will rise to the most challenging of situations. Thanks to its contactless technology, delicate and flexible parts can be analysed without the risk of breakage or deformation. Its blue laser can be used with any surface: metal or plastic, matt or glossy, light or dark, smooth or textured. This eliminates the need for powdering parts, further increasing productivity.
The scanner’s precision means that colour-mapped CAD comparisons can be generated with confidence or parts inspected thoroughly with GD&T analysis.

Highly versatile, the Zephyr III 50 3D scanner can be used with a wide range of machines: CMMs, measuring arms, robots, machine tools. Companies can invest in a single Zephyr III 50 for use on different machines – a CMM and a Kreon measuring arm, for example. Specially designed for industrial environments, it is equally at home in workshops, at production lines or in measuring labs. Equipped with temperature compensation, the Zephyr III 50 is ready for use immediately, without requiring any warm-up period.
Scanner Specifications
| Zephyr III 50 | |
| Max scanning speed | 600.000 pts/sec |
| MPE (P[Size.Sph.All:Tr:ODS]) (2σ) *¹ | 5 µm |
| MPL (P[Form.Sph.D95%:Tr:ODS]) (2σ) *² | 8 µm |
| MPL (P[Form.Pla.D95%:Tr:ODS]) (2σ) *³ | 10 µm |
| Max laser line width | 50 mm |
| Max frequency | 300 Hz |
| Laser line color | Blue 2M |
| Line resolution | 15 µm |
| Stand-off distance | 95 mm |
| Field of view | 40 mm |
| Temperature compensation | Yes |
For certain applications, such as aligning parts, measuring deep, narrow pockets, or analyzing transparent surfaces, a probe can come in useful. Like all Kreon scanners, the Zephyr III 50 can scan and probe simultaneously in the same measuring range, thanks to a probe fitted directly underneath the scanner. By combining the best of contact and contactless technologies, the time for analyzing parts can be reduced significantly while maintaining the same high quality of measurements.
The Zephyr III 50, designed for accuracy, completes the Zephyr III scanner range that started out with the Zephyr III 150, which is all about speed. The advanced technologies at the heart of the Zephyr III product family boost companies’ productivity, helping secure their future growth.
To know more, check Kreon3D.


