Allison Baker | Sep 02, 2020
With scalable lens and camera options, the AVX550 is a versatile asset for quality control.
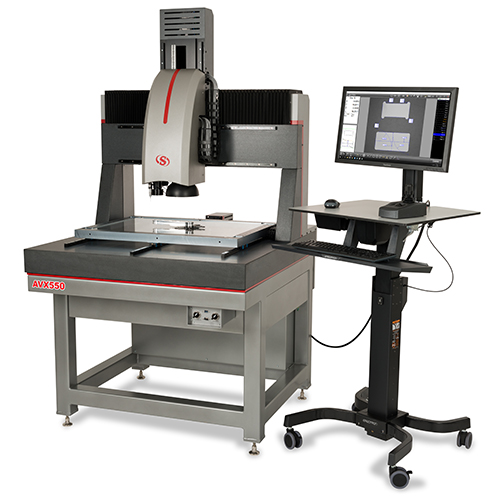
Introducing one of the most versatile large multi-sensor, large format platforms on the market: The AVX550 Multi-Sensor Vision System. Equipped with dual optical systems and touch-probe capability, the AVX550 can measure parts with a diverse range of feature sizes and geometries. It can be equipped with two cameras and lenses to be used sequentially in the same program along with touch probe options. For accuracy, durability, and stability, including under demanding requirements, the AVX system features a granite base and bridge design.
“We are pleased to offer our customers a powerful, easy-to-use multi-sensor measurement system which streamlines and optimizes the QC process,” said Mark Arenal, General Manager, Starrett Metrology Division. “Using a single system, production parts can be examined on the shop floor or in the QC lab on macro and micro levels as one comprehensive process.”
The AVX550 features dual optical systems that work in tandem to measure a broad range of features. The primary zoom lens enables small intricate features to be inspected with high precision and resolution of up to 2 microns. A secondary large field-of-view camera is equipped with a telecentric lens that can simultaneously inspect large areas of a part, or an entire part itself. A broad range of zoom options also means that measurement configurations can be custom-tailored to meet specific application requirements, and eliminates the need to change lenses or re-calibrate the system. Throughput is further enhanced with fast platform travel speeds and dual collimated profile lights which are essential to the effectiveness of the dual optical systems.

Equipped with the M3 software package from MetLogix, a traditional mouse as well as a touchscreen monitor makes user interaction easy and intuitive. Auto part recognition enables creating a part measurement program that comprises the desired features of a part for inspection, which can automatically be saved in the system or to a network. Programmable light output options can be built into the program as defined steps, including being called up as the part recognition program initiates. For fast, accurate and repeatable results, once the program is created, placing that part within the camera’s field-of-view allows for the saved program to initiate and run the inspection. Features such as a “Superimage” function allows piecing together multiple camera frames in order to view a large part as one single image. A Renishaw Touch Probe may also be utilized for quick acquisition of discreet points along a part’s profile and 3-D geometry mapping.
There are several options for lens configurations. For inspection of small, intricate areas, a powerful 12:1 zoom optics lens is equipped with a 26x to 310x magnification range for precise resolution. The fixed magnification telecentric lens comes with magnification options of 0.14x, 0.3x, 0.5x, 0.8x, 1.0x 2.0x and 4.0x. Systems can be configured in a larger measurement range on the X, Y, and Z axes, and can also be equipped with Q-axis rotary positioners for increased capability.
To know more, check Starrett.


