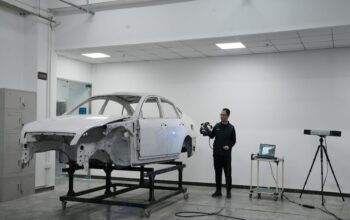
Scantech’s KSCAN-Magic 3D laser scanner has greatly enhanced the inspection process of elevator components during projects at China Tianjin OTIS Elevator Ltd.
Modern elevators are mainly composed of traction machines, guide rails, counterweight devices, safety devices, signal control systems, hall doors, etc.
The supply of mechanical components in the elevator industry has a significant impact on the production, manufacturing, and safety quality of elevators.
China Tianjin OTIS Elevator Ltd., founded in 1984 is a company that specializes in manufacturing elevators and moving stairways.
It is a joint venture created by OTIS Elevator Company, the world’s leading company for elevator and escalator manufacturing, installation and service.
The company was seeking a new way to optimize its inspection process for the elevator components manufactured.
Inspect a Large Elevator Component
Due to current inspection bottlenecks, several crucial improvements were necessary for the customer. They needed to prioritize quality assurance, ensuring that elevator components met stringent quality standards.
Efficiency was also important, with a focus on conducting on-site measurements and enhancing detection efficiency to streamline the inspection process. Moreover, they sought to transition from cumbersome to convenient and efficient data analysis.
The elevator components under examination were specified with the following dimensions: a length of 2245 mm, a width of 1728 mm, and a height of 350 mm. It is not easy to move this large and heavy part.
It has a blue and reflective metallic finish, which poses challenges for scanning and measuring. Additionally, it has complex geometries, intricate details and stringent requirements for GD&T.

Drawbacks of Traditional Measurement Methods
Traditional visual and manual inspections are commonly employed for the appearance assessment of elevators.
This involves the use of measuring tools such as vernier calipers, steel rulers, tape measures, and feeler gauges to assess the dimensions and geometry to ensure the parts comply with various specifications and requirements.
Before purchasing the Scantech 3D scanner, engineers at OTIS use traditional stationary measurement equipment in a dedicated lab, which had several drawbacks:
This measurement equipment measures one point at a time, which can be time-consuming for large parts with numerous features or intricate surfaces.
Additionally, moving the part to be measured to a measurement room can introduce logistical challenges and increase the overall time needed for measurement.
Lastly, it may struggle with measuring highly reflective surfaces, which can further hinder its efficiency in inspections.
The traditional methods often resulted in missed measurements and errors due to their heavy reliance on human operations.
New Measuring System: 3D Scanning for Inspection
OTIS turned to 3D scanning to enhance its inspection. The key factors in choosing Scantech’s 3D scanner KSCAN-Magic were its portability and functionality.
It is portable and insensitive to environmental conditions such as vibrations and thermal variations, therefore this 3D laser scanner can conduct on-site measurements.
It comes with five operating modes including hyper-fine scanning and built-in photogrammetry, which can capture various features with ease.

The 3D scanner efficiently captured the intricate contours of the elevator components
Thanks to its robust algorithm, it offers an excellent ability to scan reflective surfaces. Therefore, precise and complete 3D data of the part were captured.
The entire process was completed in just 10 minutes, showcasing its speed and effectiveness.
The dimensions, surface profiles, and hole positions of the component were captured with specific values, which means the engineer can identify tolerances with ease.
Scan Results and Project Significance
The adoption of Scantech’s 3D measurement solutions was remarkably intuitive. It didn’t necessitate the creation of a new process; rather, it seamlessly replaced an existing one.
Beyond merely offering additional measurement data, 3D scanning empowered engineers to verify the precise dimensions and geometries of components.
High Efficiency
The system’s on-site scanning capability eliminates the need for transportation. By conducting scans directly at the location, it significantly reduces measurement time. The 3D scanner effortlessly tackles reflective surfaces.
Whether it’s reflective or black surfaces, accurate data capture is achieved without any fuss. Notably, there’s no requirement to spray the part before scanning. This streamlines the process and ensures precise results.

Excellent Accuracy
The highly precise scanning system boasts an impressive scanning accuracy of up to 0.020 mm. One of its standout features is the built-in infrared photogrammetry system.
By efficiently reducing accumulated errors caused by large-sized measurements, this system ensures exceptional volumetric accuracy.
It’s particularly well-suited for scanning and measuring large-sized objects without compromising precision.

Easy of Operation
The 3D scanner is designed with user-friendliness in mind. Its simplicity and ease of learning make it an excellent choice for both beginners and experienced operators.
With minimal prerequisites, the operator can become proficient in using it after just 1 day of training. Whether you’re capturing intricate details or large-scale objects, this scanner ensures a smooth and straightforward experience.

Comprehensive Analysis
The scanning system captures full-field and detailed point clouds of elevator components. By comparing the point cloud data onto the CAD models, engineers can perform quick and accurate comparisons.
Engineers and inspectors gain valuable insights into imperfections, irregularities, and deviations from the expected geometry.
Armed with the complete dataset—point clouds, CAD models, and inspection reports—engineers can conduct precise analysis and facilitate informed decision-making.


